I always hated the fact that most of the themes never gave me any control to change the look and feel of my Blog Post layout. The only way to do it was by creating or editing a WordPress Single Post Template. That meant, I had to write complex PHP and CSS code.
And if you have ever read any of my articles, then you know I don’t like to code. I prefer to build my websites without touching any code because it saves me a lot of time.
So I kept quiet. Didn’t do anything because there was no way to create a custom Single Post Template in WordPress without writing any code.
This was true until the awesome team behind the Beaver Builder plugin decided to build a plugin called Beaver Themer.
Beaver Themer plugin opened up a lot of possibilities to customize every aspect of a WordPress website without having to write any code.
So now I was able to create a custom Single Post Template without having to worry about writing and maintaining a piece of code.
If you too are looking to create a custom Single Post Template in WordPress without writing complex code, then this tutorial will show you how to do this.
Let’s get started…
What Are We Going To Do Exactly?
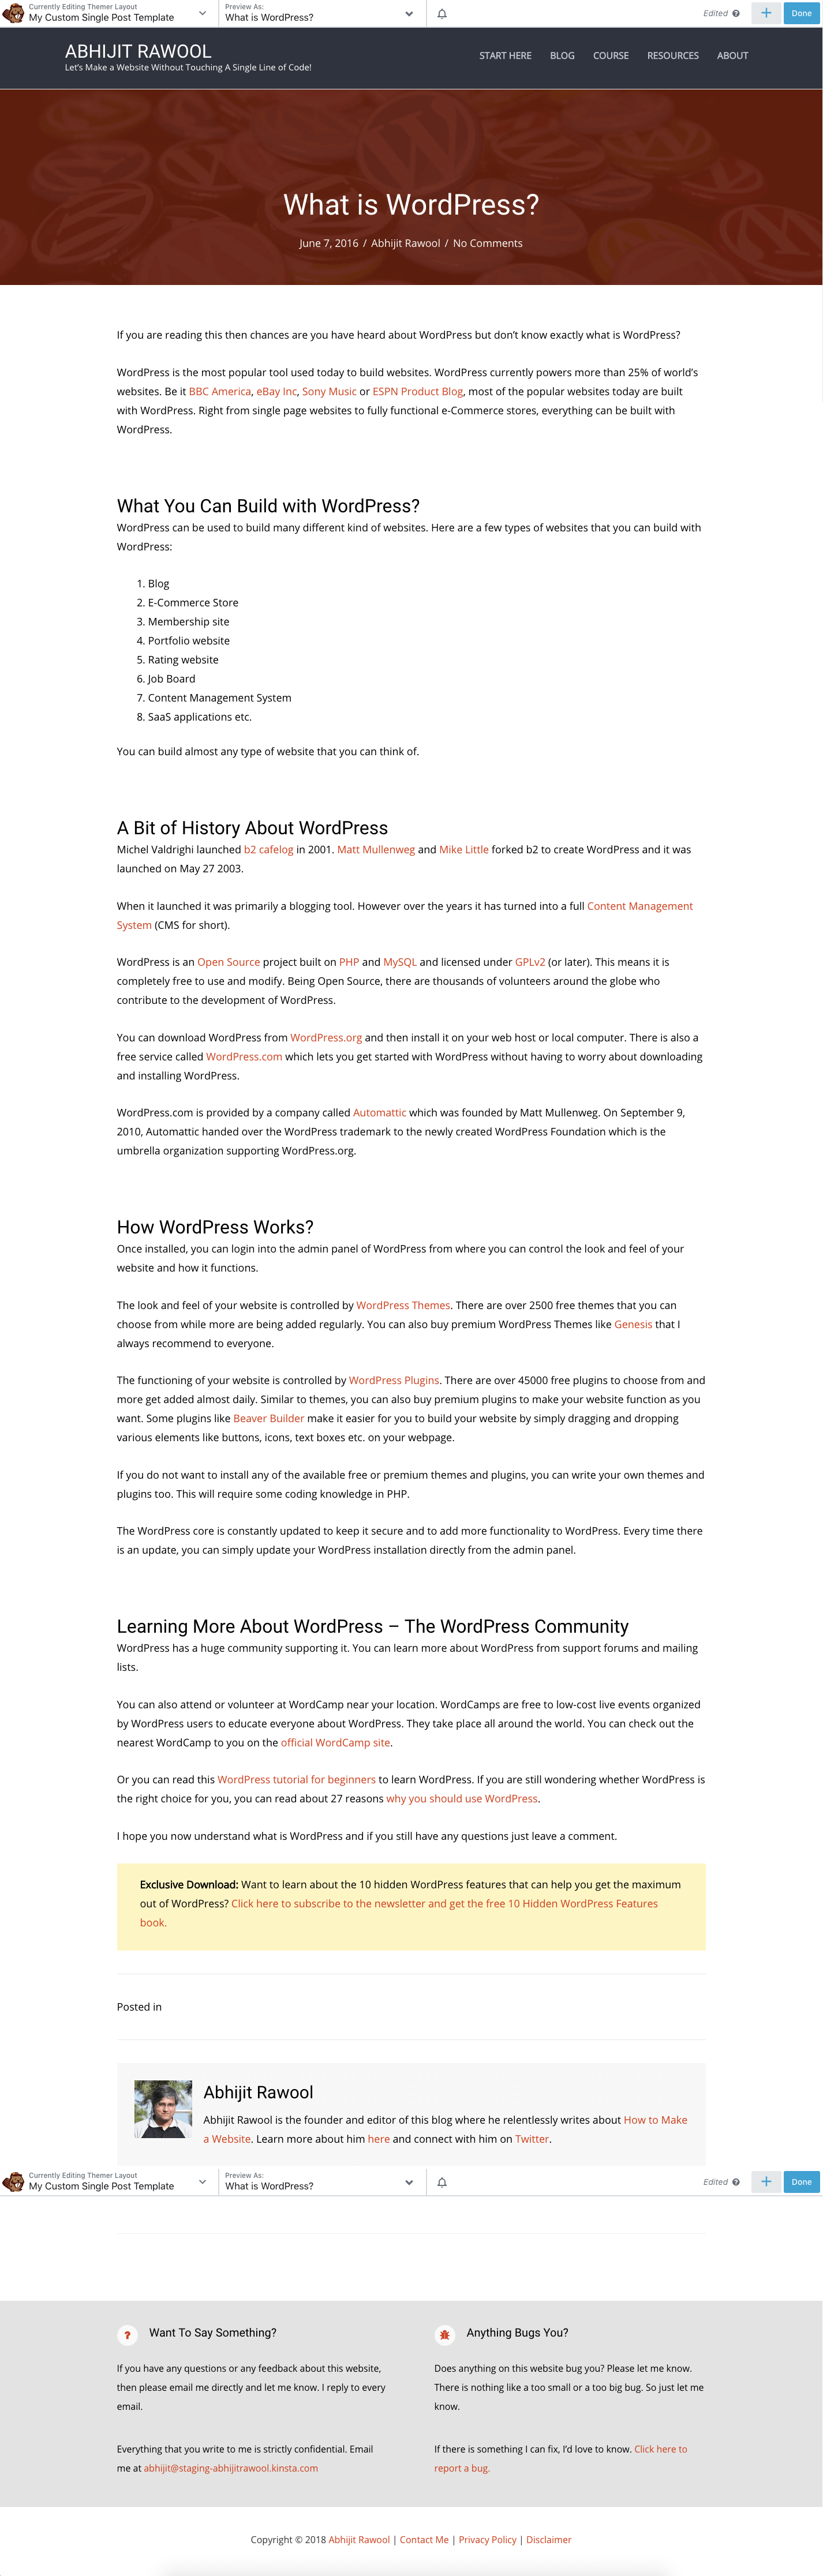
We are going to take a Blog Post layout that looks like this…
and change it to look like this…

Fair enough?
Great!
Now about the tools that we will need to use…
What Tools Will We Need To Create This Custom WordPress Single Post Template?
We will be using Beaver Builder plugin to build the layout of the Post and Beaver Themer plugin to apply the layout to WordPress Posts.
We are also going to use the Astra Theme because it is one of the themes supported by the Beaver Themer plugin.
To know if your theme supports Beaver Themer plugin, check the list of themes on this Beaver Builder Help Documentation or just check with the developer of your theme.
If your theme does not support Beaver Themer, then quite frankly, change your theme. WordPress has evolved to an extent where you can do many things without the need to write code. So there is no reason to get stuck using a theme that still forces you to write code for changing the look, feel, and layout of your website.
Beaver Themer is a great plugin developed by a fantastic team to help people like you and me who want the freedom to customize our website to our liking but don’t know how to write code to do it.
Other than that, if you want to understand why I chose Beaver Builder plugin and Astra theme, the read these two articles to understand why:
- Beaver Builder Review – What I Think After Using It For More Than 4 Years
- Astra vs Genesis Theme – Why Comparing These Two Themes Is Stupidity
With that said, let’s get on with the tutorial…
Steps To Create Custom Single Post Template In WordPress
Before you start, make sure you have the Beaver Builder and Beaver Themer plugins installed along with a theme that supports the Beaver Themer plugin.
Once you have all of these installed, you can create the custom Single Post Template by following the 3 simple steps given below:
- Create a Single Post Template using Beaver Themer plugin
- Build the Single Post Template Layout using Beaver Builder plugin
- Apply the Custom Single Post Template to all Blog Posts using Beaver Themer plugin
Now let’s see how to perform each of these steps.
Step 1: Create A Single Post Template Using Beaver Themer Plugin
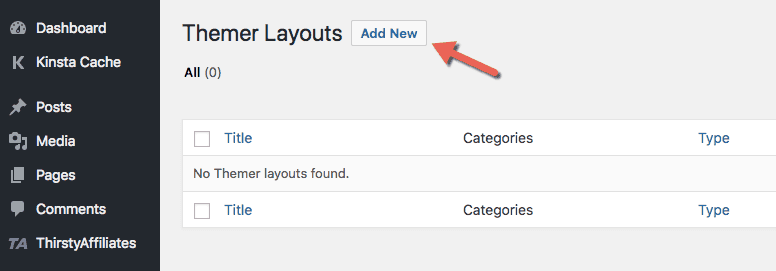
To create a Single Post Template in Beaver Themer, go to Beaver Builder > Themer Layouts page from WordPress Admin Panel Menu…

On the Themer Layouts page, click the Add New button…
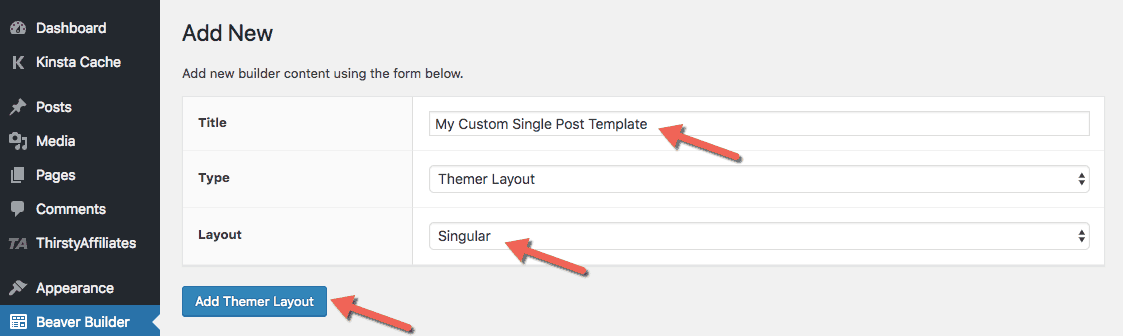
You will be taken to the Add New page. On this page, give a Title to the layout and select Singular in the Layout field, then click the Add Themer Layout button…
You should now see the Edit Themer Layout page as shown below. Click the Publish button to save your work.
Side Note: You can select Archive instead of Singular in the Layout field to create a custom blog layout template for your blog page.
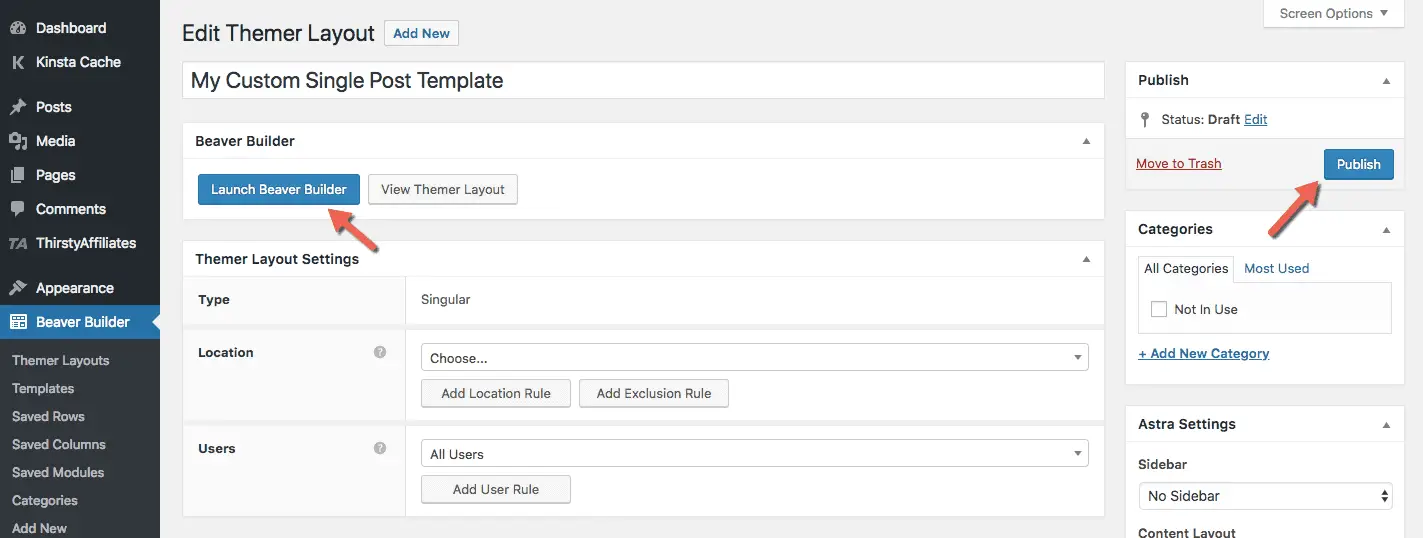
Now click the Launch Beaver Builder button to continue to the next step.
Step 2: Build The Single Post Template Layout Using Beaver Builder Plugin
After clicking the Launch Beaver Builder button, you will be taken the front-end of your website where you can start building the new layout of your Single Post Template using Beaver Builder.
Notice that Beaver Themer has intelligently detected that you are trying to create a custom Single Post Template layout and so it has created a new layout out-of-the box for you.
If you are wondering how Beaver Themer managed to pull in all the details of a Blog Post, then the answer is Field Connections.
Field Connections is a feature of Beaver Themer which enhances the Beaver Builder modules to dynamically pull in data.
To understand what I am saying, at this point if you click on the Post Name, you will see that the Heading Module’s settings box shows up. In this box, notice that the Heading field is connected to Post Title.
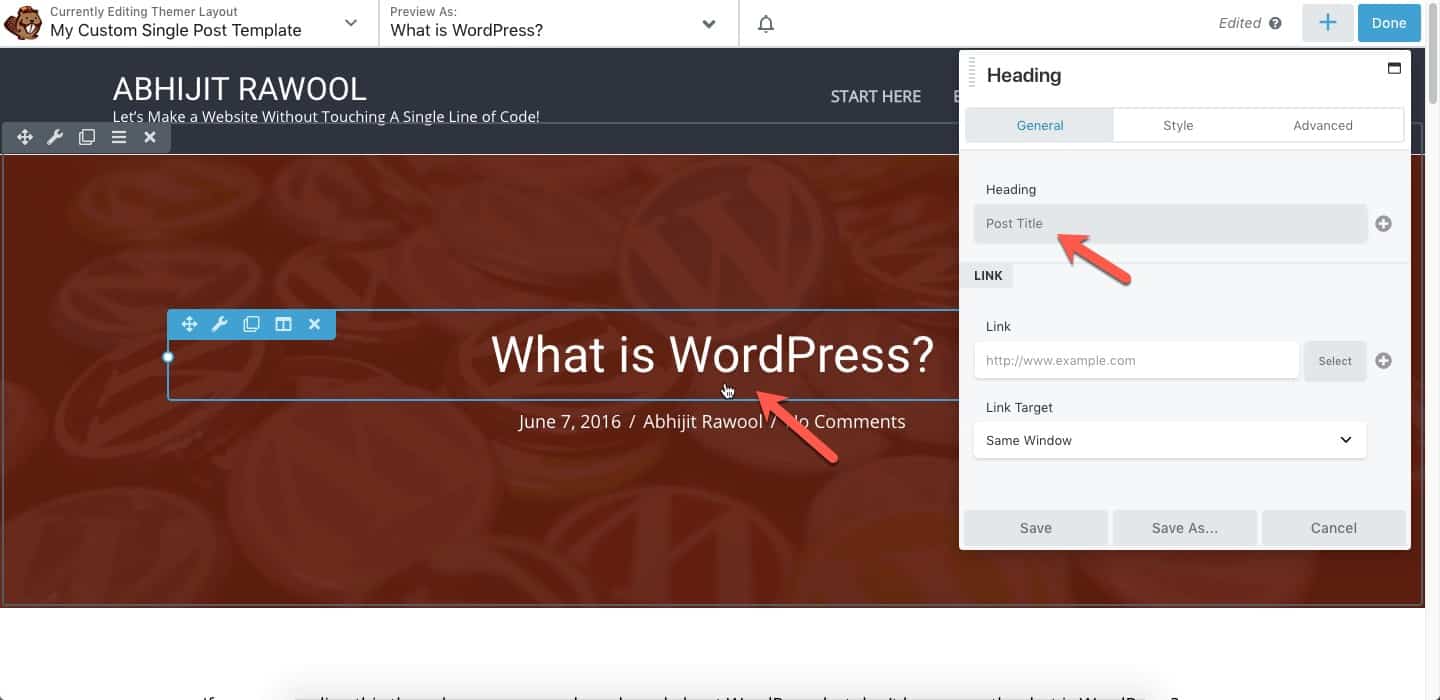
This is the Field Connections feature of Beaver Themer in action.
You can set what data displays in this Heading field by clicking the plus icon adjacent to the Heading field.
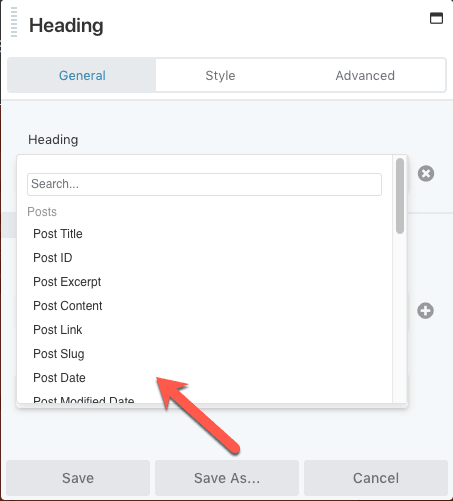
Clicking the plus icon will display a list of data that you can connect with the Heading field.
In this case, the Heading field is connected to Post Title. So now when this template is applied to Blog Posts in Step 3, Beaver Themer will dynamically pull in the Post Title of the Blog Post that someone is viewing on the front-end of your website.
Isn’t that cool?
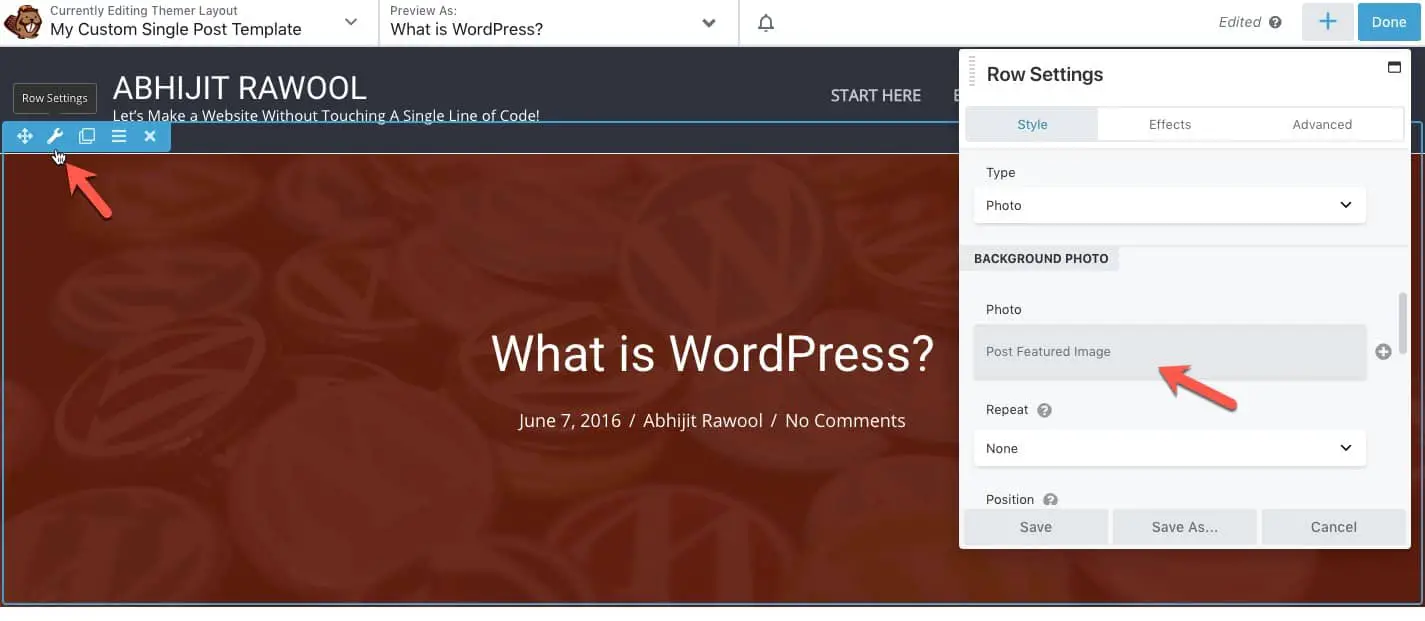
This Field Connections feature is not just limited to the Heading module of Beaver Builder. You can even use it to set row backgrounds and many other fields.
In fact, this particular Single Post Template that we are creating right now is also setting the row background using Field Connections feature. You can see it by opening the Row Settings box.
This Field Connections feature is by far the most powerful feature of Beaver Themer plugin because you can literally pull any WordPress data and display it wherever you want to.
You can learn more about the Field Connections feature over here in the Beaver Themer Documentation.
Beaver Themer also adds some new modules to Beaver Builder which you can use by going to Themer Modules Group and dragging and dropping them on the template page that you are building.

The Post Content and Comments Modules are being used on this Single Post Template that we are building too.

Similar to the Field Connections feature, these special Beaver Themer modules will also dynamically pull in the Post data and comments when someone views the Blog Post on the front-end of your website.
For more details on the Themer Modules, refer this official documentation of Beaver Themer.
I guess, you have now started to get the idea of how powerful the Beaver Themer plugin is.
Moving on…
I am not going to add any modules right now. I like the new layout that Beaver Themer has created.
But if you want, you can completely customize this layout by simply dragging and dropping various Modules and using Field Connections if you want to.
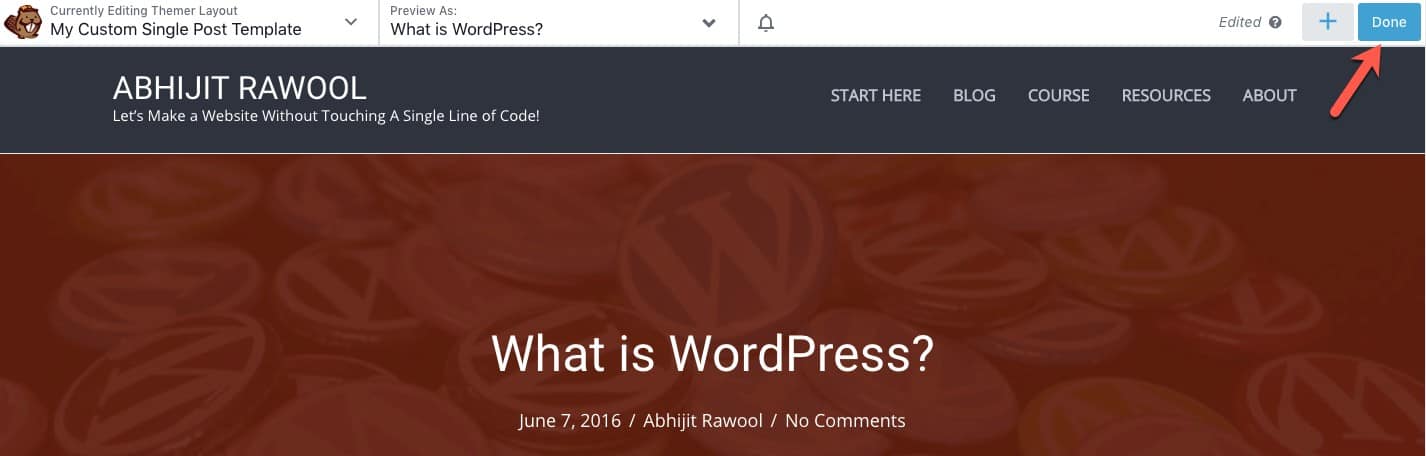
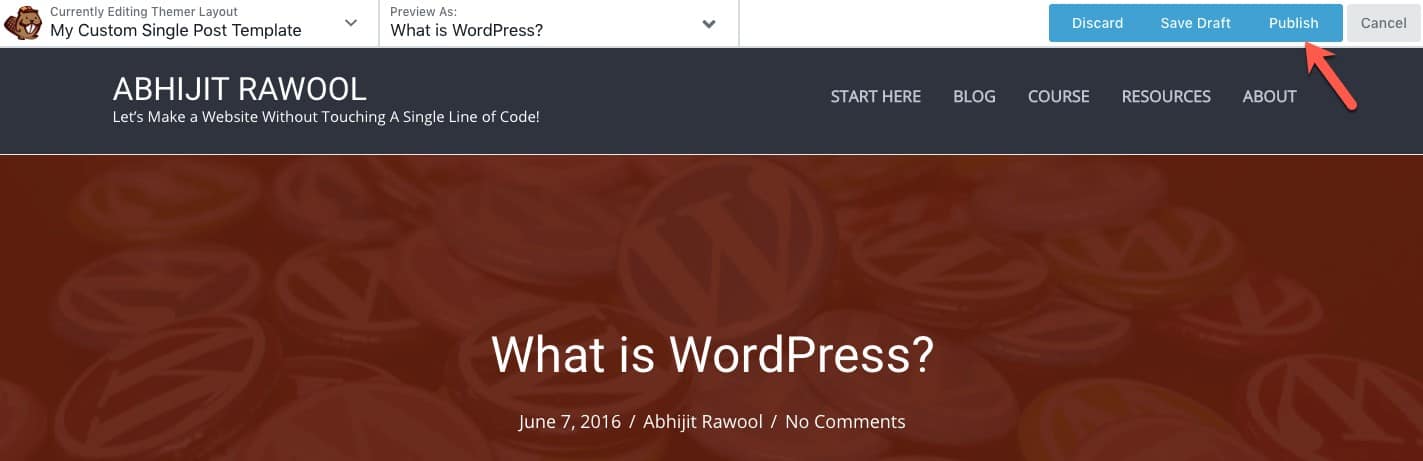
Once you are done with building the layout, you can publish it by clicking the Done button in the upper right corner and then clicking the Publish button.
Now it is time to apply this Single Post Template to all Blog Posts.
To do that, let’s move to the next step…
Step 3: Apply The Custom Single Post Template To All Blog Posts Using Beaver Themer Plugin
Now that the custom Single Post Template layout is completely built, it is time to apply this template to all Blog Posts.
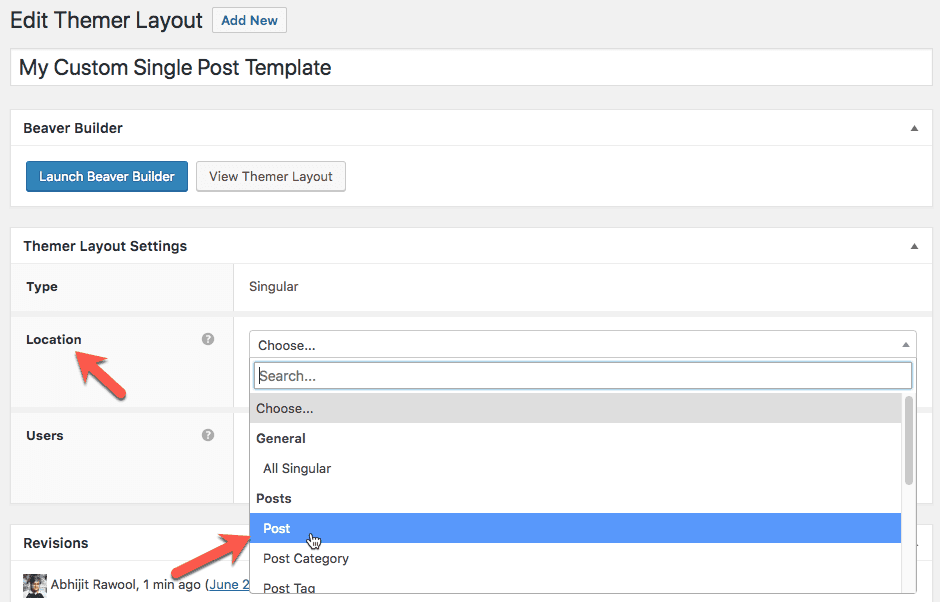
To do this, click the Edit Themer Layout action in the top Admin Panel bar.

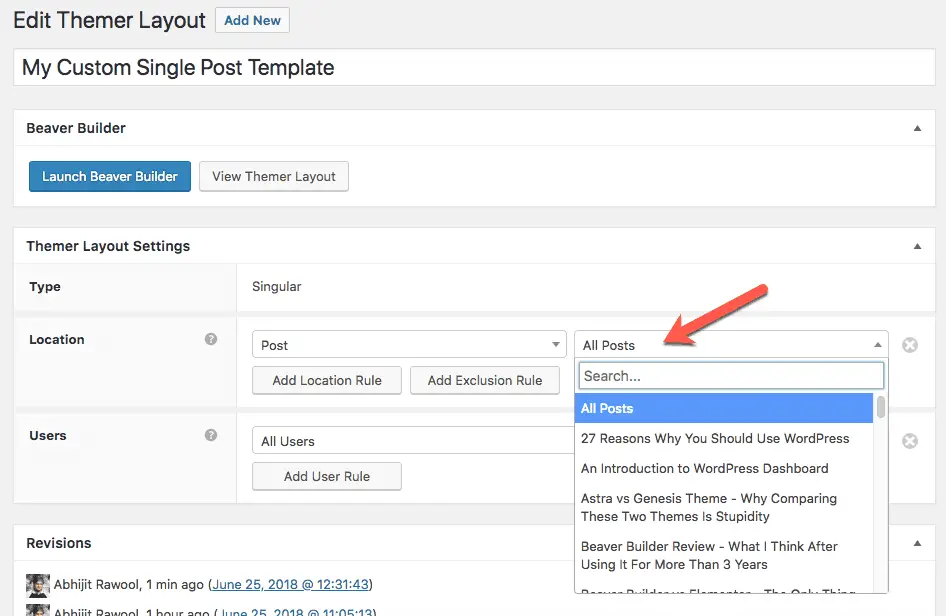
You will come back to Edit Themer Layout page. On this page, select Post in the Location field.
Since we want this new template to be applied to all Blog Posts, I will leave the All Posts selected.
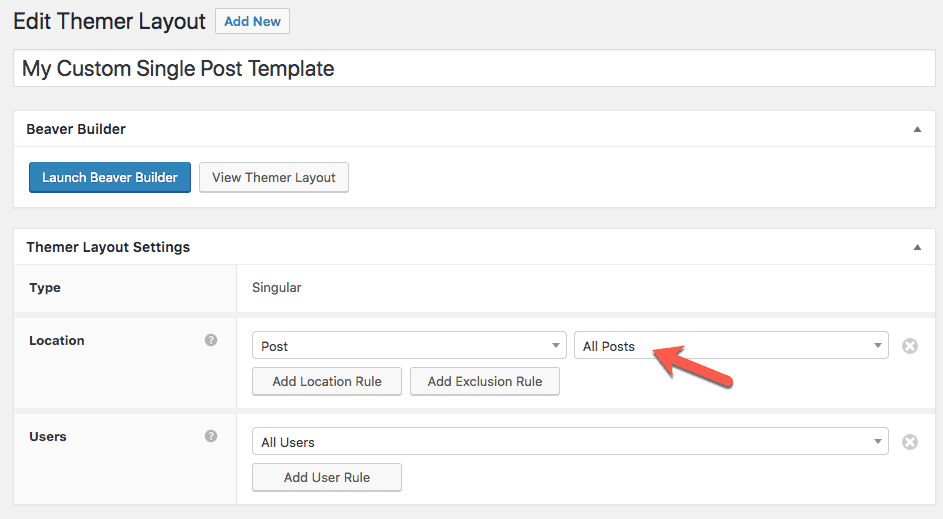
If you want, you can apply this new template to just some specific Posts too by selecting them instead of All Posts.
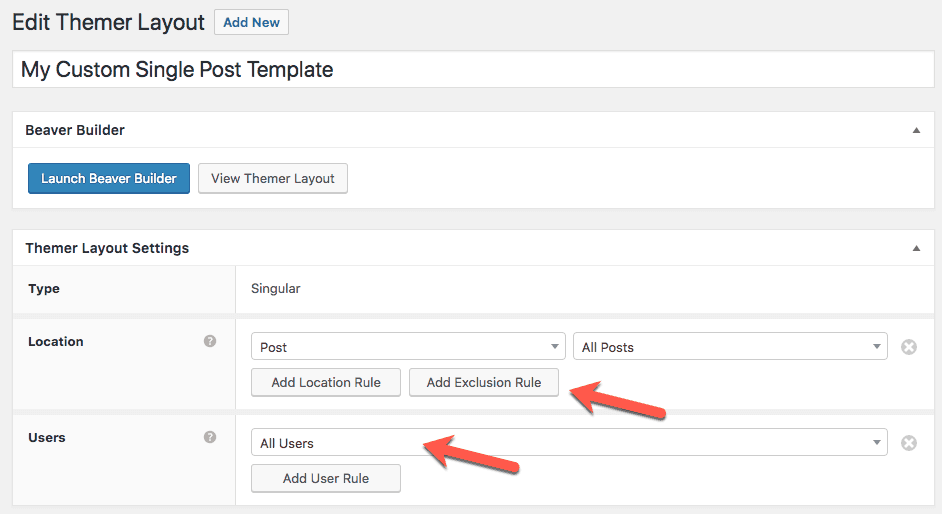
You can also exclude some Posts by using the Add Exclusion Rule button. Or you can just display this layout to users with certain roles only by selecting them in the Users field.
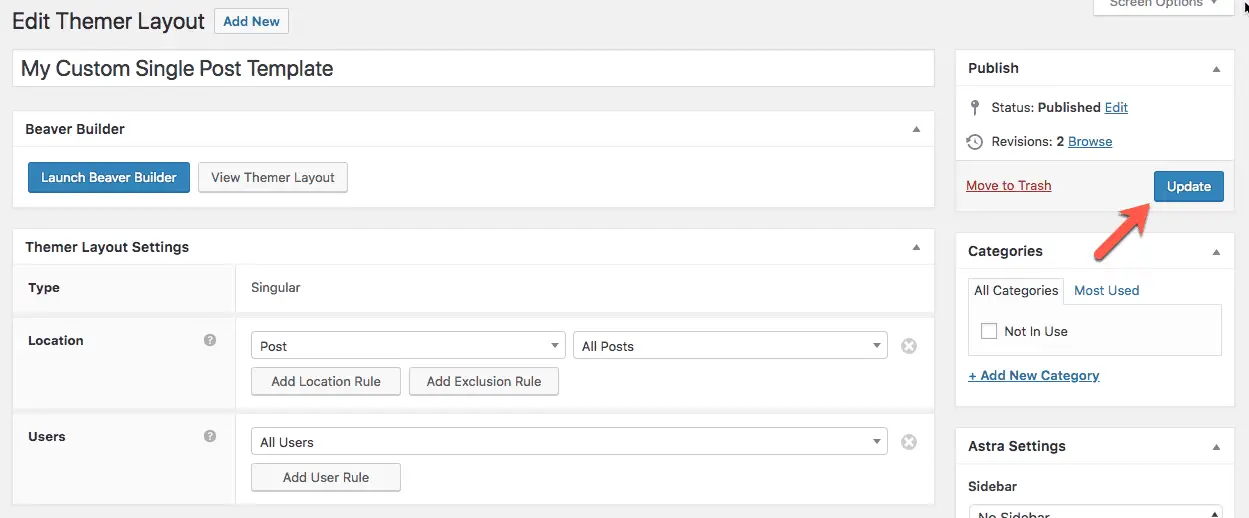
Once you are done setting these Themer Layout Settings, save your changes by clicking the Update button.
Now if you view the Blog Posts on the front-end of your website, you will see that they are displayed in the new layout.
And That’s It!
Congratulations!
You have now created a completely custom WordPress Single Post Template without writing a single line of code.
Wasn’t that easy?
No code! No Mess! Just build the layout visually, set some options, and you are done.
By now I think you have realized that there is nothing as such that Beaver Themer cannot do. That is why I said in the beginning that Beaver Themer opens up a lot of possibilities to customize every aspect of a WordPress website without having to write any code.
Check out the other cool stuff that Beaver Themer can do for you.
And if you still have any questions, I am here. Just ask them in the comments below.
Also, don’t forget to share this tutorial on Facebook, Twitter and Pinterest or with anyone you know who wants to customize Single Post Templates in WordPress.