What I am going to show in this article is probably the best and the easiest way to install WordPress on Mac. It is by using DesktopServer.
I absolutely love using DesktopServer because of how easy it makes to install WordPress. More on that later.
If for some reason you do not want to use DesktopServer then here’s something for you:
Installing and working with WordPress using MAMP is not very straightforward. And if you don’t have the enthusiasm to learn some technical details then you are better off using DesktopServer.
With that said, let me show you how to install WordPress on Mac using DesktopServer.
Install WordPress on Mac using DesktopServer
There are just two steps that you need to perform to get WordPress up and running:
- Download and Install DesktopServer and
- Install and Setup WordPress using DesktopServer
Watch the below video to learn how to install WordPress on Mac using DesktopServer.
If you prefer to read, then all the steps from the video are listed below.
Download and Install DesktopServer
Go to DesktopServer’s site https://serverpress.com/. Create an account and download the free version.
It also has a paid version which has a lot of other features. You can read about them on DesktopServer’s website. But for this tutorial, you just need the free version.
Once you have downloaded DesktopServer zip file, unzip it. In the unzipped folder, you will find a “.app” file. Double-click it to start the installation process.
You will be asked to provide the administrator privileges.
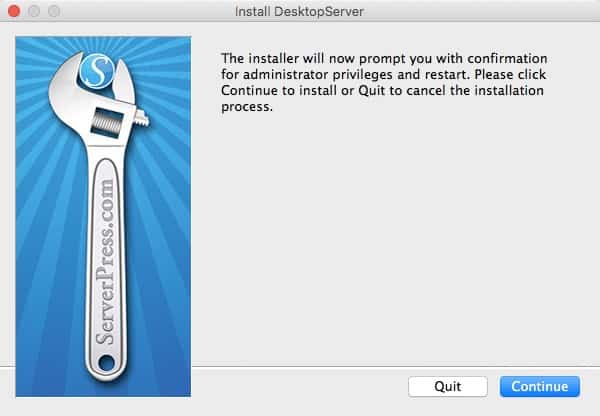
Click Continue button. On the next screen, you will be asked to provide the administrator credentials of your machine.
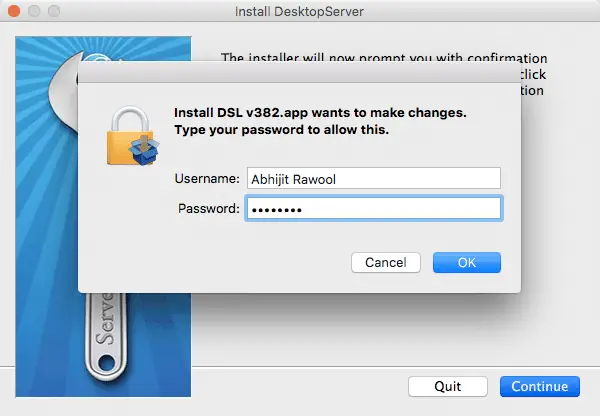
Provide them and click the OK button. Next, you will be asked to read and accept the licensing terms.
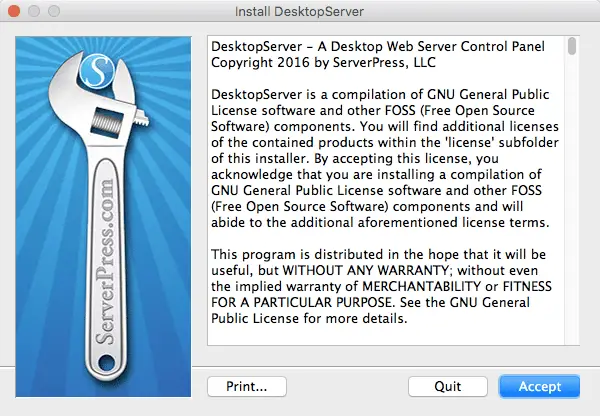
Accept them to continue with the installation.
If you are installing DesktopServer for the first time then on the next screen “New DesktopServer Installation” option will be pre-selected for you.
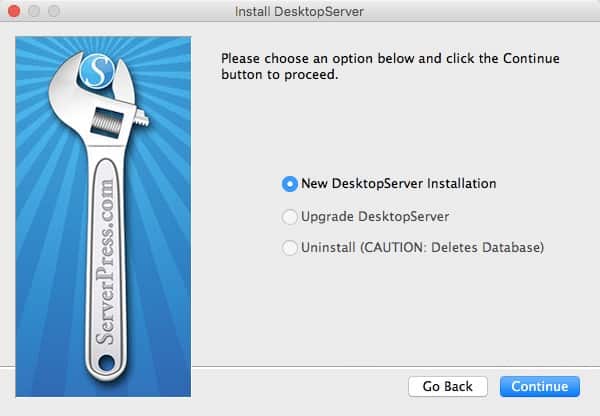
Click Continue to start the installation.
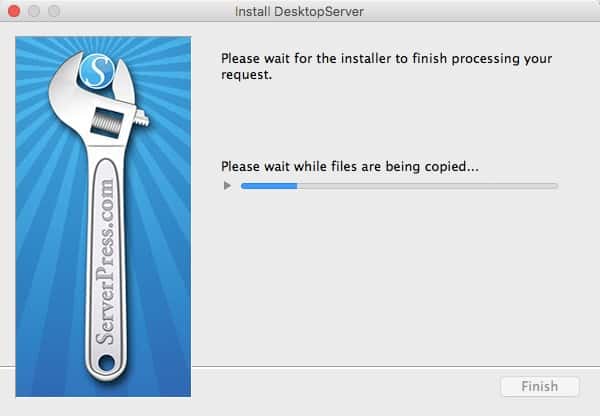
You will get a message on successful completion of the installation process.
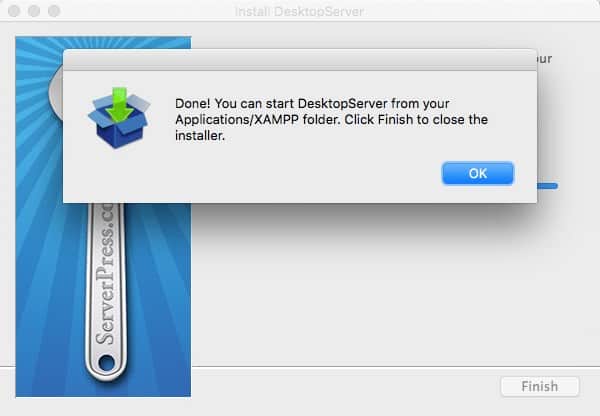
Click OK button and then on the next screen click the Finish button.
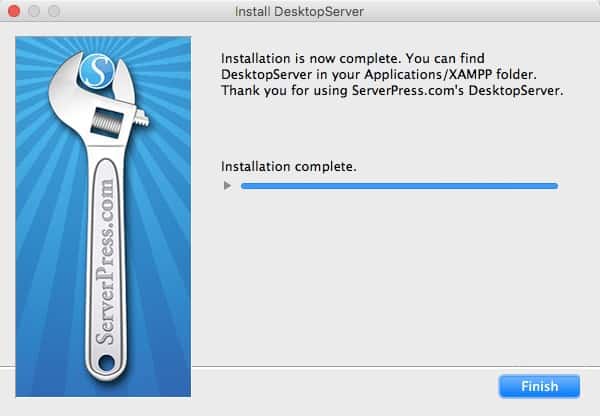
Congratulations, you have successfully installed DesktopServer. Now it is time to install WordPress.
Install and Setup WordPress using DesktopServer
Don’t worry, you don’t have to download WordPress installation files from anywhere. To install WordPress, just launch DesktopServer from your Launchpad.
You should see the below screen on launching DesktopServer.
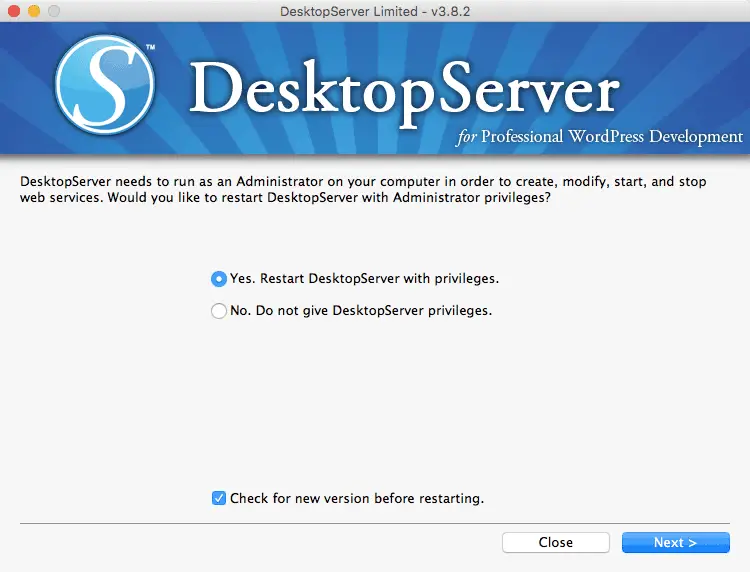
Click Next button. You will again be asked to provide administrator credentials of your machine. Provide them to continue with the installation.
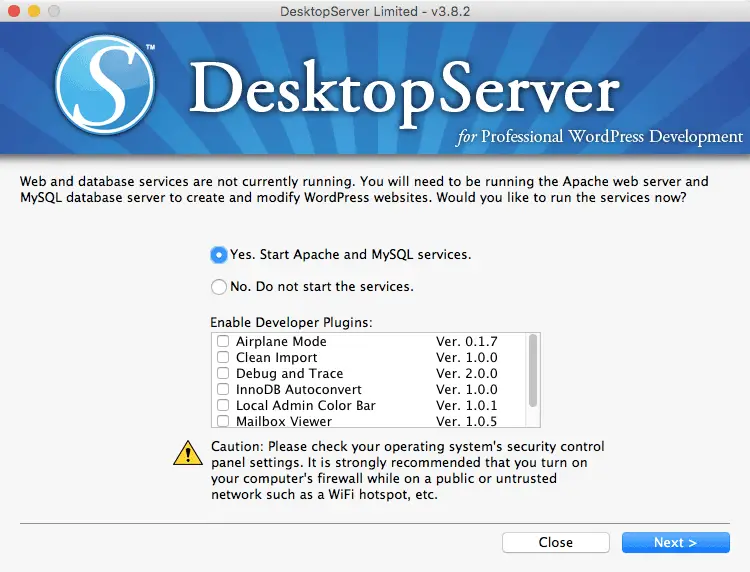
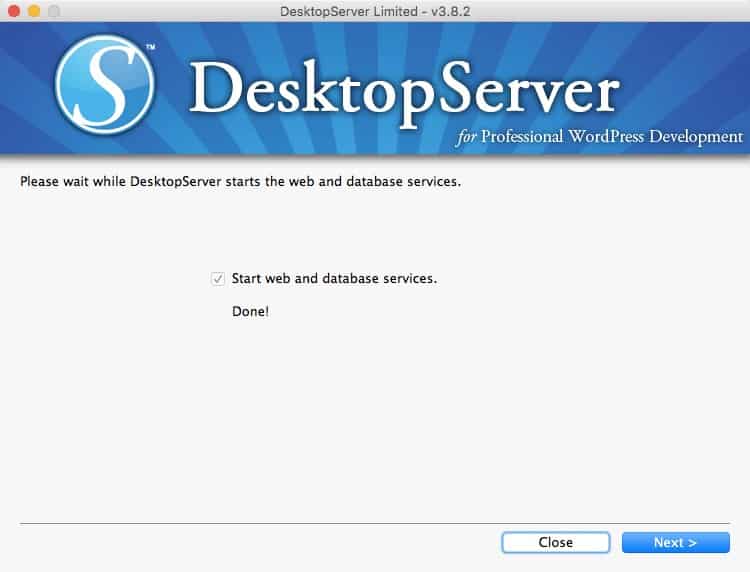
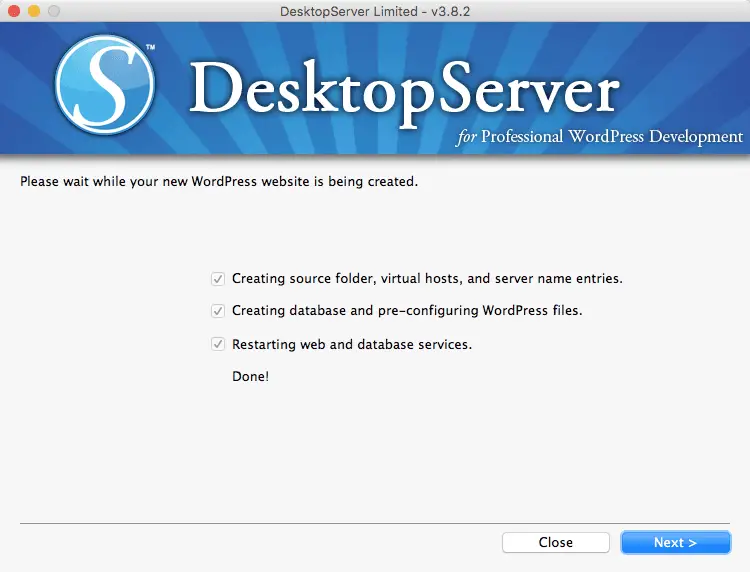
Click Next button to start Apache and MySQL services. Once the services are started, you will get a confirmation message.
Click Next button. Now you should see a screen which should let you create a new WordPress development site.
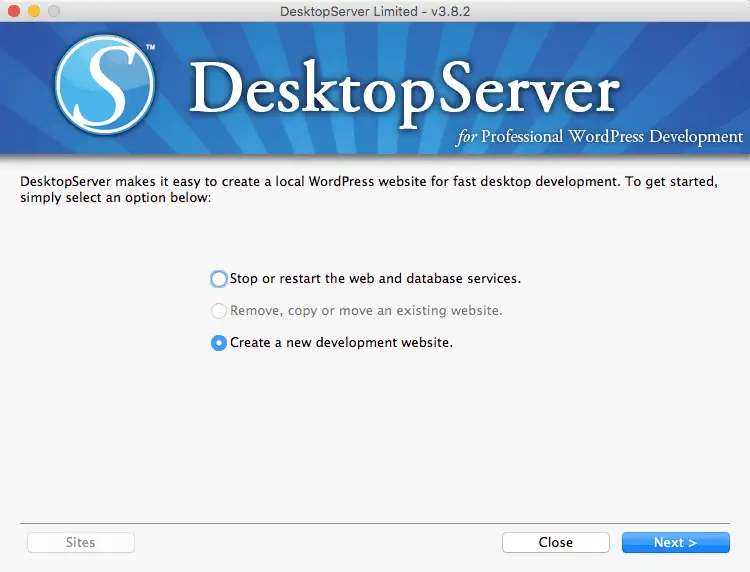
Select the option to create a new WordPress development site and click the Next button.
NOTE: Since this is the first time you are installing WordPress, you need to select the option to create a new development site. Once you have a site up and running, you can stop at this point. To access the site, you can directly type in the URL of the development site in your browser.
On clicking the Next button, you will see the below screen.
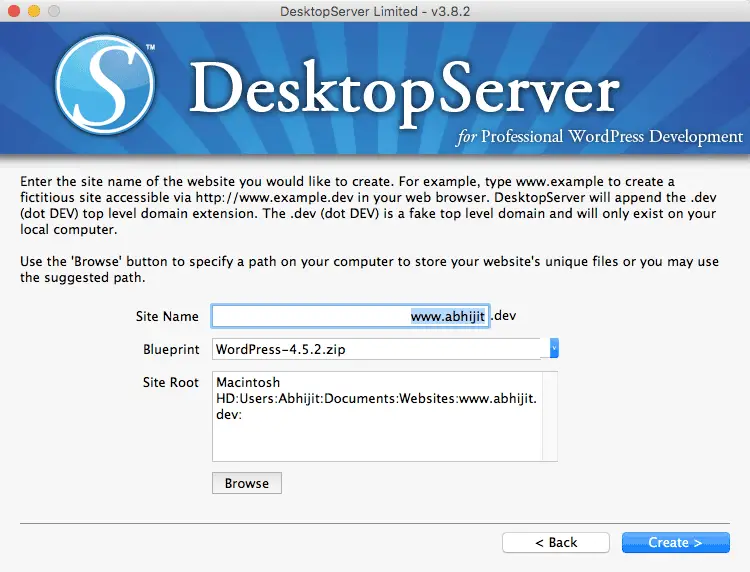
Give a URL to your site. I chose to give www.abhijit.dev. You can also see the version of WordPress that will get installed. You can also change the location on your Mac where all of the website files will get stored.
Click the Create button once everything looks good.
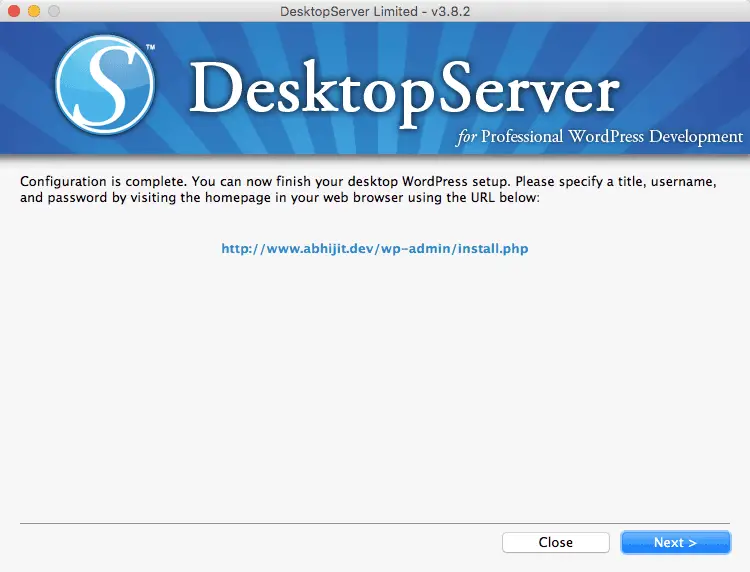
On successful installation, you should see a screen which will show that everything has got installed successfully.
Click the Next button and you will see a link to start the WordPress setup process.
Click on the link to start the WordPress setup. You will be asked to select the language in which you want to install WordPress.
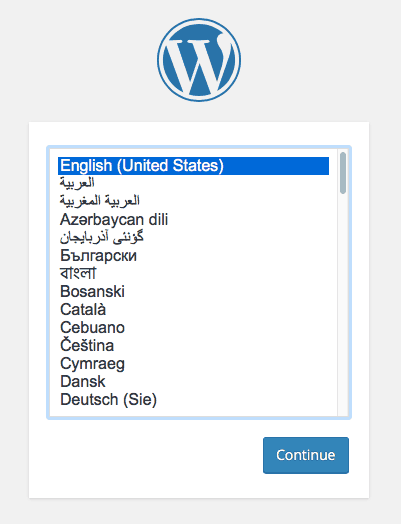
Select a language and click the Continue button. I selected the English language.
On the next screen, you will be asked to provide the Site title, admin username, password etc.
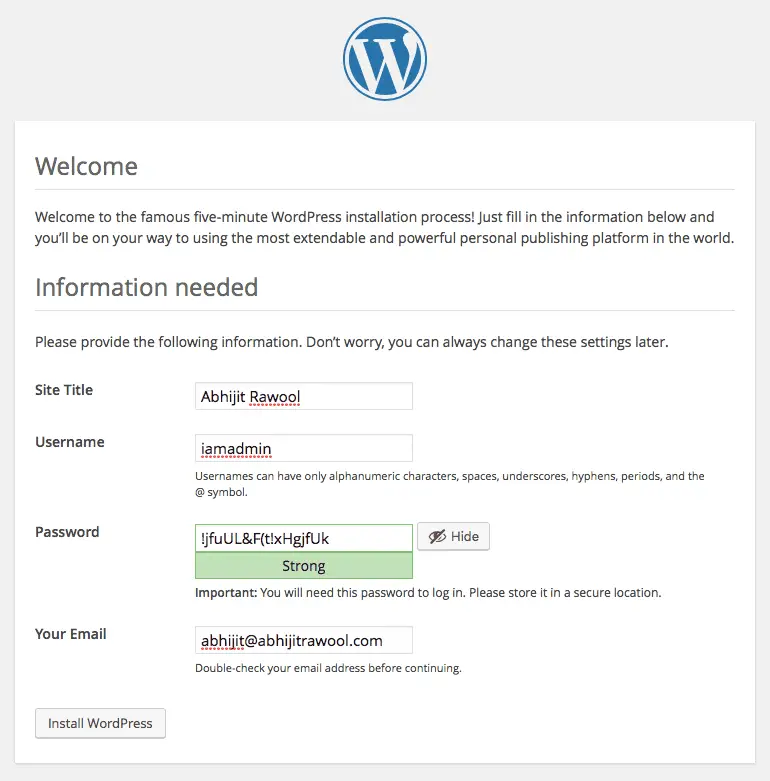
Provide all the details and click the Install WordPress button. If everything goes well, you should see the Success message.

That is it!
You have now successfully installed WordPress on your Mac using DesktopServer. You can login to the admin panel of your WordPress website by clicking the Log In button and providing the username and password that you gave on the previous screen while setting up WordPress.
Pretty Impressive… But…
I know you must be thinking that it cannot be this easy to install WordPress.
Don’t I have to install MySQL database as I did while installing WordPress using MAMP?
Nope, you don’t. DesktopServer will take care of installing MySQL database on its own.
Don’t I have to fiddle with “localhost” and “port numbers” like I did with MAMP?
Nope, you don’t. Again DesktopServer will take care of these,
Hmmm… Not everything can be this hunky-dory. What is the catch?
The catch is that with the free version of DesktopServer, you can install only 3 local WordPress sites at a time. To install and work with more sites, you will need the paid version of DesktopServer.
If you are just starting out with WordPress then the free version is more than enough for you. But if you plan to use WordPress professionally then I will recommend buying the paid version of DesktopServer.
It is well worth the money.
That Is All!
I hope you have now understood how you can easily install WordPress on Mac using DesktopServer.
So get going…
And if you have any questions along the way, ask them in the comments below. I will do my best to answer them.
Also, if you found this article useful, please share it with your friends on Facebook and Twitter. I will really appreciate that.