A few months back, I installed Ninja Forms on one of my websites for creating a Contact form. However, the Contact Form that I created using Ninja Forms wasn’t looking great. So I wanted to style it, but I didn’t know how to write CSS code. In the end though, I did figure out a way to style my form without writing any code. So…
How to style Ninja Forms without any CSS code? There are two ways to style Ninja Forms without writing any CSS code:
- By using PowerPack Addons for Elementor plugin, and
- By using PowerPack Addon for Beaver Builder plugin.
Let me show you how both of these methods work.
Method 1: How To Style Ninja Forms Using PowerPack Addons For Elementor Plugin?
PowerPack Addons for Elementor plugin is a free addon plugin for Elementor. So you will first need to install and activate the Elementor plugin and then install and activate the PowerPack Addons for Elementor plugin.
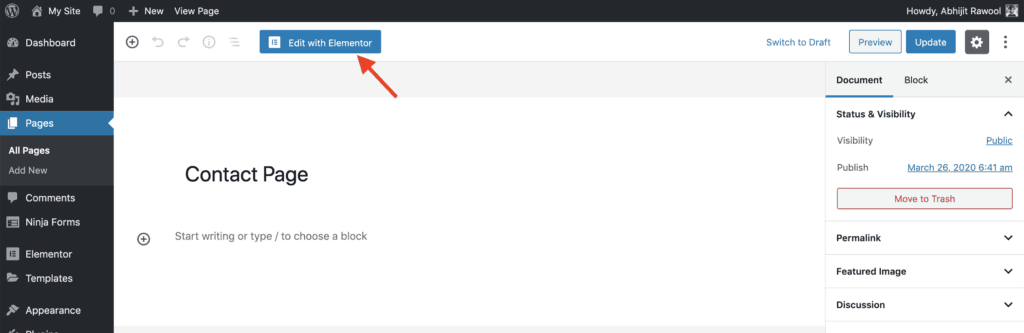
Once both the plugins are active, edit the page where you want to place the Ninja form and click the Edit with Elementor button.
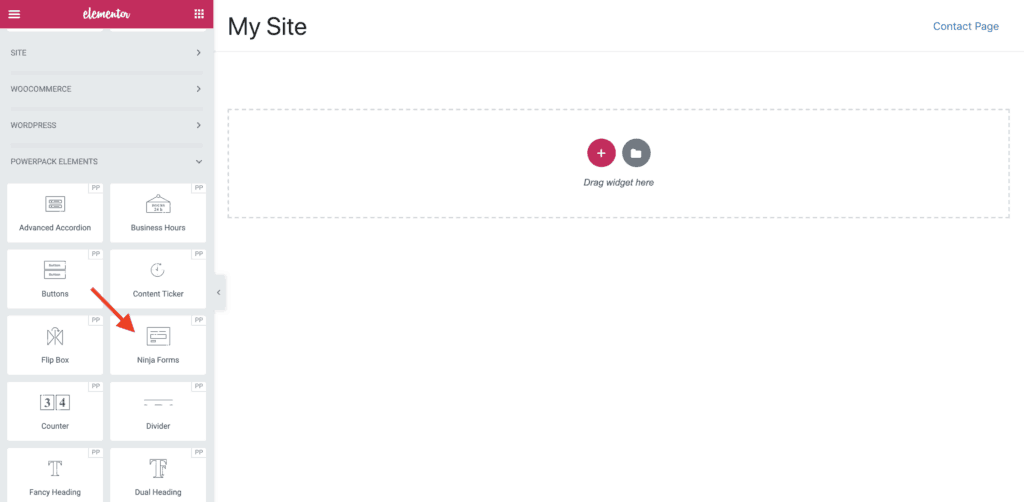
You will then be taken to the front-end of your website with Elementor active. Scroll down in the left-hand side Elementor panel until you see the PowerPack Elements widgets section. Drag-and-drop the Ninja Forms widget on the page.
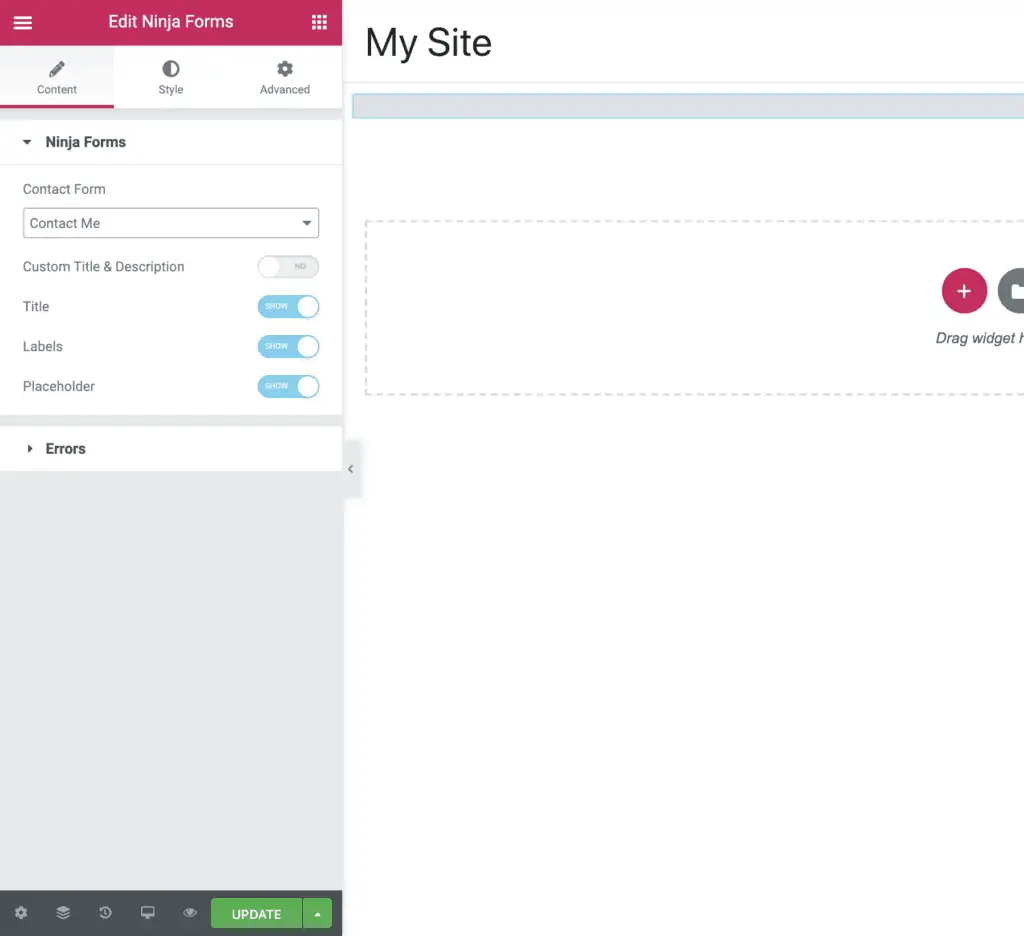
You will now see the Ninja Forms widget settings in the left-hand side panel. Select the form that you want to style in the Contact Form field. Here you can also set a Custom Title and Description for your form as well as show or hide the Title, Labels, Placeholder, and Error messages.
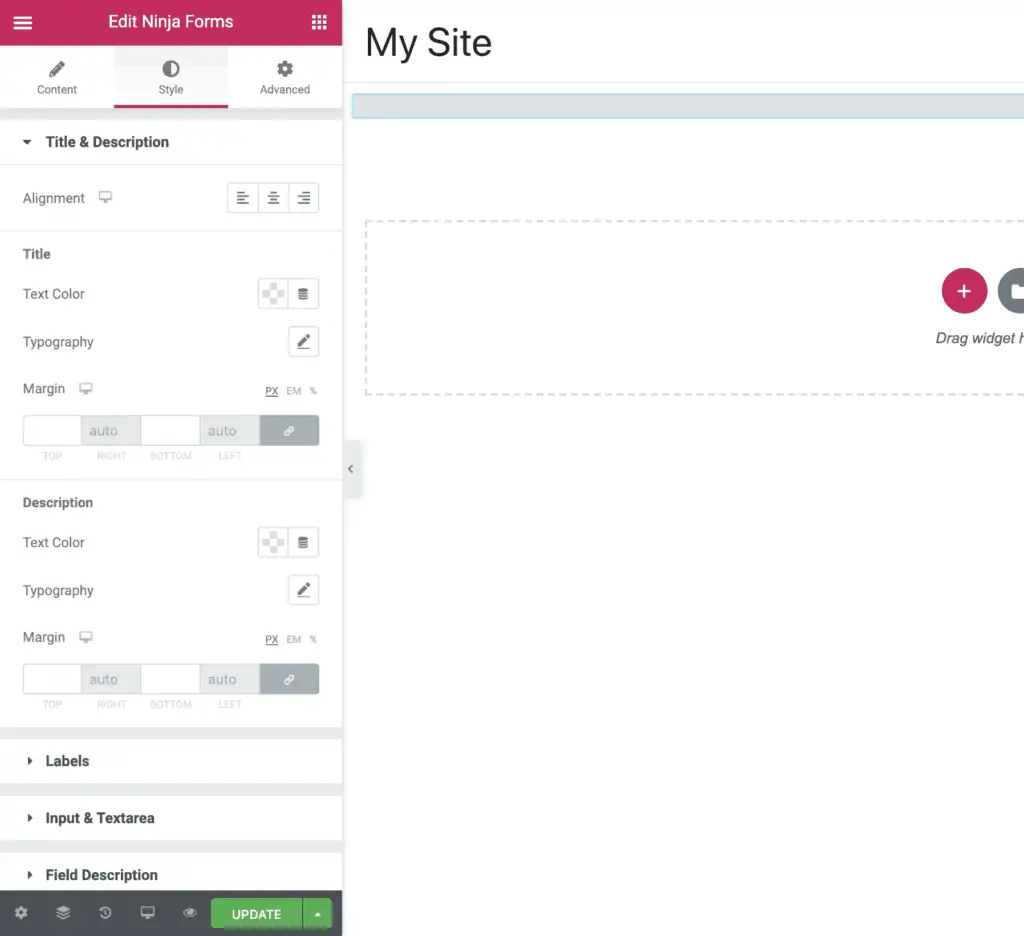
Now to style your Ninja Form, go to the Style tab. Here, using the Title & Description settings, you can style the Title and Description of your Ninja Forms form.
Using the Labels settings, you can style the Labels of your form.

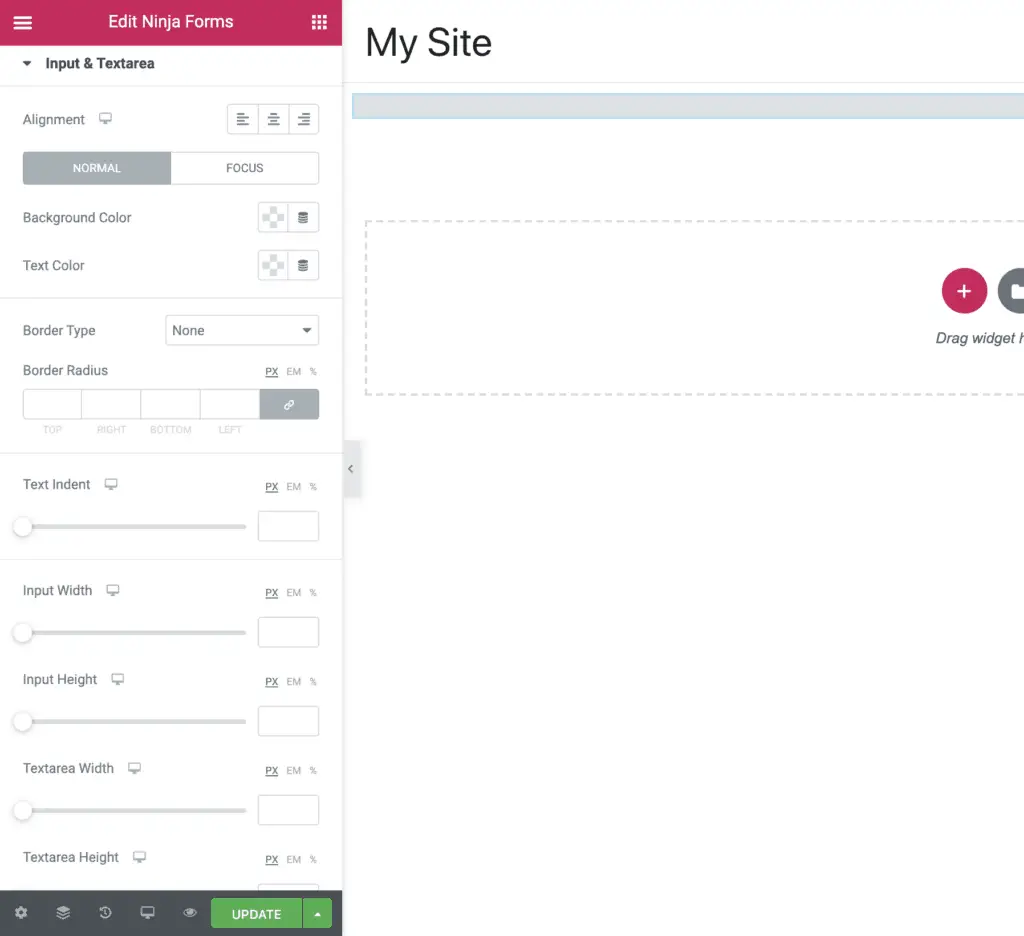
Using Input & Textarea settings, you can style the Input and Textarea fields of your form.
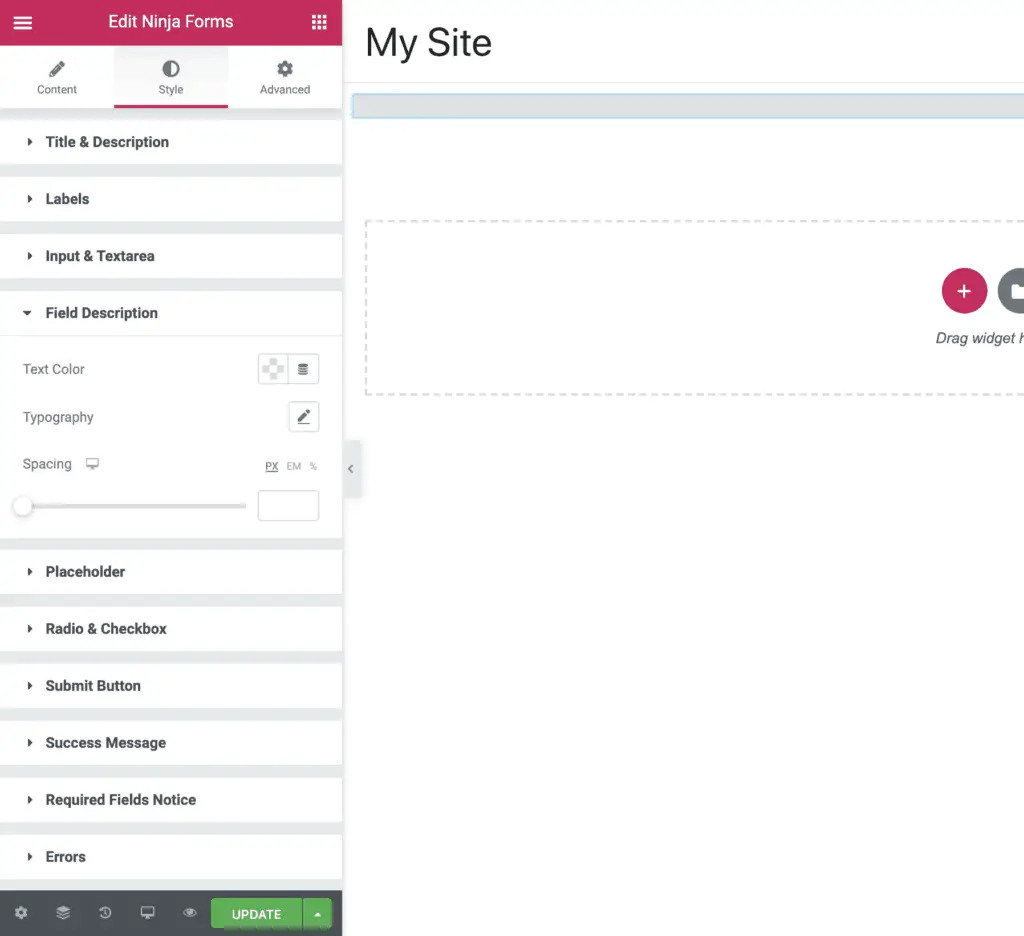
Using the Field Description settings, you can style the field description.
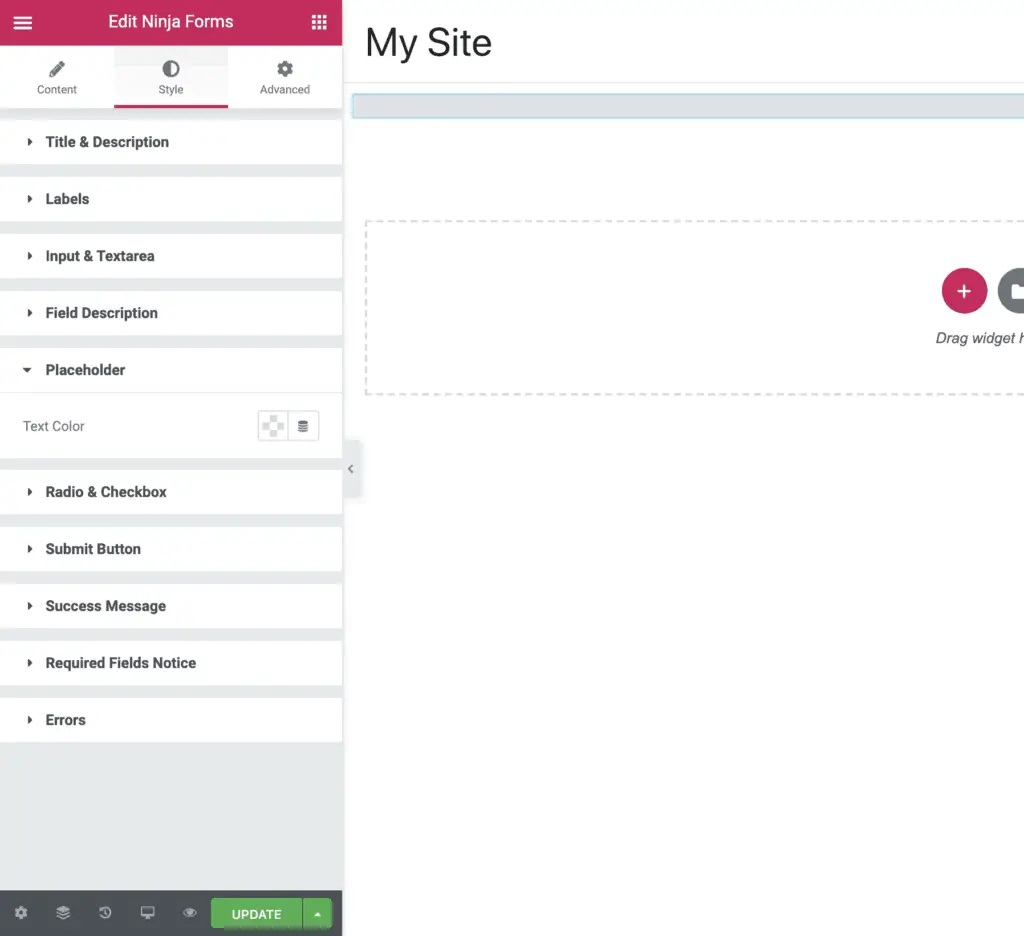
Using the Placeholder settings, you can style the placeholder color.
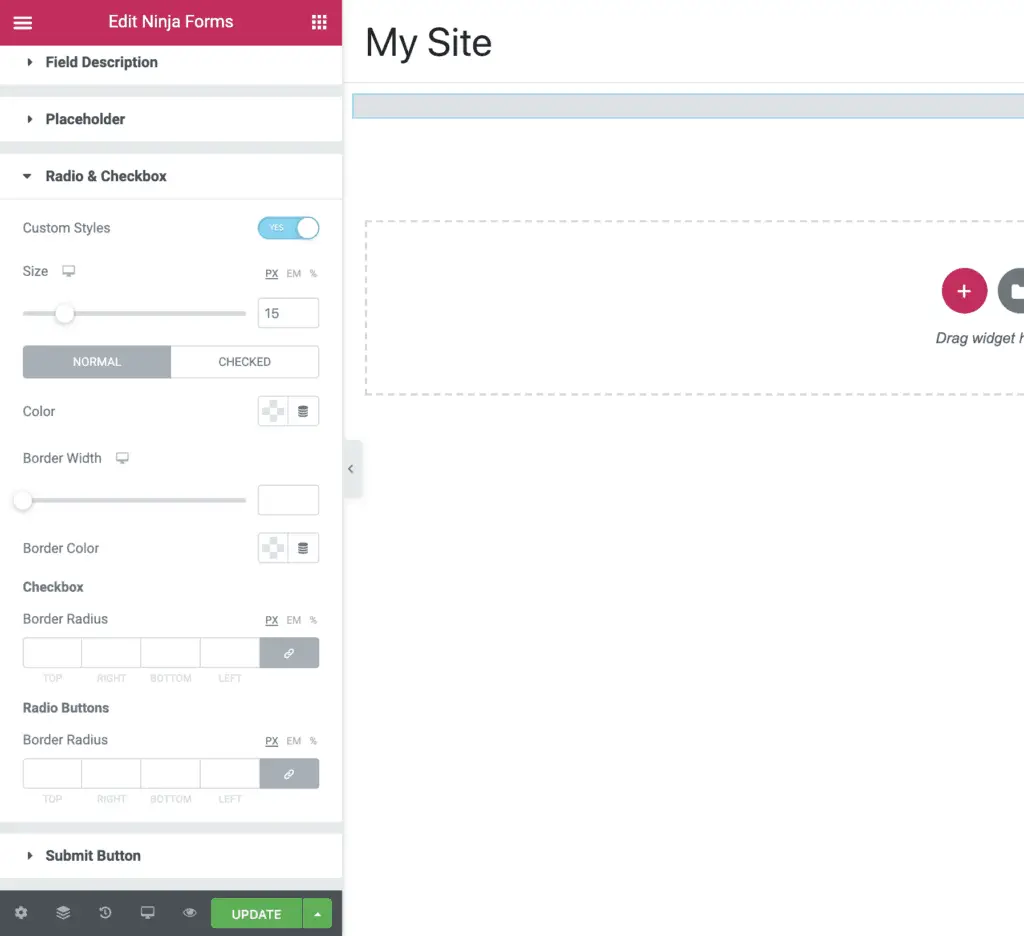
Using the Radio & Checkbox settings, you can style the radio buttons and checkboxes.
Using the Submit Button settings, you can style the submit button of your Ninja Forms form.

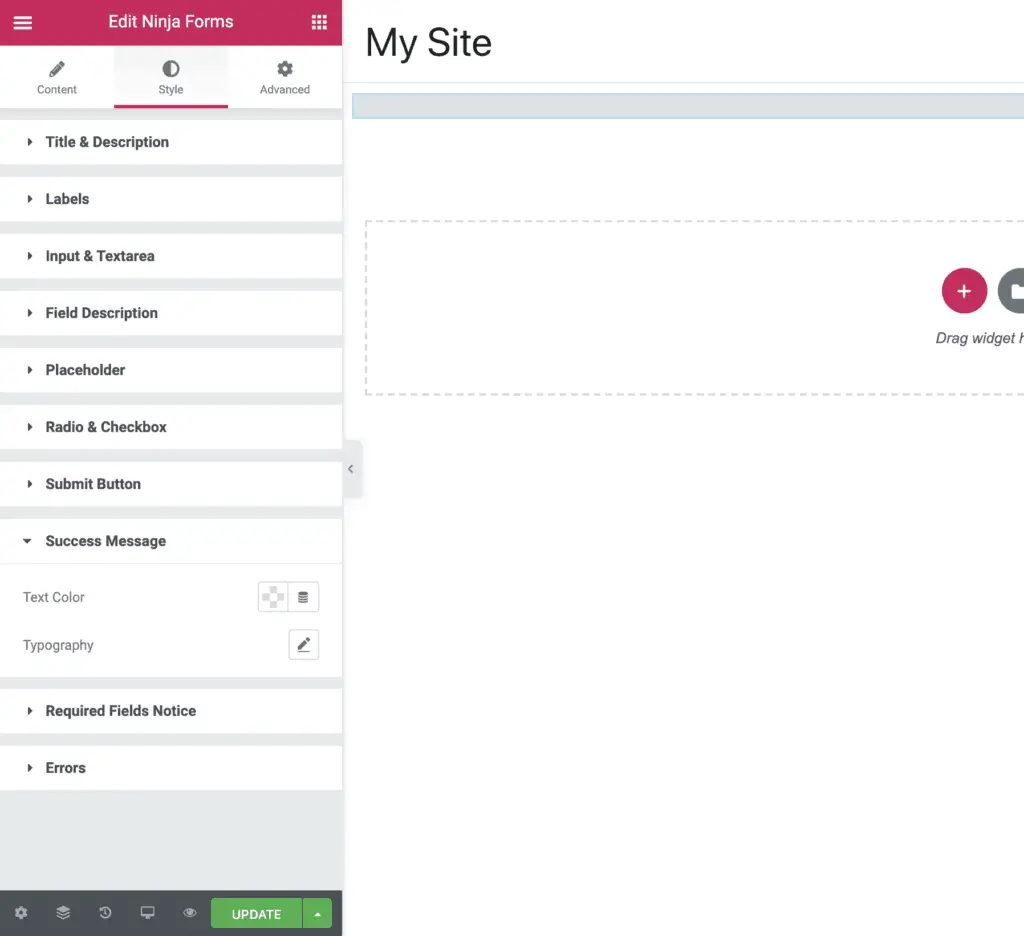
Using the Success Message settings, you can style the messages of your form.
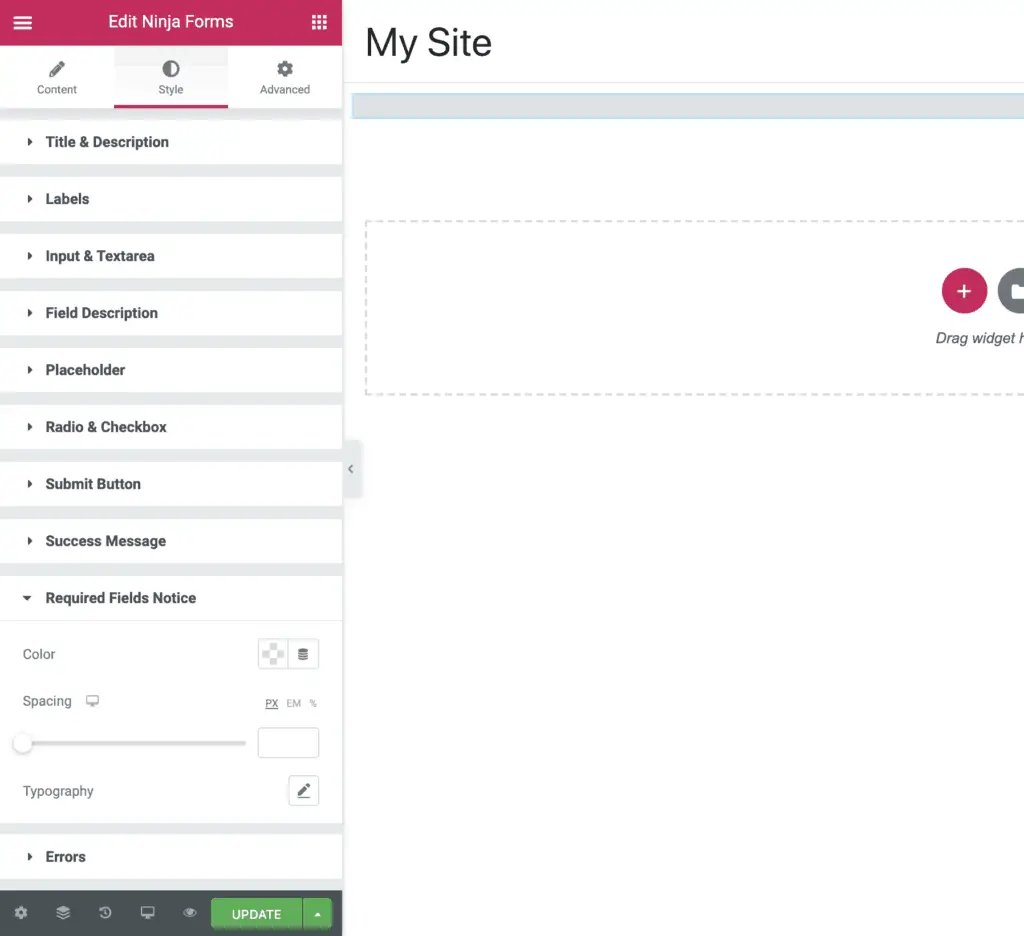
Using the Required Fields Notice settings, you can style the required fields.
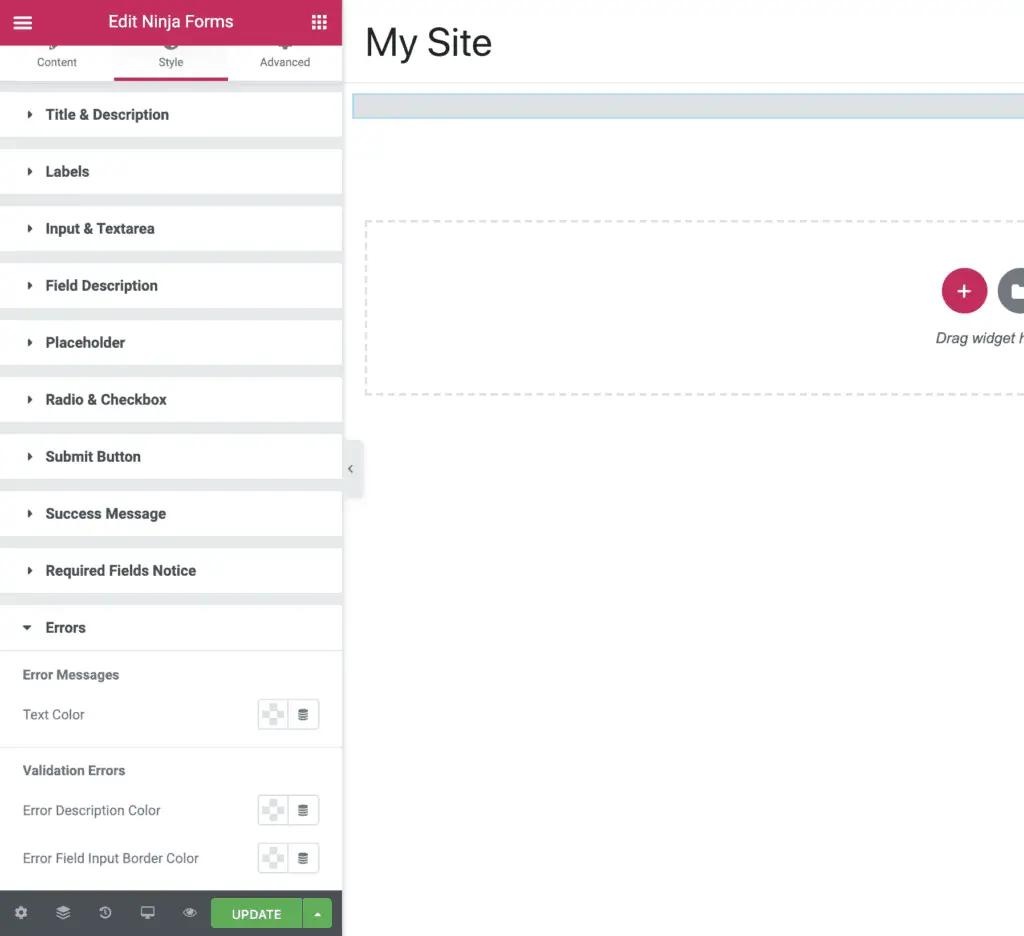
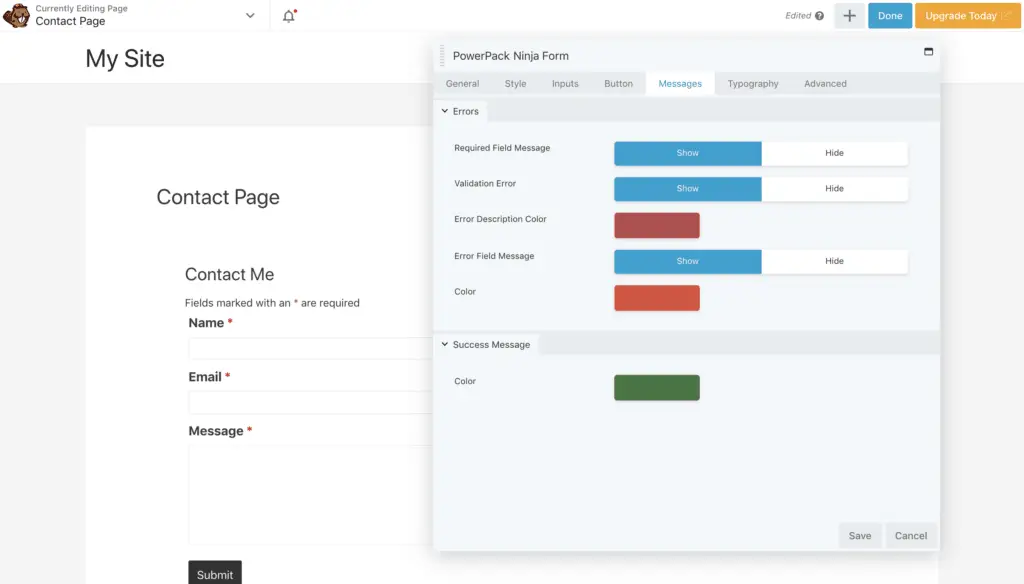
And using the Errors settings, you can style the error messages.
Phew! So many settings!
But I think you have now got a good idea of the extent to which you can style Ninja Forms.
You can literally style all aspects of your form using PowerPack Addons for Elementor plugin.
But…
What if you are using Beaver Builder as your page builder instead of Elementor?
That’s where the second method to style Ninja Forms comes into the picture.
Related Further Reading:
- 2 Simple Methods To Style Contact Form 7 Without Code
- 4 Methods To Style WPForms Without Writing CSS Code
- 4 Ways To Style Caldera Forms Without Any CSS Code
- 2 Easy Ways To Embed A PDF In Elementor Without Writing Code
Method 2: How To Style Ninja Forms Using PowerPack Addon For Beaver Builder Plugin?
PowerPack Addon for Beaver Builder is a premium addon for Beaver Builder, and it works with the free version of Beaver Builder too.
So first install and activate the Beaver Builder Lite plugin and then install and activate the PowerPack Addon for Beaver Builder plugin.
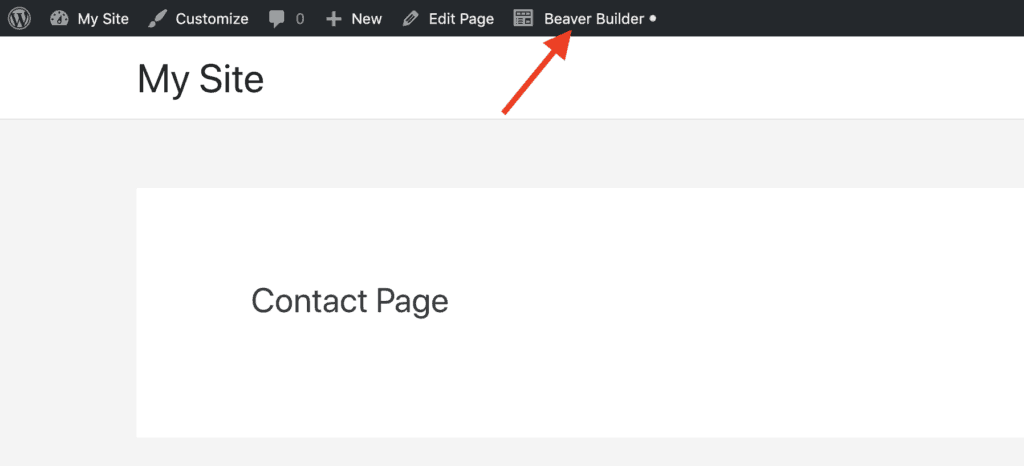
Once both the plugins are active, open the page on which you want to place the Ninja Forms form and click the Beaver Builder link in the WordPress Admin Bar.
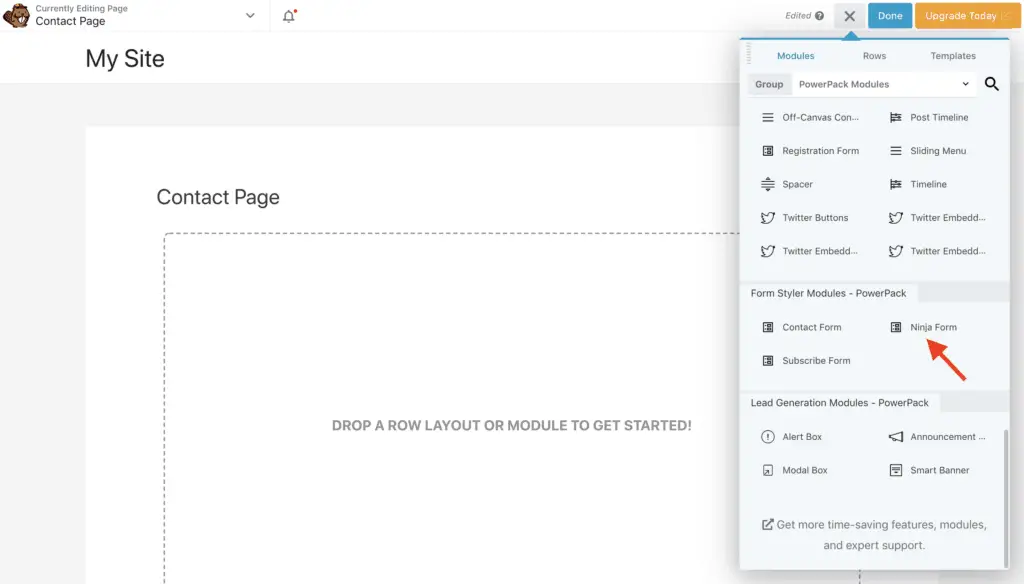
This will activate Beaver Builder. On the right-hand side Beaver Builder panel, select PowerPack Modules in the Group drop-down field and then scroll down to Form Styler Modules section. Drag-and-drop Ninja Form module on the page.
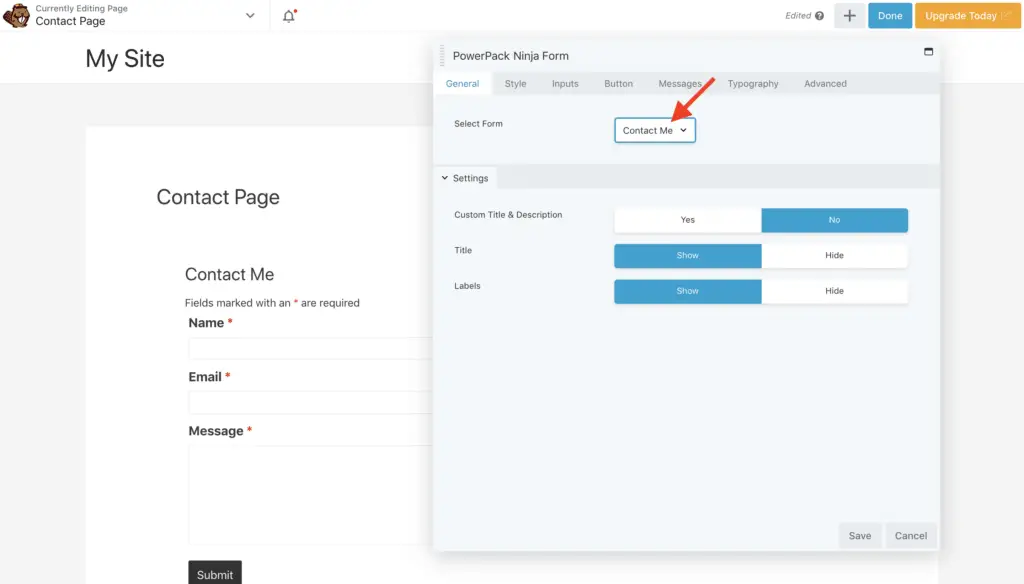
Select the form that you want to style in the Select Form field. Here, you will also be able to set Custom Title and Description and show or hide the Title and Labels.
On the Style tab, you will find the settings to style the Ninja Forms background, border, padding, title, and description.

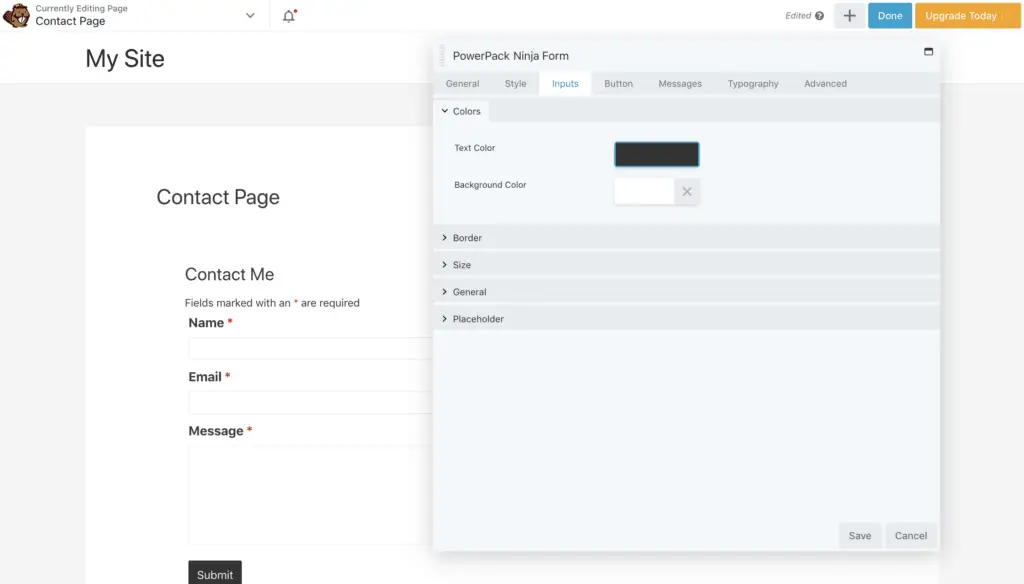
On the Inputs tab, you will able to style Ninja Forms field styles. Here, you will find settings to style your form’s colors, border, style, size, round corners, placeholder, etc.
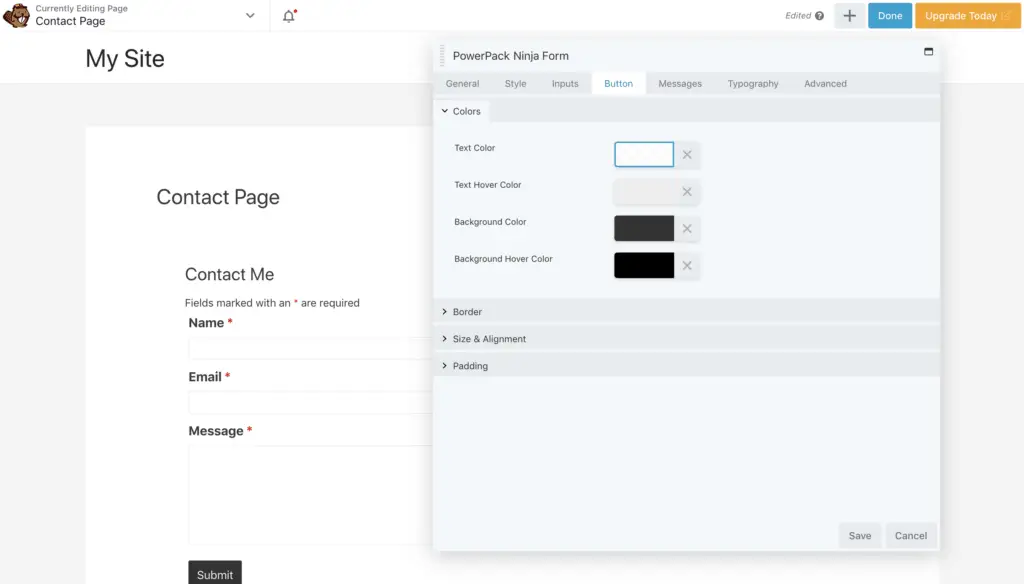
On the Button tab, you can style the submit button of your Ninja Forms form.
On the Messages tab, you can style the error, success, and validation messages of Ninja Forms.
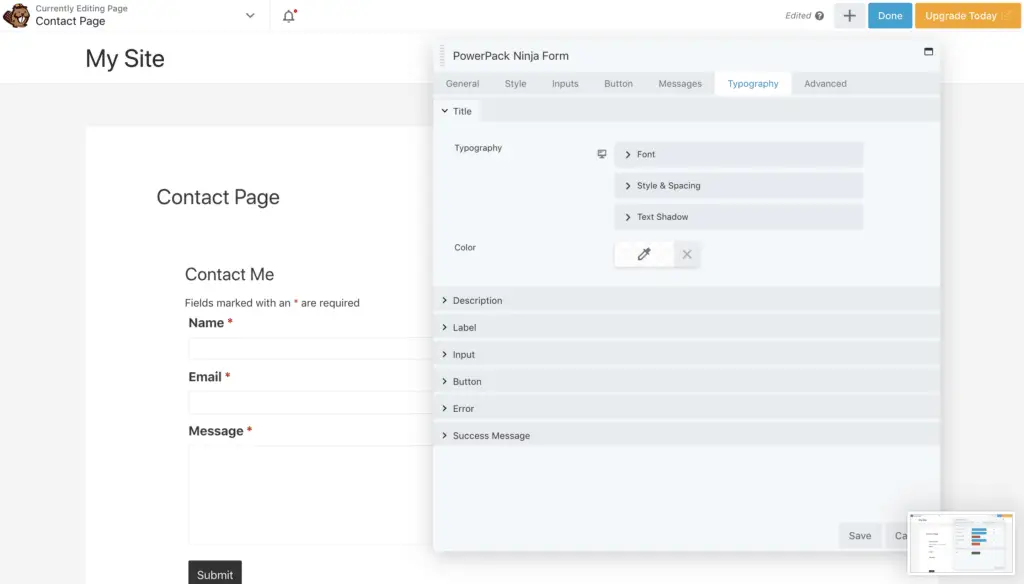
And on the Typography tab, you will be able to style the fonts of Ninja Forms.
Alright! Those are a lot of settings.
I guess you have understood by now that it is possible to completely style Ninja Forms without writing any CSS code at all.
So…
What’s Next?
Don’t waste your time hunting for CSS code snippets to style Ninja Forms.
By using one of the above two methods, you will be able to style Ninja Forms without having to write any code.
That is going to save you a lot of time and headaches.
So just decide which method works for you and run with it.