Want to make a WordPress website for artists?
This detailed guide will show you the easiest way to make an artist website using WordPress. If you are an artist, you can use this website to display your work or even sell your work.
And the best thing is that I will show you how to build your website without fiddling with any code. Artists should not be getting worried about working with code anyway!
Recommended Further Reading:
Okay, so let’s get started…
There are only 3 steps involved in making an artist website:
So without any further ado, let’s get started.
But first, the million dollar question…
How Much Does It Cost to Make An Artist Website Using WordPress?
There are only 3 costs involved in making a website…
- Cost to register a domain,
- Cost to host the website, and
- Cost of themes and plugins needed to build the website.
A domain usually costs $11 to $12 per year and a web host would cost around $48 a year at a minimum.
As for the cost of themes and plugins needed to build your website, I will show you some great quality themes and plugins that you can use for free.
So the total cost comes to around $60 a year or around $5 a month.
Pretty cheap, isn’t it?
Okay, so let’s get started…
STEP 1: Register A Domain
A domain is basically the URL using which people will visit your website. For example, the domain of this website is abhijitrawool.com and you can visit this website by just typing in abhijitrawool.com in your web browser.
You can spend hours deciding which domain name to pick. Don’t do that. I would say, keep it simple.
Either pick your name as your domain like I did with this website abhijitrawool.com or choose your business name as your domain.
Either way, decide on one now because you need to register this domain.
NOTE: It is not essential that you pick a .com domain. You can pick any other domain too, like .net or .org. But .com is the most common one. If your business is local to your country, then you can consider picking country specific domain too, like .ca, .au, .in, etc. Check out the complete list of country-specific domains.
Okay, time to register your domain now.
Just go to Namecheap and buy your domain. If you need help, refer this guide on registering a domain.
Namecheap is the Domain Registrar that will help you to register your domain. Over the years I have tested various Domain Registrars but haven’t found any that is better than Namecheap.
Now that you have a domain, it is time to get a Web Host.
STEP 2: Set Up Web Hosting
A Web Host is basically a company that lends its servers on rent to you so that you can place your website on one of those servers.
There are thousands of Web Hosts on planet Earth. If you sit down to evaluate each one of them, then you are going to get a severe headache.
So I highly recommend that you either choose Kinsta or BigScoots depending on your budget. I have tested many different web hosts, but none of them come close to the performance and customer care that these two offer.
Visit either Kinsta or BigScoots and buy one of their WordPress hosting packages. You can pick their entry-level plans.
Keep in mind that you already have a domain so there is no need to buy one from the web hosts. You should always keep your domain separate from your web host. Never keep all your eggs in one basket!
Once you have bought a web hosting plan from Kinsta or BigScoots, read this step-by-step guide on how to host a WordPress website.
It will walk you through all the steps that you need to take for installing WordPress, SSL and pointing your domain to your web host. So don’t skip reading this guide.
At this point, you should be able to access your WordPress Admin panel shown below using the username and password that you set while installing WordPress.
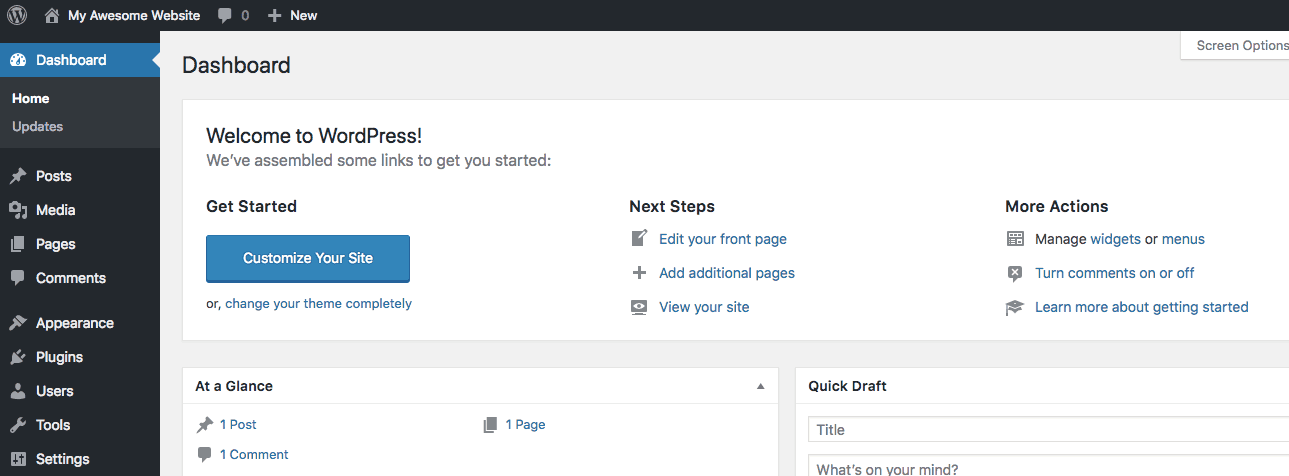
If you are not able to access your WordPress Admin panel, then you have done something wrong. If this happens, then please get in touch with your web host.
If you are able to access the WordPress Admin panel, then you are ready for the last step.
STEP 3: Build The Artist Website
Alright, now the fun part!
Let’s build your website.
Here are the tools that you will use to build your website:
- Astra Theme, because it is free,
- Astra Starter Sites Plugin, again because it is free,
- Beaver Builder Lite Plugin, because it is also free!
- Ultimate Addons for Beaver Builder Lite Plugin, again free,
- Ultimate Addons for Gutenberg Plugin, once more, because it’s free, and
- WooCommerce Plugin, for selling your work and also because it is free!
See? I told you earlier that I will show you quality themes and plugins that are free.
But wait…
Why am I not using some readymade WordPress themes for Artists? Why am I asking you to use Astra theme?
Great question!
The reason is, most WordPress themes that are made for artists look great but these themes will force you to write code if you want to edit your website to make it look and feel the way you want to.
Astra theme on the other hand, lets page builder plugins like Elementor or Beaver Builder build the pages. This way you can easily edit any part of your website by just dragging-and-dropping various elements on the page.
Sounds good, isn’t it?
Why fiddle with code when you can build your website by just dragging-and-dropping things around? Correct?
But again, why Beaver Builder plugin? Why not Elementor plugin?
That’s because I have heavily tested Beaver Builder plugin and found it to be far better than Elementor plugin in many aspects. You can read my Beaver Builder review and also my Beaver Builder vs Elementor comparison to understand why you should choose Beaver Builder as your page builder plugin. It is a rock solid, secure and stable plugin.
Okay, with that out of the way, now let’s talk about the steps that you need to carry out to build your website.
There are 5 small steps in all:
- Set Up WordPress Settings
- Install Astra Theme
- Install Astra Starter Sites Plugin
- Import Astra’s Artist Starter Site
- Tweak Your Website As You Want
These are fairly simple steps, so let’s get started…
STEP 3.1: Set Up WordPress Settings
You will first need to set up your website’s Title, Tagline and URL Structure.
To set up Title and Tagline, follow the instructions on setting up WordPress General Settings.
And then to set up the URL Structure, follow the instructions on setting up Permalink Settings.
By the way, those two links above will take you to specific sections of a massive guide on how to make a website. That guide is written for people wanting to create their website from scratch. Since you are trying to build a WordPress website for artists, you should follow this guide and not that one.
Okay, now it’s time to install Astra Theme.
STEP 3.2: Install Astra Theme
Follow these instructions on installing Astra Theme.
Once Astra theme is installed and activated, it is time to install the Astra Starter Sites plugin.
STEP 3.3: Install Astra Starter Sites Plugin
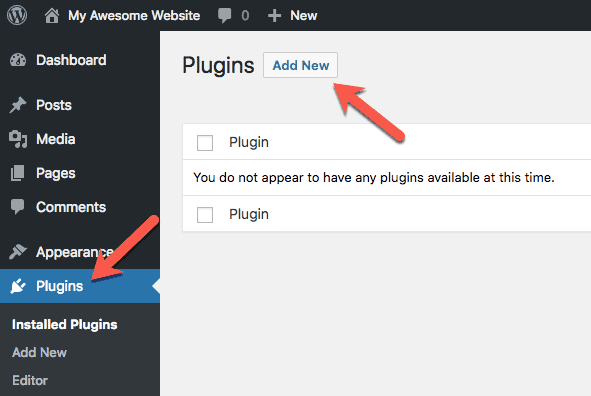
For installing Astra Starter Sites plugin, click on “Plugins” in the WordPress Admin menu and then click the “Add New” button…
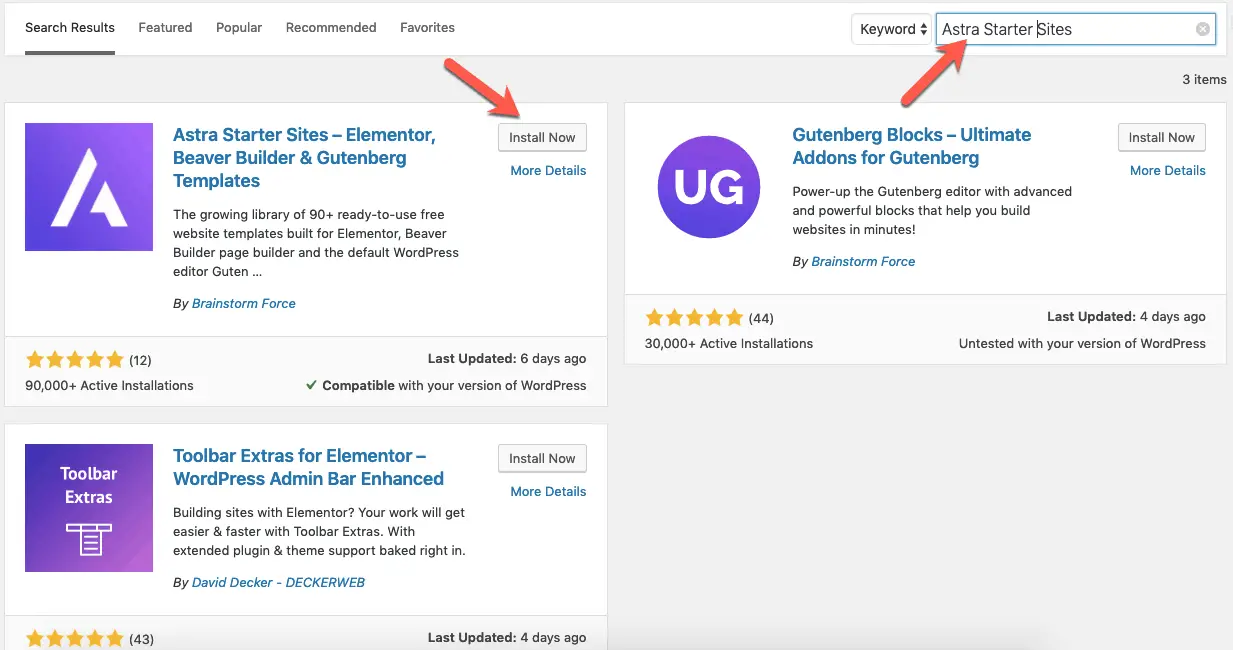
Now search for Astra Starter Sites plugin and install it.
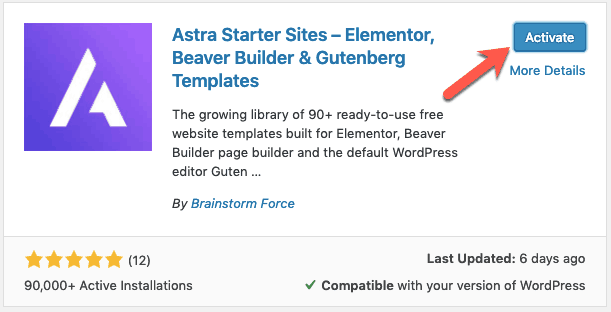
Once installed, activate the plugin.
Great! Now it is time to import Astra’s Artist Starter Site.
STEP 3.4: Import Astra’s Artist Starter Site
The team behind Astra theme has built a number of website templates that they call Starter Sites. Some of them are free and some of them are only available in Astra’s premium Essential and Growth bundles.
You can see all of Astra’s Starter Sites over here…
Using Astra Starter Sites plugin, you can import these sites directly into your WordPress Admin panel to build your website in one go. And since these Starter Sites use page builder plugins like Beaver Builder or Elementor, you can edit your website by simply dragging-and-dropping various elements on the page.
For the purposes of this tutorial, we will import the free Artist Starter Site made by Astra team that uses Beaver Builder as the page builder plugin.
This website template is perfect because once you import it, you can instantly display your portfolio as well as start selling your work online.
You can check out the demo of this free Artist Starter Site over here…
Now to import the Artist Starter Site, click the See Library link under Astra Starter Sites plugin on the Plugins page…

On the next page, select Beaver Builder as the Page Builder…

You will now see a list of all readymade Starter Sites that you can just import to build your website. Scroll down to find the Artist Starter Site…
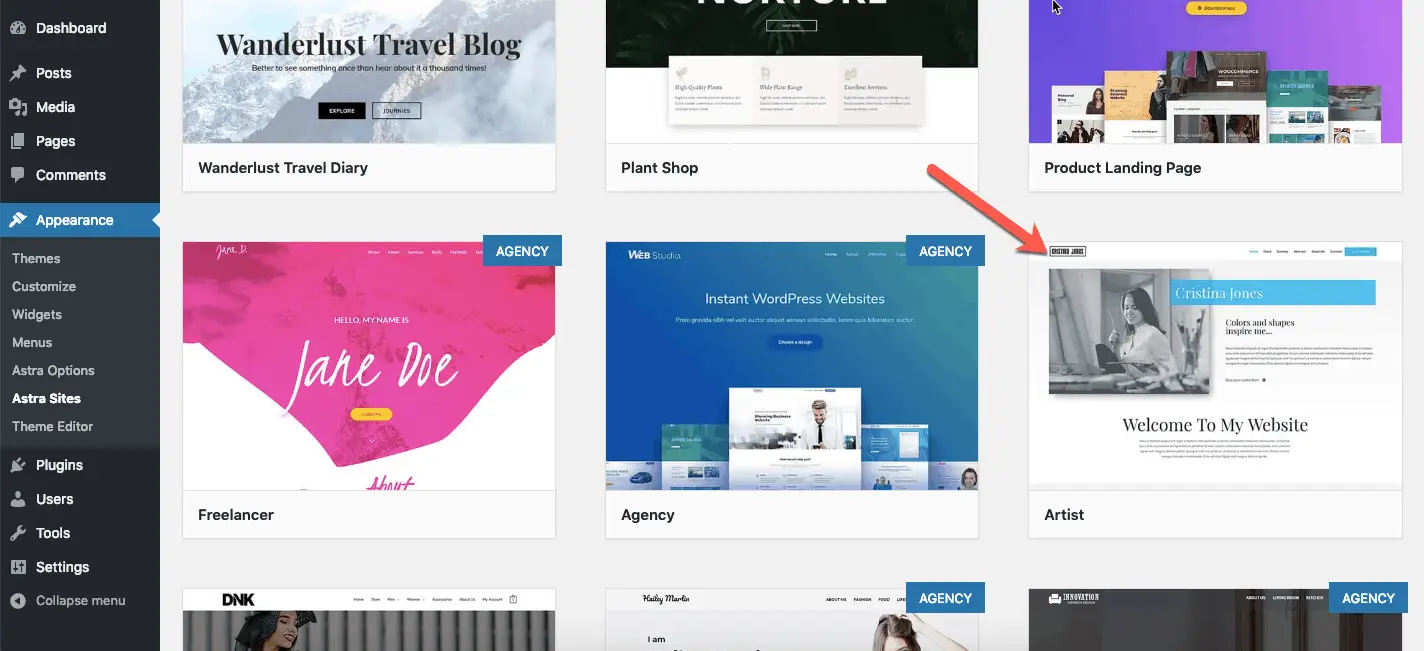
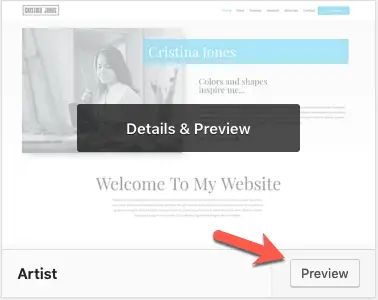
Hover your cursor on the Artist Starter Site and click the Preview button to preview the site.
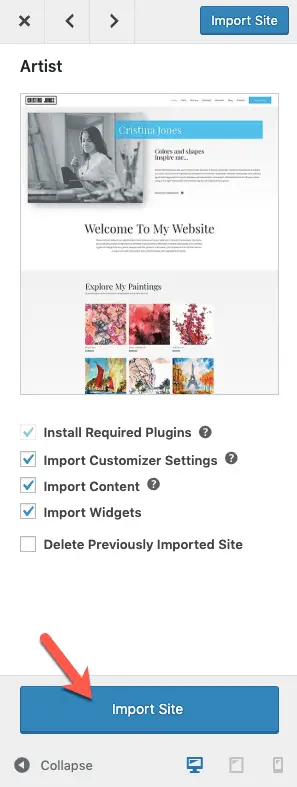
On clicking the Preview button, you will see the list of things that are required for importing this Starter Site. When you are ready to import the site, click the “Import Site” button for importing the Starter Site.
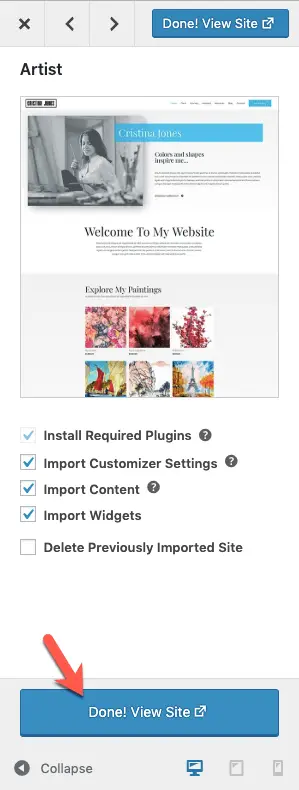
Be patient while the site is getting imported. It can take a while. Once the site is imported, you will see the View Site button. Click it to view your site.
That’s It! Congratulations!
You now have a fully functional and a great looking artist site.
And now you are free to start making edits to your website.
NOTE: At this point, you can delete the Astra Starter Sites plugin from Plugins page in your WordPress Admin Panel.
STEP 3.5: Tweak Your Website As You Want
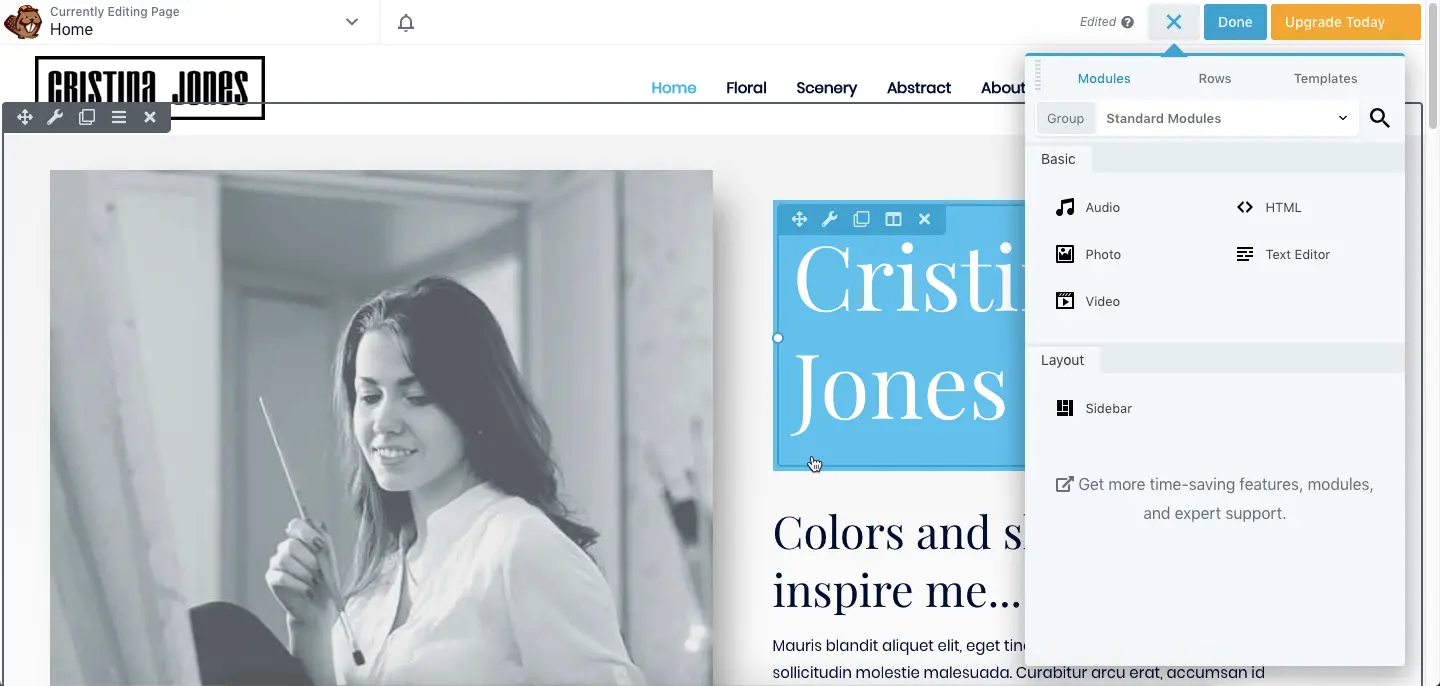
You can start changing the text and images to make your site look the way you want it to look.
Just open the page that you want to edit and click the “Beaver Builder” link in the WordPress admin bar at the top to edit that page.

You will then be able to edit the page by dragging-and-dropping various elements on the page.
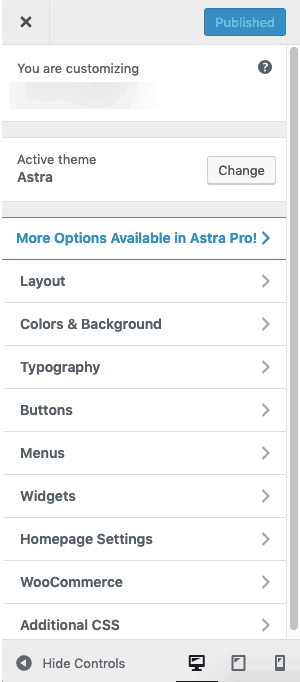
And to change your website logo, menu, footer, etc. you can click the “Customize” link in the WordPress admin bar…

This will open the WordPress Customizer panel where you can set various things such as fonts of your website, header, footer, menu, etc.
No need to touch any code or break your head searching for code snippets around the world.
You can tweak your website by just adjusting some settings or dragging-and-dropping various elements on the page.
So now…
What’s Next?
If you need absolute flexibility in designing your website without touching any code, then I recommend that you get the pro versions of Beaver Builder and Astra.
These pro versions add a lot of functionality and features which you can use to design your website any way you want to without worrying about writing code.
You can check out Beaver Builder’s pro version features over here…
And…
You can check out Astra Theme’s pro version features over here…
And Finally…
Congratulations once again on building a WordPress website for artists!
If you found this guide useful in building an artist website, then please share it with your friends and network so that someone else can benefit too.
Plus I would really appreciate it.
Just click the social sharing buttons below to share this guide.
And if you have any questions, then just ask them in the comments section below.