Building a WordPress website for Photographers has become extremely simple nowadays.
You don’t have to worry about dealing with Code or complicated technologies at all!
And in this guide, you will learn how to create a photography website.
More importantly, you will not only learn how to make such a website, but you will also learn how to make it in a particular way so that you will never have to deal with any code while editing your website for years to come.
Sounds interesting, isn’t it?
Great!
So let’s get started right away…
But first, the usual and the most important question…
How Much Will It Actually Cost To Make A WordPress Website For Photographers?
Let’s break down the cost of making a photography website…
Here’s how the cost breakdown looks like:
- You will need to buy a Domain for your website, for example, mywebsite.com. This will cost you around $12/year which comes to around $1/month.
- Then you will need to buy a Hosting Account where you will host your website so that everyone else in the world can visit your website. This will cost you around $4/month which comes to around $48/year.
- Finally, you will need to buy Astra Theme’s Essential Bundle to import a pre-built premium photography website directly into your WordPress website. This bundle will cost you $169 for the first year and then around $135 per year from second year onwards. Now, you can get rid of the $135 per year cost by buying Essential Bundle’s Lifetime plan too. That decision is entirely yours.
Other than these costs, there are a few other optional costs that you might want to consider. We will talk about these towards the end of this guide.
Now, what you are about to learn is probably the fastest and the most efficient way of making a website for photographers.
So get excited and let’s begin…
Steps Involved In Making A Photography Website
There are 3 steps that you need to perform to make a photography website. They are:
Now that you know the overall steps involved in making a photographer’s website, let’s see how to perform each of these steps…
STEP 1: Register A Domain
A domain is nothing but the web address that people will use to visit your website. For example, the domain of this website is abhijitrawool.com
Yes, I have used my name as the domain name. You can do the same.
Or if you already have a name for your photography business, then you can register a domain with your business name. For example, myphotographybusiness.com
One thing that you should definitely consider is getting a country-specific top-level domain. For example, .ca, .au, .in, etc. if you do business only within your country. Check out the complete list of country-specific top-level domains.
I would recommend not spending too much time in deciding your domain name because there is a high probability that you might get stuck at this step for days and weeks. So try to pick a name as soon as you can.
Once you have picked a domain name, you will need to register it so that no one else can use it.
To register your domain name, I recommend using Namecheap.
I have used Namecheap for over 10 years now and I am completely satisfied with their customer service. More importantly, Namecheap doesn’t have any hidden costs like other domain registrars.
Check out these step-by-step instructions on how to register your domain name.
Great!
Now that you have registered your domain name, it is time to set up your web hosting…
STEP 2: Set Up Web Host
Web Host is basically a company that rents you some space on their servers where you can keep your website.
You can keep your website on your personal computer too… but hey, how will people visit your website when you shut down your computer? They simply can’t!
So you will need to invest some money in buying a web hosting account for your website.
Now, there are thousands of web hosting companies in the world.
You will find companies that offer web hosting at a dirt cheap price to companies that offer web hosting at a very high price.
Just remember one thing while choosing your web hosting company…
You get what you pay for!
So I recommend that you choose either BigScoots or Kinsta as your web host.
I have personally used both and both are fantastic value for money web hosts. Right from server speed to customer service, everything is top notch.
Kinsta is a bit costly than BigScoots. So depending on your budget, buy web hosting from one of these.
Here’s a complete guide to hosting a website.
Read and follow this guide carefully. It will show you exactly what you need to do to install WordPress in your web hosting account and then point your domain to your web host.
After performing all the steps from this guide, you should be able to log in to the WordPress Admin Panel of your website.
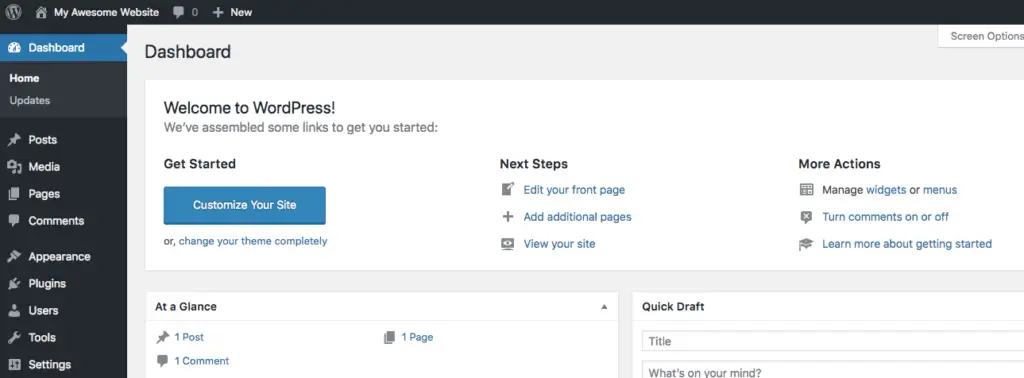
Now that you have WordPress installed and you are all ready to go, it is time for the last step of building your photography website.
STEP 3: Build Your Website
As I mentioned above, there are basically 4 sub-steps that you need to carry out now:
- Set Up WordPress General and Permalink Settings
- Install Astra WordPress Theme
- Install Astra Premium Sites Plugin
- Import Astra’s Photography Portfolio Premium Site
STEP 3.1: Set Up WordPress General and Permalinks Settings
Now, that you have WordPress installed, let’s quickly set up a couple of important settings in WordPress, the General Settings and the Permalink Settings.
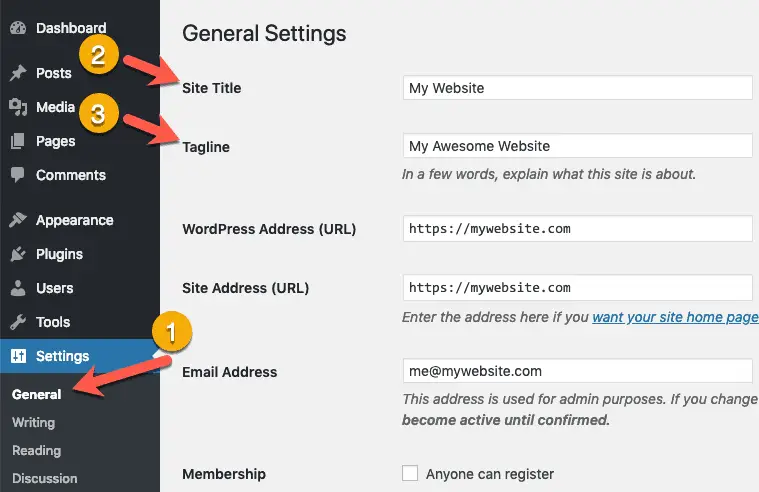
To set up General Settings, go to Settings > General and make sure you set the Site Title and Tagline for your website.
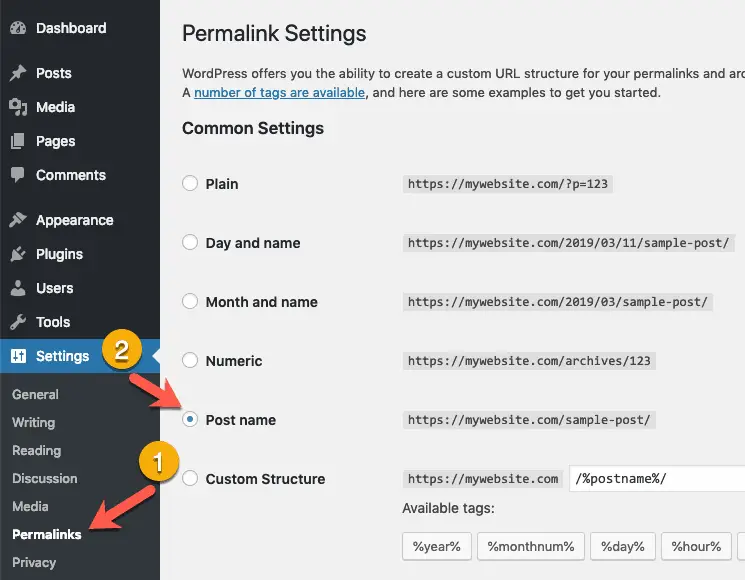
Then quickly go to Settings > Permalinks and make sure “Post name” is selected. If it’s not, then select it and save the settings.
Alright, now it’s time for the next step…
STEP 3.2: Install Astra WordPress Theme
Before you install the Astra theme, let me tell you why I am recommending this theme and not some other photography theme.
The thing is that almost all the photography themes will make your life miserable when you will try to make minor adjustments to your website’s design so that it looks just the way that you want it to look.
Astra theme on the other hand, is a bare-bones theme that will never stand in your way when you are trying to change the design of your website.
I know, your next question is going to be…
If Astra is a bare-bones theme, then how will I build a great looking photography website with it?
That’s exactly why I recommended Astra theme in first place. You will not build the design of your website using Astra theme. You will do that using Beaver Builder Lite and Ultimate Addons for Beaver Builder plugins.
But we are jumping ahead of ourselves.
For now, just understand that Astra theme is not going to stand in your way when the time comes to design your website.
Okay! With that out of the way, let’s install the Astra theme.
Follow these instructions to install the Astra theme.
Now, you might have noticed that the above link takes you to a mega guide on building a website. But since you are building a photography website, you should follow this guide and not that one.
Alright! Once you have installed Astra theme, let’s move to the next step…
STEP 3.3: Install Astra Premium Sites Plugin
I hope you have already purchased Astra’s Essential Bundle.
This bundle comes with 3 important plugins, Astra Pro plugin, Astra Premium Sites plugin and Ultimate Addons for Beaver Builder plugin. While buying this bundle, make sure you select Ultimate Addons for Beaver Builder plugin as your choice for the Page Builder Addon because you will be using Beaver Builder as your page builder to build your website.
Once you have made your purchase, you should be able to download Astra Premium Sites plugin zip file as well as note the License Key for this plugin from your account page on Astra’s site.
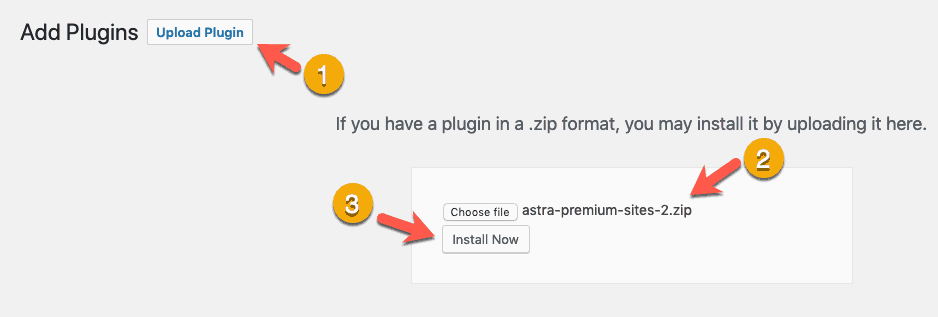
Once you have downloaded the plugin, come back to your WordPress Admin Panel and go to Plugins page. On this page click the Add New button…
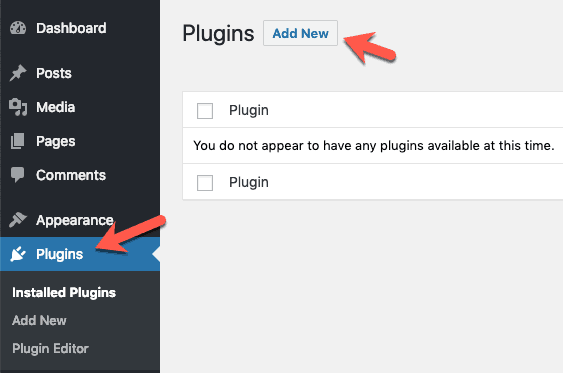
Then click the Upload Plugin button on the Add Plugins page to upload the Astra Premium Sites plugin zip file that you just downloaded. Once you have uploaded the zip file, click the Install Now button to install the plugin.
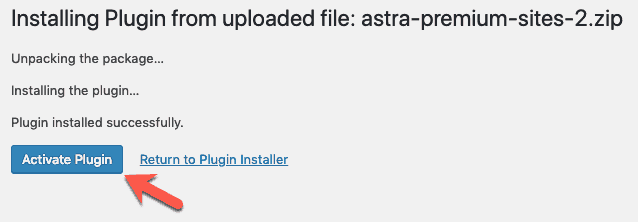
And then click the Activate Plugin button to activate the plugin once it is installed…
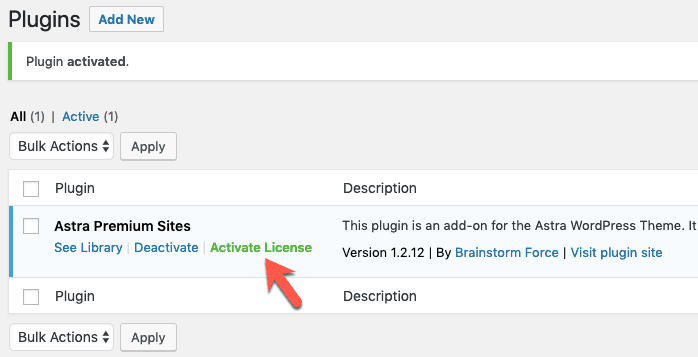
After this, click the Activate License link to activate the Astra Premium Sites plugin.
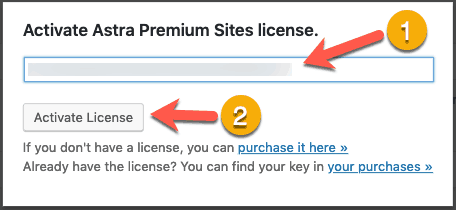
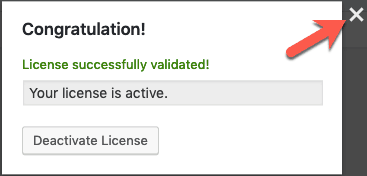
In the activate popup that shows up, enter the License Key that you just noted while downloading the Astra Premium Sites plugin from your account page on Astra’s website and click the Activate License button.
A Congratulations popup might show up. Just close that popup.
Alright, onto the next step…
STEP 3.4: Import Astra’s Photography Portfolio Premium Site
Now it is time to import Astra’s premium Photography Portfolio website.
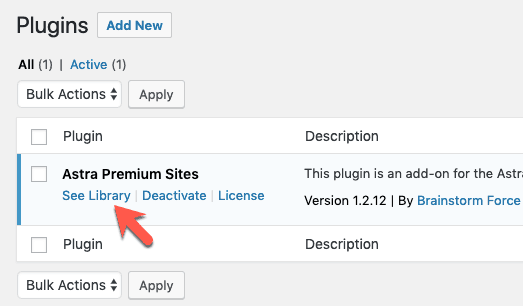
Click the See Library link under Astra Premium Sites plugin on the Plugins page.
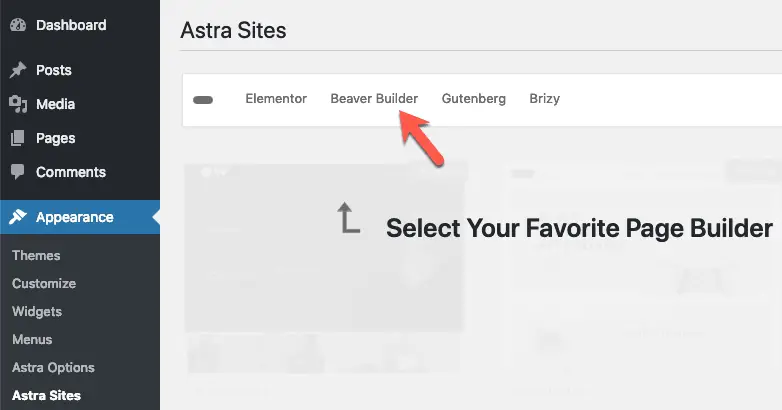
Then on the Astra Sites page, click Beaver Builder in the top filter panel…
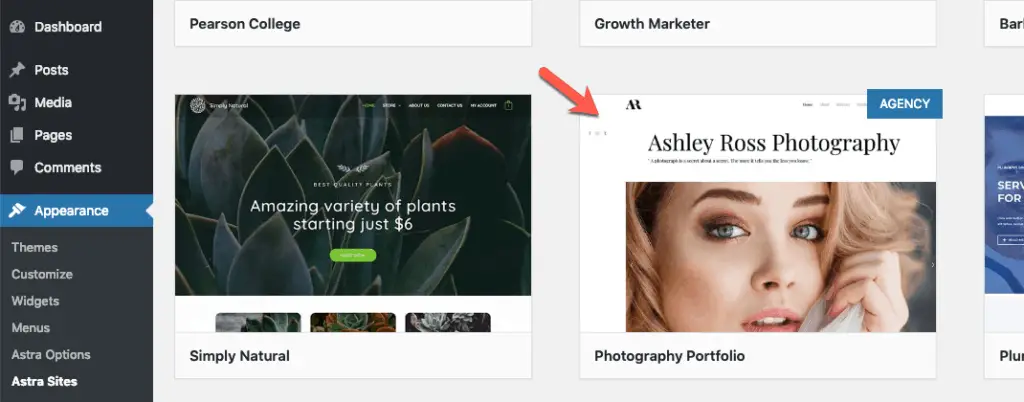
Now, scroll down and click on the Photography Portfolio website.
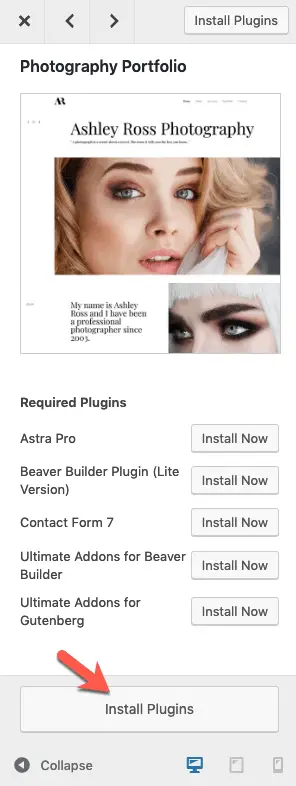
You will then see the preview of the website. Now click the Install Plugins button in the left side panel.
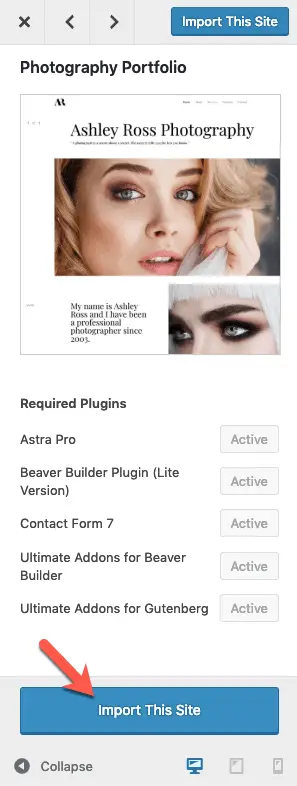
Once all the plugins are installed and activated, you will see the Import This Site button. Click it to import Astra’s premium Photography Portfolio website into your WordPress website.
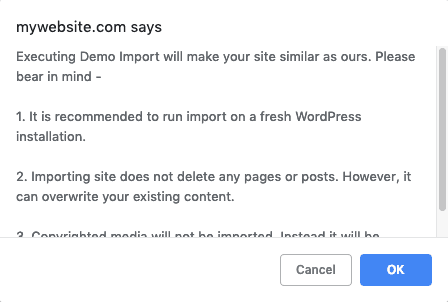
Astra might show you a warning popup, read it and click OK button.
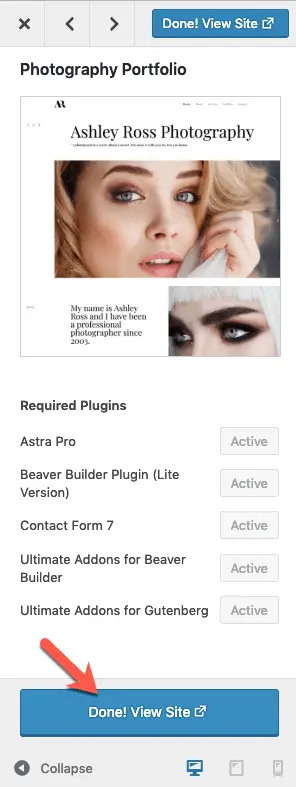
At this point, Astra will start to import the entire website and set it up for you. It might take a few minutes. Be patient. Once the site is imported, you will see the View Site button. Click it to view your website.
And that’s it!
You have successfully created your photography website.
Congratulations!
NOTE: Now you can delete the Astra Premium Sites plugin from the Plugins page in your WordPress Admin Panel.
Great! But…
What To Do Next?
Now you can start editing your website by simply dragging-and-dropping stuff around.
To start editing any page on your website, just open it and click the Beaver Builder link in the top admin bar.

Beaver Builder will ask you to take a small tour of the plugin interface. Take it if you have never used Beaver Builder before.
You can then start adding, editing, moving, and deleting the various elements on the page by dragging-and-dropping them on the page using Beaver Builder…

You will notice that you cannot edit certain areas of your website, like the header, menu, footer, etc. To edit those, click the Customize link in the top admin bar.

This will open up the WordPress Customizer Panel where you can set all the site-wide settings like your logo, fonts, and colors of your photography website, etc.
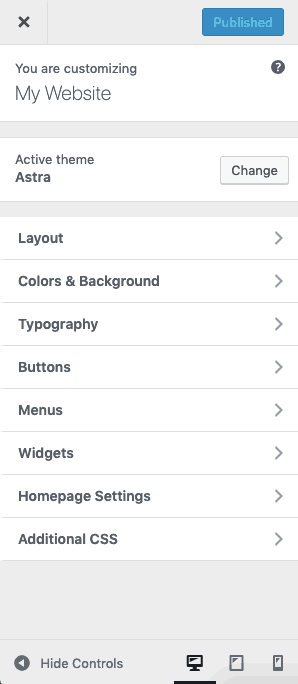
Play around and set up everything as you want.
If you need more flexibility in designing your website, then consider getting the Beaver Builder Pro version.
This is the additional optional cost that I was talking about at the start of this guide which you should consider.
Beaver Builder is the most stable, secure, and rock-solid WordPress page builder plugin available in the market today. So there is no reason to not try it out.
Okay, anything else?
Yes…
Let’s talk about…
How To Optimize Your Photography Website?
Now that your website is completely built, you should spend some time optimizing it.
Since you will be dealing with lots of images and that too of very high resolution and sizes, I would recommend that you use ShortPixel plugin.
ShortPixel will compress your images to reduce their sizes so that your pages load fast.
It is a totally free plugin but if you are going to deal with lots of images on your website, then it might make sense to get the paid version of ShortPixel plugin.
Check out ShortPixel plugin and all of its plans…
Okay, now let’s talk about SEO, Site Speed, and Security.
To optimize a WordPress website for search engines, you can use the free version of Yoast SEO plugin. This plugin has been the most popular SEO plugin in the WordPress ecosystem for a very long time now.
So just install the Yoast SEO plugin and spend some time setting it up.
As for the website speed, I can recommend some caching plugins but I won’t.
The reason is, website speed is dependent on a lot of things than just caching.
And ideally, with a good web host, you don’t need additional caching plugins.
If you selected BigScoots or Kinsta as your web host, then both of them come with their own caching which works very well.
So don’t fall for people recommending separate caching plugins.
Okay!
But what about Security?
Again, I can recommend some WordPress security plugins, but I won’t.
Similar to website speed, security of a website is also dependent on a lot of factors. The biggest factor of them all being the web host.
If you have selected BigScoots or Kinsta, then there is no need to worry about security as such. Both of these web hosts will keep your website secure.
So don’t fall for people asking you to set up a WordPress security plugin.
Recommended Further Reading:
- How Much Does A Photography Website Cost? (Actual Figures)
- 21 Best Photography Website Homepage Ideas (Real-life Examples)
- 25 Great Examples Of Photography Website Welcome Messages
- Is Wix Good For Photography Websites? (Here’s What I Found)
- 100 Best Keywords For Photography Websites That You Should Target
And Finally…
Congratulations one more time for building a WordPress website for photographers.
I hope you found this guide useful.
If you did, please share it with your friends on social media. I would really appreciate that.
And if you have any questions, then just ask them in the comments below. I would love to answer them.