This question had me stumped for quite a while. Unfortunately there is no easy way to create a button in Beaver Builder that can launch OptinMonster’s 2-step optin lightbox without getting your hands dirty with some code.
Jason Pelker at WPGenius has written an excellent article on how to launch OptinMonster lightbox on clicking Beaver Builder button using javascript.
However, I wanted to find some way of achieving the same without using a javascript, preferably HTML and CSS. This was due to the fear of using javascript which I have no idea how to use and fix things if they go wrong.
For those of you wondering why it is so difficult to create a button in Beaver Builder to launch OptinMonster’s lightbox, here’s why.
Why Beaver Builder Button Cannot Launch OptinMonster Lightbox?
OptinMonster lets us launch a 2-step optin lightbox by creating a hyperlink that looks something like this:
<a href=”#” class=”button manual-optin-trigger” data-optin-slug=”h95qqg9sqx9atrsl”>Click me!</a>That class that you see in the link’s code “manual-optin-trigger” and the attribute “data-optin-slug” are the root cause of all problems.
When you create a button in Beaver Builder there is no way you can add these to the button link.
Here’s How To Launch OptinMonster Lightbox Using Beaver Builder Button
It was very evident to me that I cannot use the Button module of Beaver Builder to achieve this. The only way I would be able to do this was to create the button using HTML and CSS.
Luckily, Beaver Builder also has HTML module which I could use to paste in the necessary HTML.
After a little bit of digging around, I found a forum thread on Beaver Builder’s support forum which helped me write the HTML and some basic CSS for the button.
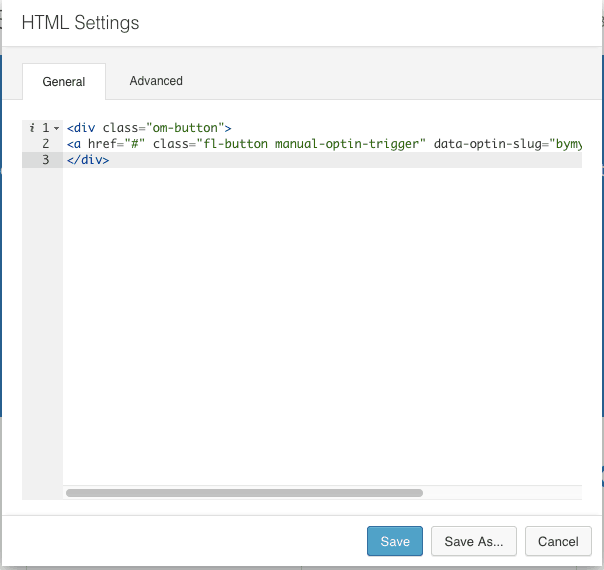
With the help of this forum thread, I built the HTML code for the OptinMonster lightbox button which looked like this:
<div class=”om-button”>
<a href=”#” class=”fl-button manual-optin-trigger” data-optin-slug=“bymyqg9sqx9atrsl”>Start Course</a>
</div>
Notice the additional “div” element and the “om-button” and “fl-button” classes that were added to original OptinMonster lightbox button code given above.
After this, I dragged Beaver Builder’s HTML module on the page and pasted the above code inside the HTML module.
After doing this, I could see the button.
Finally, it was time to paste the CSS code from the forum thread to style the button. This is the code that I got from that forum thread:
.enquire-button {
text-align: center;
}

.enquire-button a.fl-button {
background: black;
color: purple;
}
However the button still looked very basic. I realized that I have to write some more CSS to style the button.
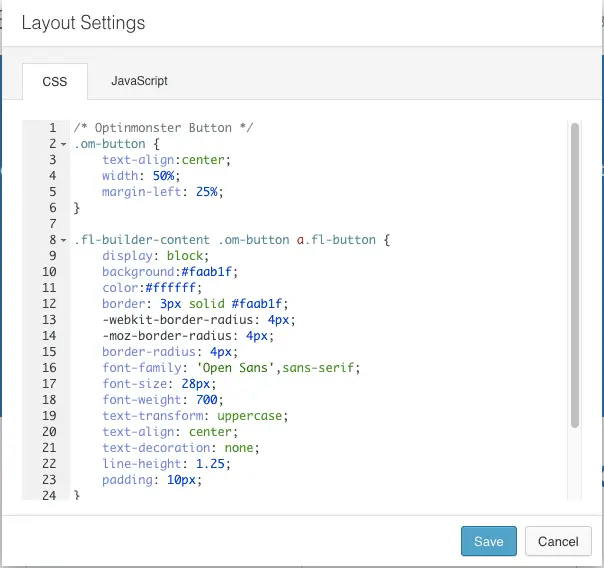
Here is the CSS that I came up with. You can copy and use it if you need.
/* Optinmonster Button */
.om-button {
text-align: center;
width: 50%;
margin-left: 25%;
}

.fl-builder-content .om-button a.fl-button {
display: block;
background: #faab1f;
color: #ffffff;
border: 3px solid #faab1f;
-webkit-border-radius: 4px;
-moz-border-radius: 4px;
border-radius: 4px;
font-family: ‘Open Sans’,sans-serif;
font-size: 28px;
font-weight: 700;
text-transform: uppercase;
text-align: center;
text-decoration: none;
line-height: 1.25;
padding: 10px;
}

.fl-builder-content .om-button a.fl-button:hover {
background: #e59520;
border: 3px solid #e59520;
}
I then pasted this code in the CSS tab of Layout Settings under Tools menu of Beaver Builder.
That is it!
Clicking the button now opens up OptinMonster’s 2-step lightbox.
If this article helped you, please do not hesitate to share it with your friends. I will really appreciate that.