GeneratePress is a fabulous WordPress theme, but removing the footer in the GeneratePress theme is not so straightforward.
Here are the steps to remove GeneratePress footer without writing any code:
- Install and activate the GP Premium plugin.
- Activate the Elements and Disable Elements modules.
- Create an Element of type Layout.
- Give the Element a name.
- Select the Footer option on the Disable Elements tab.
- Set the Location field to “Entire Site” on the Display Rules tab.
- Publish the Element.
Let’s take a detailed look at each of these steps now.
Video Tutorial
If you prefer written tutorial, please keep reading.
1. Install And Activate The GP Premium Plugin
If you don’t know yet, GP Premium plugin is from the same team that created the GeneratePress theme.
It extends the GeneratePress theme to add a lot of useful features like layouts, elements, colors, ready-made sites, etc.
Check out all the features that GP Premium plugin offers.
And on top of all that, it is a very inexpensive plugin.
So, there is no reason to waste your time trying to find some code snippet to disable the footer.
GP premium plugin will save you a lot of time.
Now, once you get the plugin, install, and activate it.
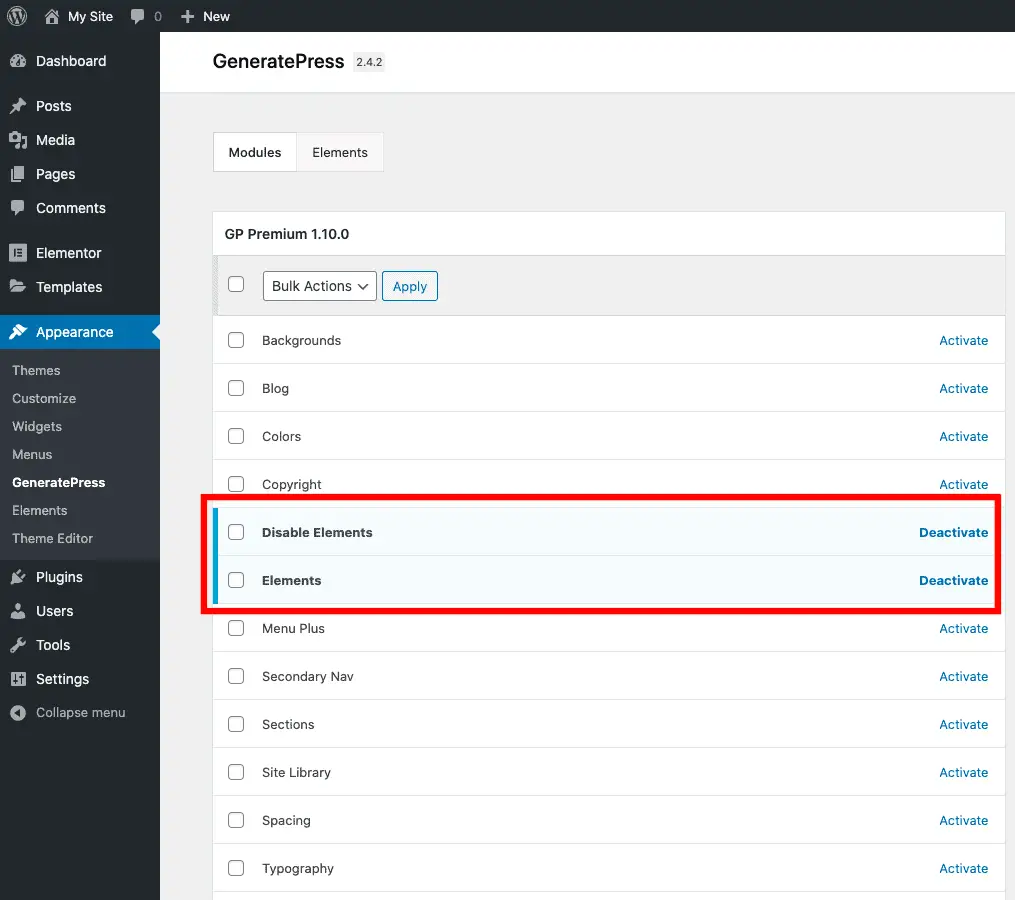
2. Activate The Elements And Disable Elements Modules
Once you have activated the GP Premium plugin, go to Appearance > GeneratePress and activate the Elements and Disable Elements modules.
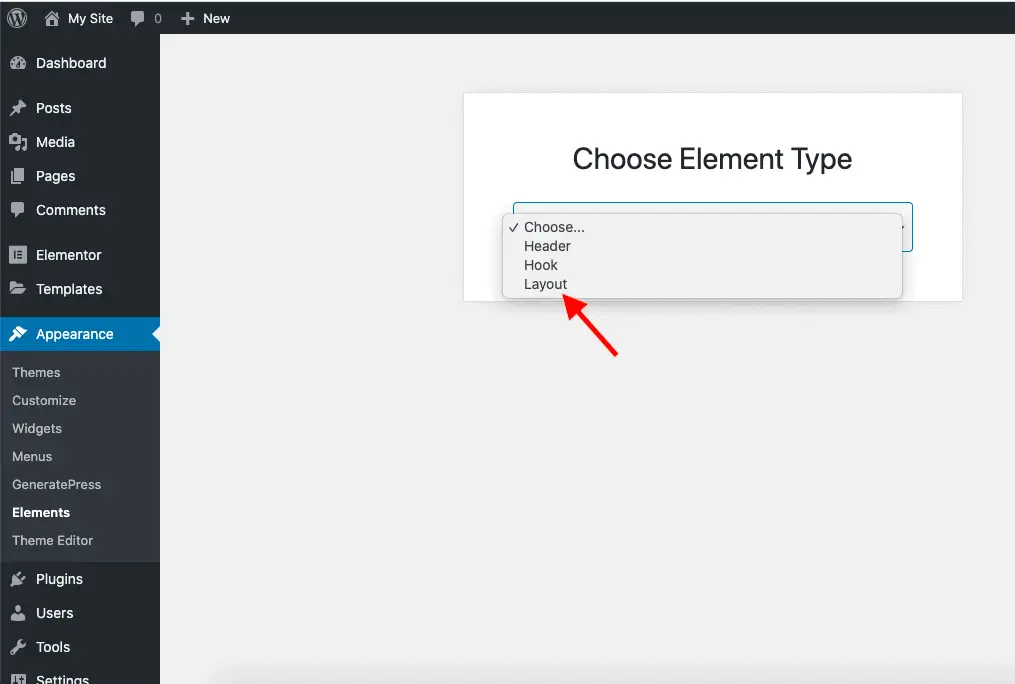
3. Create An Element Of Type Layout
Once both the modules are activated, go to Appearance > Elements and create a new Element of type Layout.
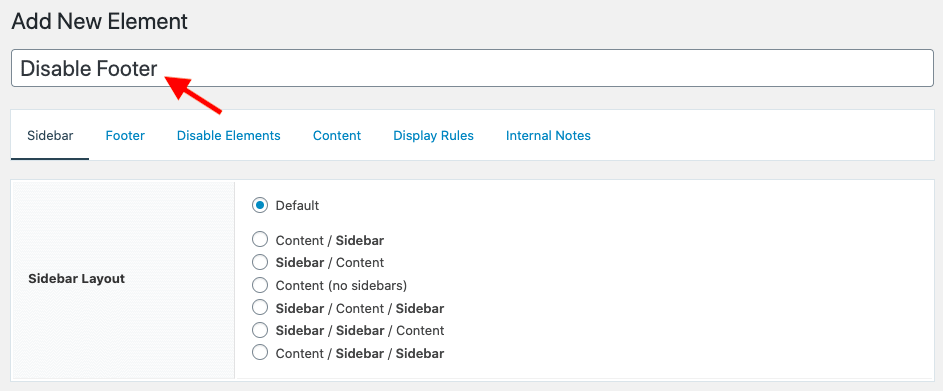
4. Give The Element A Name
This step is self-explanatory. Give some name to the new Element.
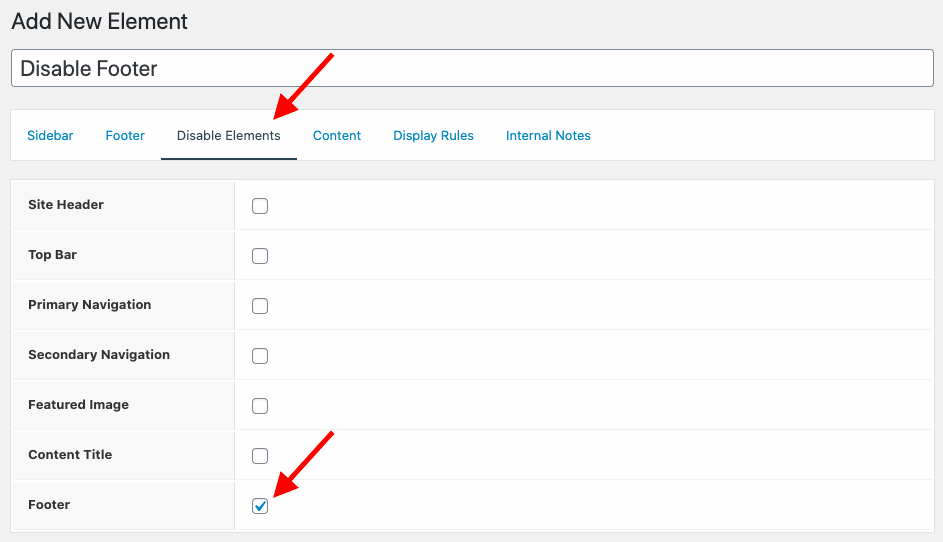
5. Select The Footer Option On The Disable Elements Tab
Now, go to the Disable Elements tab and select the Footer option to disable the footer.
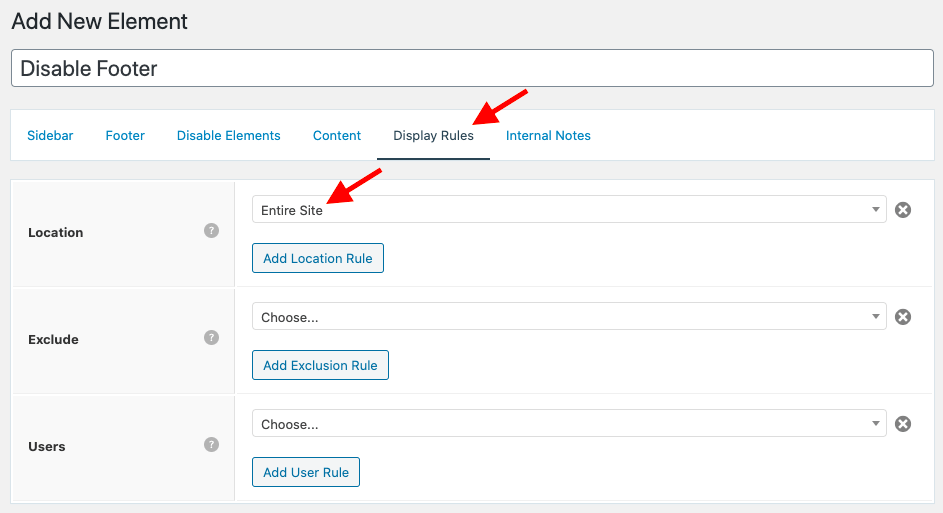
6. Set The Location Field To Entire Site On The Display Rules Tab
Now, go to the Display Rules tab and set the Location field to Entire Site. Over here, you can even disable the footer for just a few specific pages too.
7. Publish The Element
Finally, hit the Publish button to publish your Element.
And that’s it!
The footer is now removed from your entire site.
Recommended Further Reading:
- How To Remove Powered By And Copyright In GeneratePress Theme
- How To Make A Website Without Writing A Single Line Of Code
Points To Take Away
I hope you have now understood how to remove the footer from the GeneratePress theme using the GP Premium plugin.
GP Premium plugin adds a lot of useful features using which you can build your site without getting your hands dirty with code.
It will also save you a lot of time.
So it makes a lot of sense to invest some money in this inexpensive plugin.