Adding an Author Box to the GeneratePress theme is a royal pain. For some reason, the GeneratePress team decided to not provide Author Box in the theme settings. So, you are now left with no other option but to write code or use a plugin. In this tutorial, you will see both of these methods.
Given below are the steps to add an Author Box in GeneratePress theme by using a plugin:
- Install and activate the Simple Author Box plugin.
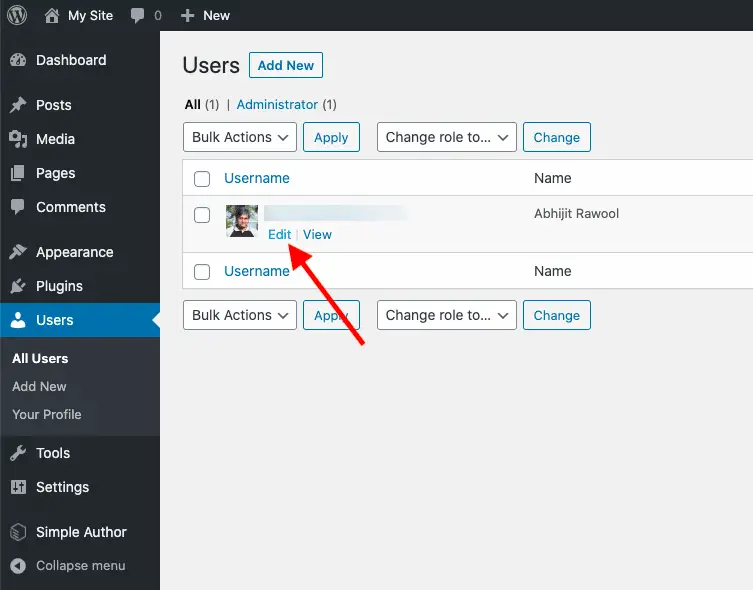
- Go to Users > All Users.
- Edit the user for which you want to display the Author Box.
- Enter the text in the Biographical Info field that you want to display in the Author Box.
- Upload a Profile Image that you want to show for the author.
- Optionally, select the Social Media links that you want to display in the Author Box.
- Save your changes.
Let’s see each of these steps in detail now.
How To Add Author Box To GeneratePress Theme With A Plugin?
First, install And activate the Simple Author Box plugin. It is a free plugin that you can install directly from your WordPress Admin Panel.
I selected this plugin because, at the time of writing this tutorial, it has the highest number of active installations and ratings.
But you can install some other Author Box plugin too. Another good one that I found is Starbox.
For this tutorial, let’s stick with the Simple Author Box plugin.
This is a very easy-to-use plugin.
Simply install and activate it, and then proceed to the next step.
Once the Simple Author Box plugin is activated, go to Users > All Users and edit the user for which you want to place the Author Box on the front-end of your website.
On editing the user, you will be taken to the Profile page of the user. Here set the text in the Biographical Info field that you want to be displayed in the Author Box for this user.
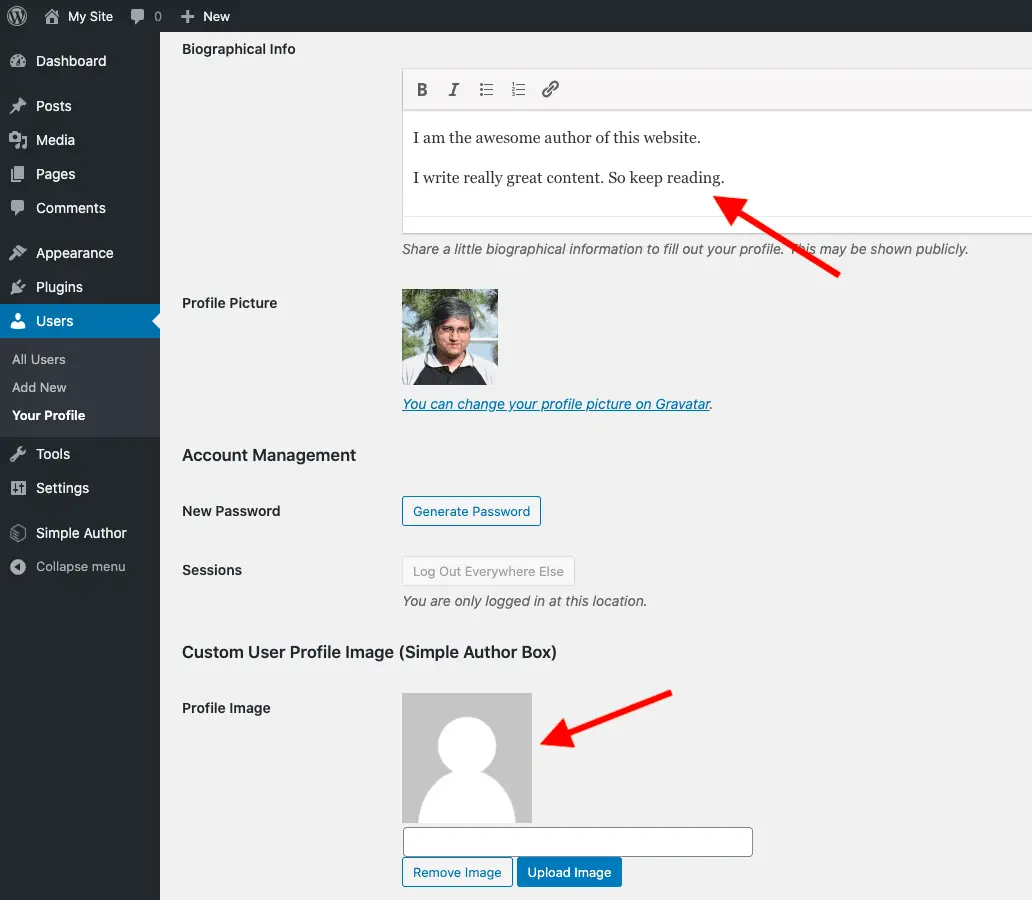
Here, you can also upload your picture in the Profile Image field. Note that if you already have a Gravatar, then you can skip uploading your Profile Image. Your Gravatar will display on the front-end in the Author Box.
Once this is done, you can optionally add your Social Media Links. The Social networks that you select will display in the Author Box. In the below image, I have added Facebook, Twitter, and Pinterest links.
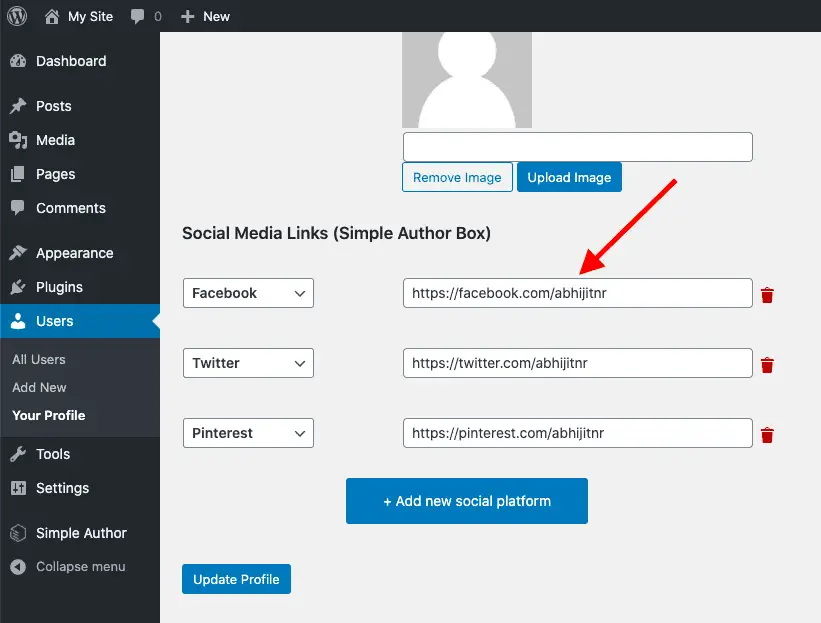
After you have entered all this data, hit the Update Profile button to save your changes.
Now you will see the Author Box below the blog post when you go to the front-end of your website and view a blog post.

And that’s it.
This wasn’t difficult, was it?
But it would have been better if GeneratePress had provided the Author Box functionality in the theme itself.
Alright! What next?
Go to Simple Author Box plugin settings and play around with the different settings available for this plugin.
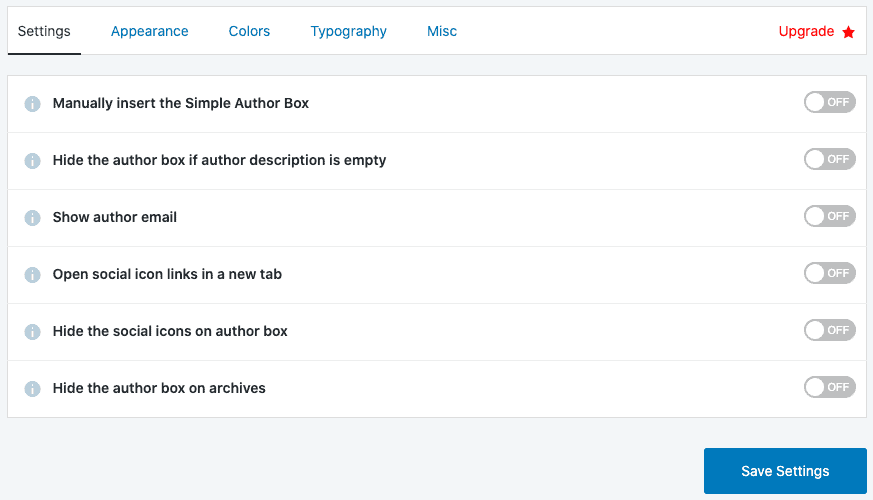
You can tweak the settings as per your liking.
But…
How To Add Author Box To GeneratePress Theme Without A Plugin?
You will need to write code to add an Author Box to the GeneratePress theme without using a plugin.
I am not a big fan of writing code because it wastes time, and maintaining it is a big hassle.
But if you still want to add an Author Box to GeneratePress theme without using a plugin, then read this forum post to get the code snippet for adding Author Box to GeneratePress theme.
I highly recommend that you use a plugin for this because it is easier to control the display of Author Box using the plugin settings than by writing code.
Now…
Related Further Reading:
- How To Remove GeneratePress Footer Without Writing Code
- How To Remove Powered By And Copyright In GeneratePress Theme
- How To Add Javascript In GeneratePress Theme (One Simple Way)
Something Important To Remember
Free plugin developers invest their own time to create plugins without getting anything back in return.
So do consider getting the premium version of their plugins to support them. That way, they will be able to support and enhance their plugins for years to come.
And finally, if you found this tutorial helpful, then please share it with your friends. I would really appreciate it.