Have you ever seen magnets?
Yes, those things that cling on to anything made from iron…
Those things that cling on to each other and…
Those things that have one end called the “North Pole” and the other end called the “South Pole”…
Despite their tendency to cling on, something strange happens when you bring the North Poles of two magnets together or bring the South Poles of two magnets together…
Those two magnets start to repel each other!
They repel each other as if they were never meant to work together.
This same repelling effect is observed when you try to insert a table in WordPress!
WordPress and Tables repel each other too!
You just cannot create a table in WordPress that looks clean and professional without using a plugin or writing some HTML and CSS code.
And as you know writing code is tricky if you are not a coder. So the only option left is to use a plugin to add a table in WordPress that looks good.
But which WordPress plugin is the best one to use for creating tables?
This is exactly what I am going to talk about in this tutorial, “How To Insert a Table in WordPress” using various plugins.
So let’s get started.
5 Easy Methods To Insert A Table In WordPress
There are mainly five methods that you can use to easily insert a table in WordPress:
- Without Using a Plugin
- Using TinyMCE Advanced Plugin
- Using TablePress Plugin
- Using PowerPack for Beaver Builder Plugin and
- Using PowerPack Elements Plugin
There are other methods too for creating a table in WordPress without using plugins but those would need you to code an HTML Table into WordPress. Writing HTML code isn’t difficult but is definitely time consuming.
And your time is more precious than a plugin.
So why waste time?
Using plugins to create tables will save you a lot of time. Time that you can easily spend on other important activities of your business or that you can spend with your beloved family.
Alright, with that said, let’s talk about the five different methods to insert tables in WordPress.
Method 1: How To Insert A Responsive Table In WordPress Without A Plugin
The new Gutenberg editor that was launched with WordPress 5.0 allows you to add tables in WordPress easily, and these tables are responsive by default.
Here’s what you need to do to insert a responsive table in WordPress without any plugin.
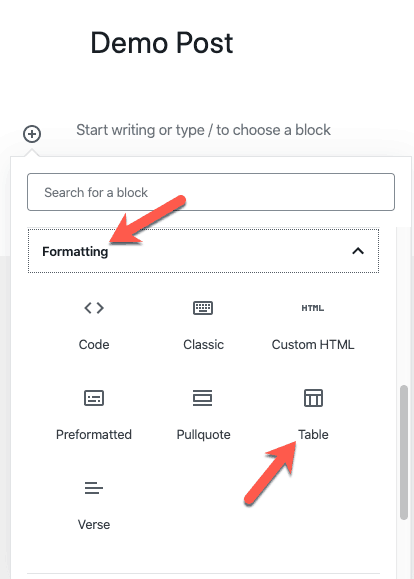
While editing a Post or Page in WordPress using the Gutenberg editor, click on the “Add block” icon.

You will then see the Table block under the Formatting group. Click it to add it to your Post or Page.
Then set the number of columns and rows that you want your table to have and click the “Create Table” button.
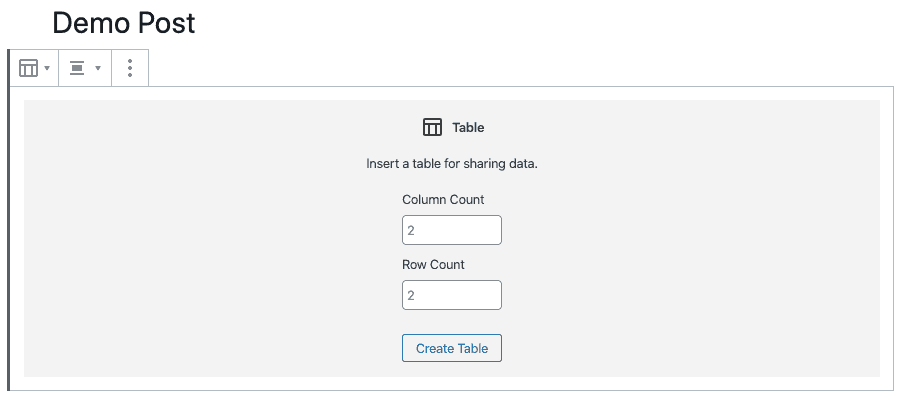
The table will then get created.
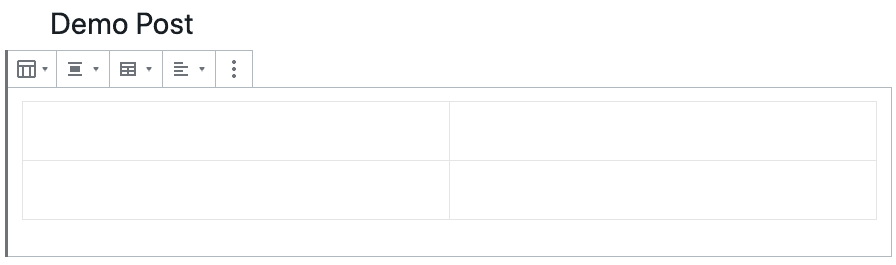
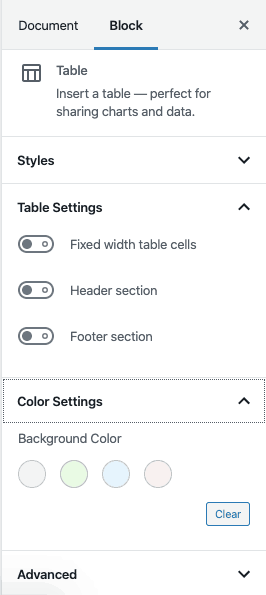
You can now set the table styles, add/remove columns and rows, adjust table alignment, etc. by using the Table block’s toolbar.
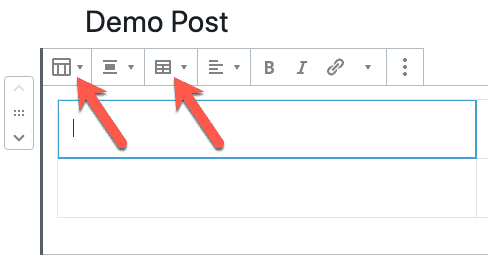
And you can also set some additional properties of the table using the Block panel on the left-hand side.
This is how the table will look at the front-end of your website.

This is great, but the table looks very basic.
So you will need to spend time writing CSS code to style this table for it to look beautiful.
That means hours and hours of wasted time if you don’t know how to write CSS code.
Here are the pros and cons of inserting a table in WordPress without using a plugin.
Pros of Adding A Table Without Any Plugin
- It is the easiest method to add a table in WordPress.
- It is unlikely that this method will stop working because it is a core WordPress feature.
Cons of Adding A Table Without Any Plugin
- The tables look very basic at the front-end. So you will need to write CSS code.
- No way to add sort functionality to the table columns.
Short Conclusion
While this is a good method to add tables in WordPress quickly, the tables do not look professional on the front-end.
Okay! Let’s look at the second method now.
Method 2: Insert A Table Using TinyMCE Advanced Plugin
TinyMCE Advanced Plugin basically adds a lot of features to the classic Visual Editor Toolbar of WordPress, like tables, search and replace, selection of font family, etc.
This plugin has over a million active installations. That’s a proof of the popularity of this plugin.
So let’s start with this plugin first…
Here’s how to create a table using this plugin.
First install and activate the TinyMCE Advanced Plugin on your WordPress website.
Once activated, insert the Classic block and you will get a lot of additional editing options in the Visual Editor Toolbar while creating or editing a Page or Post in WordPress, including an action to add a table.
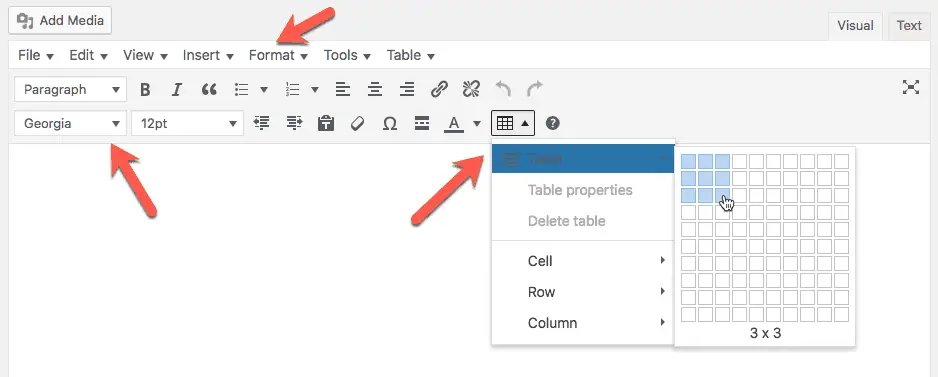
You can just select the number of rows and columns that you want in your table and TinyMCE Advanced plugin will create a table with those many rows and columns for you.
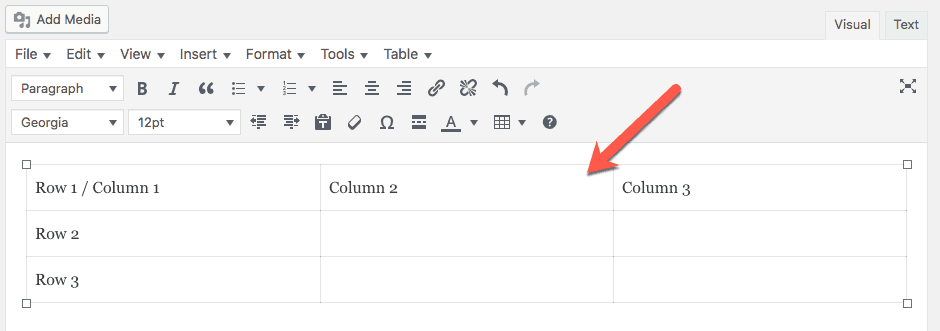
In the above image, you can see that I have created a table with 3 rows and 3 columns.
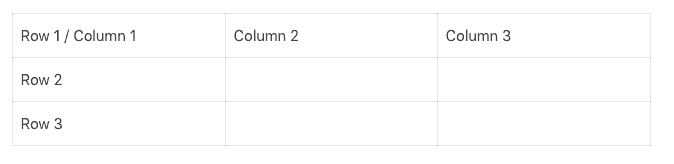
This is how the table looks on the front-end of the website:
Once you have created the table, you can style it using the Table Properties action.
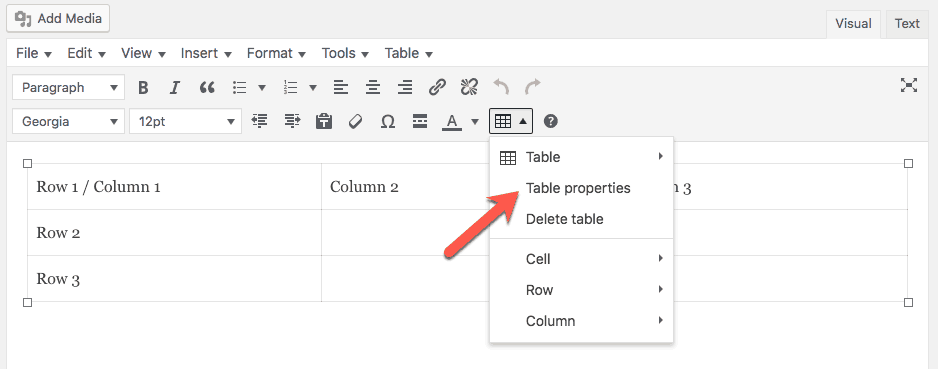
Here’s how the Table Properties popup looks like:
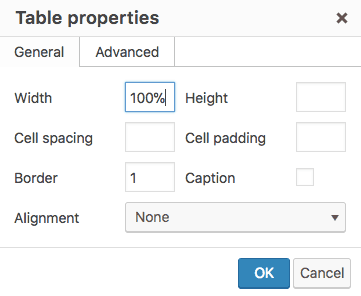
You can even set properties for the Table Cells and Rows.
This is how easy it is to add a table in WordPress using TinyMCE Advanced Plugin.
But easy doesn’t necessarily means Great.
What do I mean by Great?
I just mean the ease of controlling every aspect of the visual design of the table.
For example, you will need to write CSS code to adjust things like paddings and typography of the table.
This just means hours of wasted time. Your precious time.
But if you want to quickly create a decent table in WordPress, then TinyMCE Advanced Plugin will do the trick for you.
Here are the pros and cons that I found while working with this plugin.
Pros of Using TinyMCE Advanced Plugin To Create Tables
- It is the easiest and the simplest way to create tables in WordPress, however you need to insert a Classic block in WordPress and then add a table to it. TinyMCE Advanced Plugin does not help much while adding a table using Gutenberg editor’s Table block as described in Method 1 above.
- Millions of people are using TinyMCE Advanced Plugin. So the chances of this plugin not getting updated regularly are minimal.
Cons of Using TinyMCE Plugin
- The default styling of the table looks ugly.
- You will need to write CSS code for designing certain aspects of your table.
- The table is not sortable. There is no way to sort the data in the table columns while viewing the table on the front-end of the website.
Short Conclusion
TinyMCE Advanced Plugin is a good choice if you just want to insert a basic static table in WordPress.
Now, let’s take a look at the third method.
Method 3: Insert A Table Using TablePress Plugin
TablePress plugin is by far the most feature-rich plugin to insert a table in WordPress.
And similar to TinyMCE Advanced plugin, it is a free plugin that is well supported.
It also has a lot of extensions that add various features to the tables, like making the tables responsive, enabling row filtering, etc.
To create a table using TablePress, you will need to first install and activate this plugin.
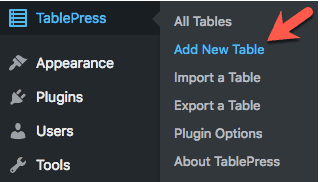
Once activated, you will see TablePress menu in your WordPress Admin panel. In this menu, click the “Add New Table” action to get started with creating your first table.
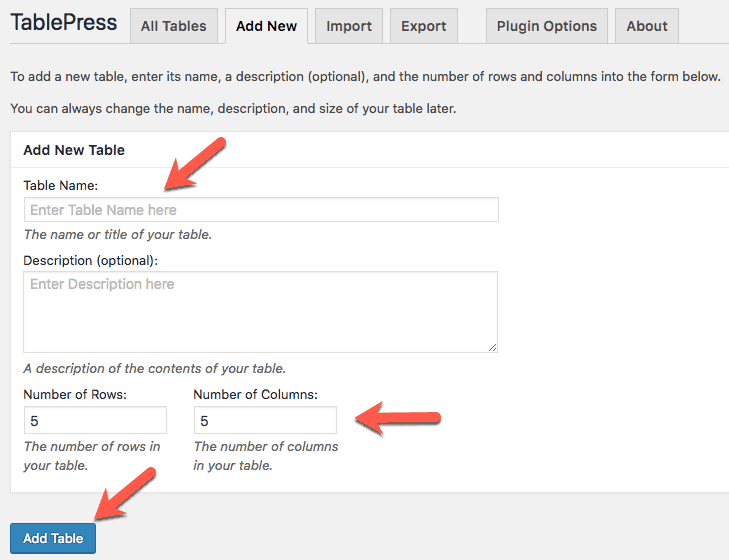
On clicking the “Add New Table” action, you will be taken to the “Add New Table” page where you can enter a name for your table and choose the number of rows and columns for your table. Once done, click the “Add Table” button.
On clicking the button, you will be taken to a page where you can enter your data in the table columns and rows. You can do this in the “Table Content” section on this page.
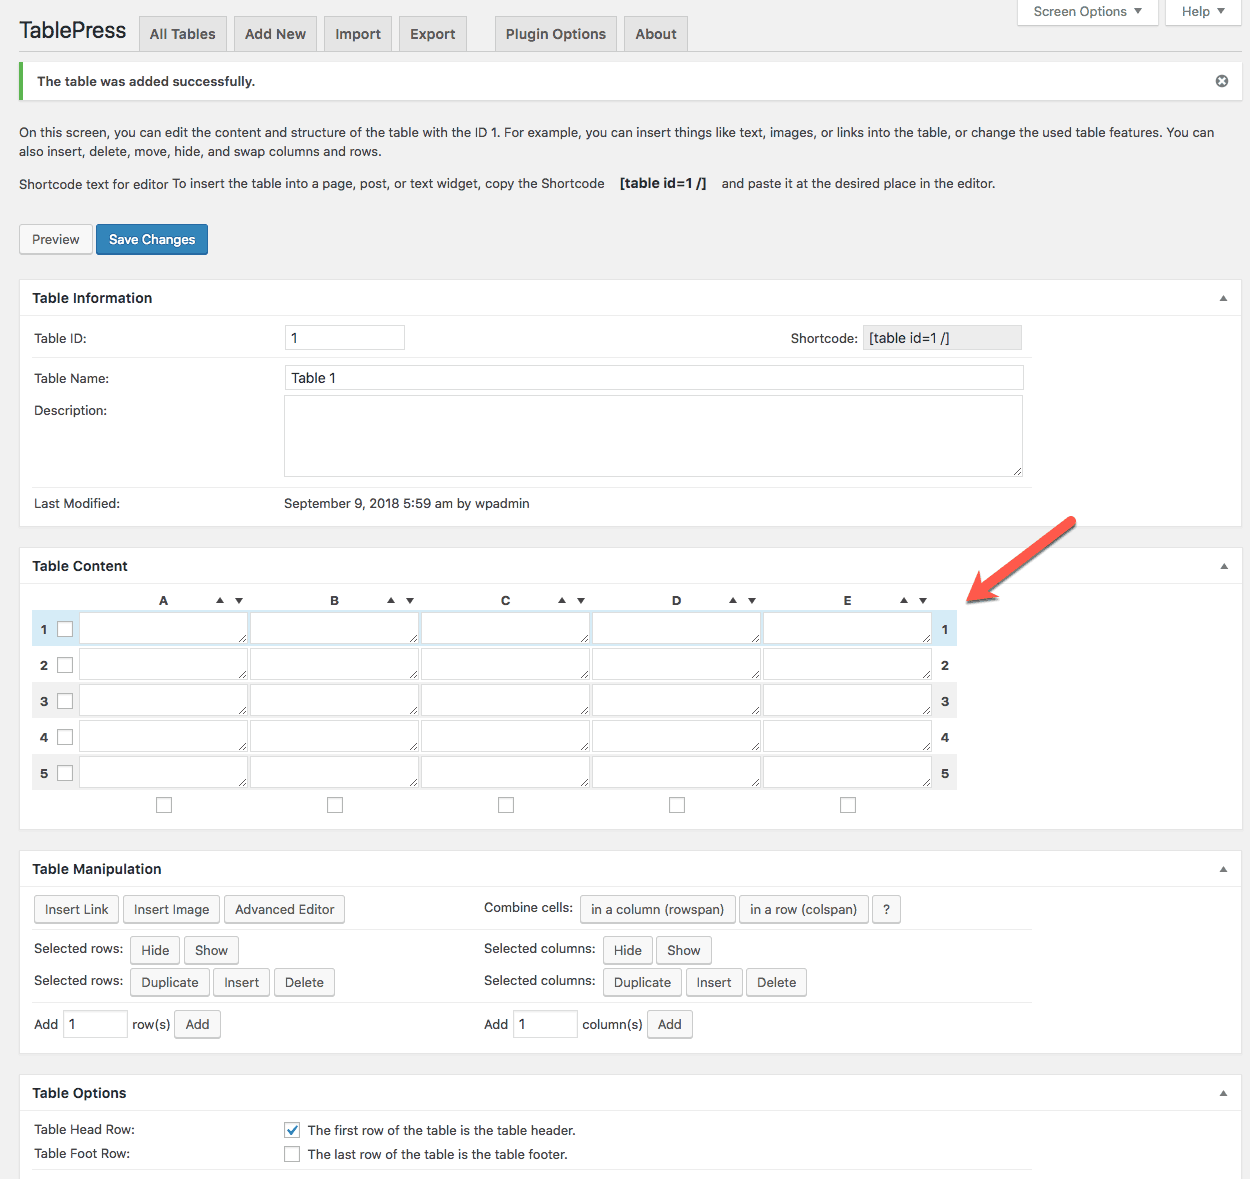
This page also has a lot of options to customize your table. So take your time to go through all the settings that TablePress provides you to customize your table.
Click the “Save Changes” button once you are done setting up your table.
Now that your table is created, you will need to insert it on a WordPress page.
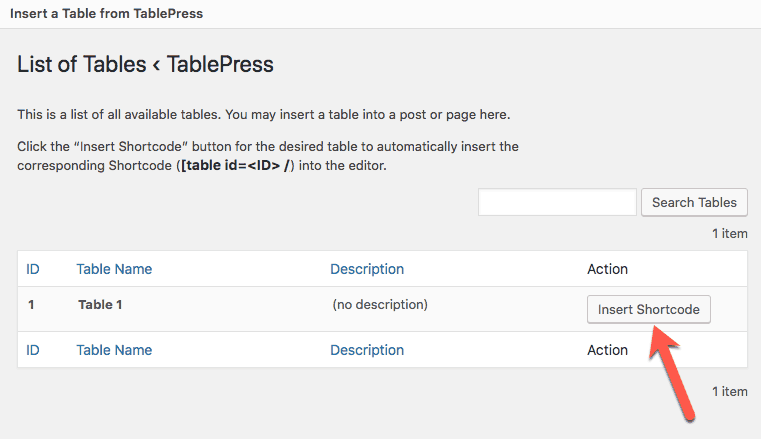
To do this, edit or create a page in WordPress. You will see an icon to insert tables created with TablePress in the Visual Editor Toolbar.
Clicking this icon, will bring up the Insert Table popup. Click the “Insert Shortcode” button next to the table that you just created to insert it on the page.
This how the table will look like on the frond-end of your website…
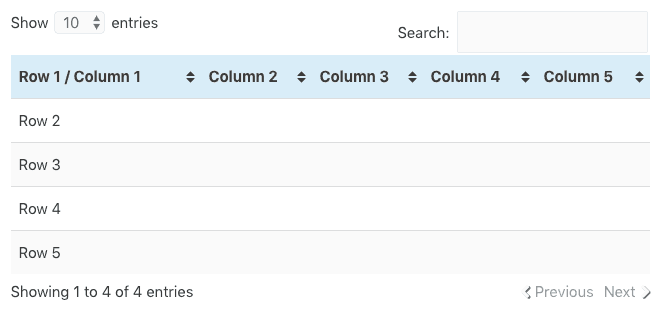
And that’s how you create a table using TablePress plugin.
Easy, isn’t it?
But then…
This plugin also has the same problem that TinyMCE Advanced Plugin has.
You have to write CSS code.
To make your tables look great, you will need to invest a lot of time in writing CSS code for simple things like setting background colors for the table rows, centering the table, changing fonts, font sizes, etc.
“Time Investment” means “Time Wasted” in this case.
And if you still decide to use this plugin, then here are the pros and cons of using this plugin.
Pros of Using TablePress Plugin To Create Tables
- Tables look better than the ones created by TinyMCE Advanced plugin.
- TablePress is a well supported plugin
- Lot of addons are available for TablePress to add more features to the tables.
Cons of Using TablePress Plugin
- The tables look decent, not great or awesome.
- Tables are not mobile-friendly by default. You need to install an additional addon to make the tables mobile friendly.
- You have to write CSS code to change the visual appearance of your table to make it look great.
Short Conclusion
TablePress is a great plugin to add decent-looking tables in WordPress. But you will have to waste your time writing CSS code.
I know, you must be wondering why I keep cribbing about writing CSS code. So let me answer this question before I move on to the other methods of creating tables.
Why I Think Writing CSS Code Is A Waste of Time
Because we no longer live in the 1990s.
Today, we have the required knowledge and technology available to us for making it possible to create tables without actually needing to write code.
So why waste our precious time in writing code?
Can we not just make it possible for everyone in the world to create something as simple as a table without forcing them to write code?
Isn’t that what we all should strive for?
Won’t that make life easy for millions of people out there who don’t know how to code?
Yes, it will.
Yet I see hundreds of plugins and themes that force the users to learn HTML, CSS, PHP, etc.
And when I see them, I often crib to no ends.
This cribbing has resulted in me creating this very website. To make people aware that there are ways to create a website without actually writing code.
I guess you get the point.
So let’s move on to methods 4 and 5.
Method 4: Insert A Table Using PowerPack for Beaver Builder Plugin
PowerPack is an addon that sits on top of Beaver Builder plugin to add more features to it.
If you are not aware of what Beaver Builder plugin does, then you are missing the fun in creating WordPress websites.
Go and take a look at Beaver Builder plugin.
However, Beaver Builder plugin does not let you create tables with it and that is where its addon PowerPack for Beaver Builder comes into picture.
Using PowerPack, you can easily add professional-looking tables in WordPress.
Here’s how you can do this…
First install and activate the Beaver Builder Lite plugin.
You can also buy the full-fledged version of Beaver Builder plugin. But for this tutorial, let us stick with the free version.
Once you have installed and activated Beaver Builder Lite plugin, install and activate PowerPack for Beaver Builder plugin.
You will need to buy the premium version of PowerPack plugin.
Once you have installed and activated PowerPack plugin, create or edit a page and click on the Beaver Builder tab to start editing the page with Beaver Builder.

You will be taken to the frond-end of your website with Beaver Builder active. Here, you will see the Beaver Builder panel active on the right-hand side.
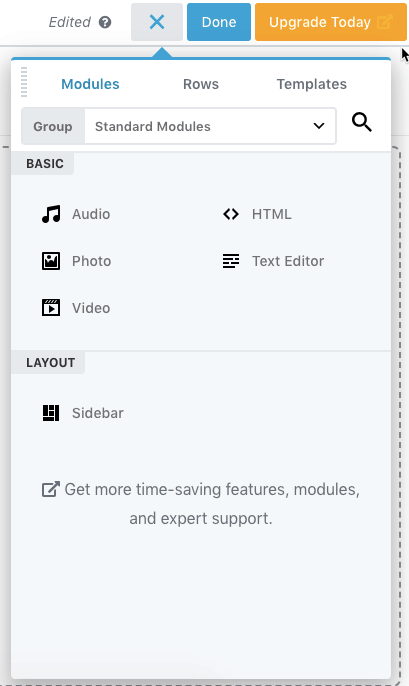
Expand the “Group” drop-down field and select “PowerPack Modules”.
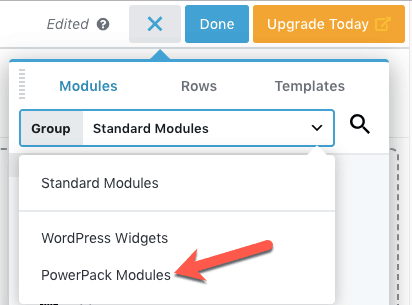
You will see all of the PowerPack modules. Scroll down to see the “Table” module.
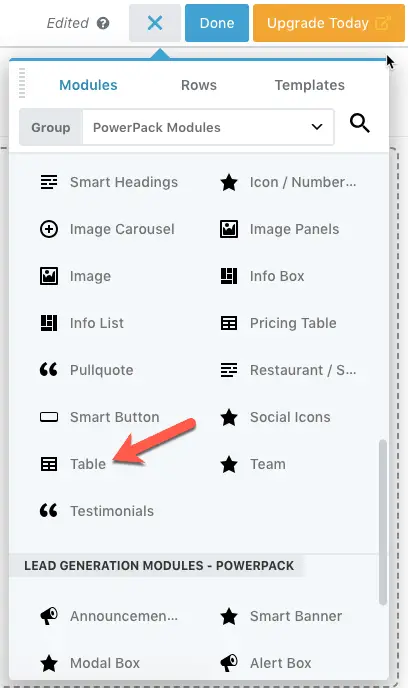
Now drag-and-drop the Table module on the page.
You can see all modules that PowerPack plugin provides by clicking Modules in the top menu on PowerPack’s website.
Coming back to the tutorial…
On dragging-and-dropping the Table Module on the page, you will see the PowerPack Table options popup.
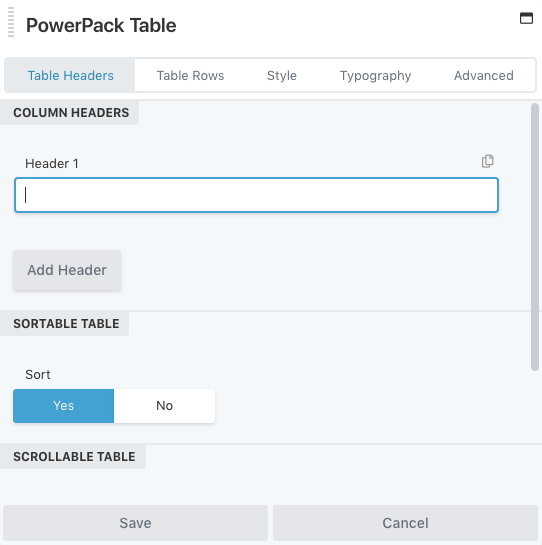
Now you can easily build an entire professional-looking table using the options in this popup.
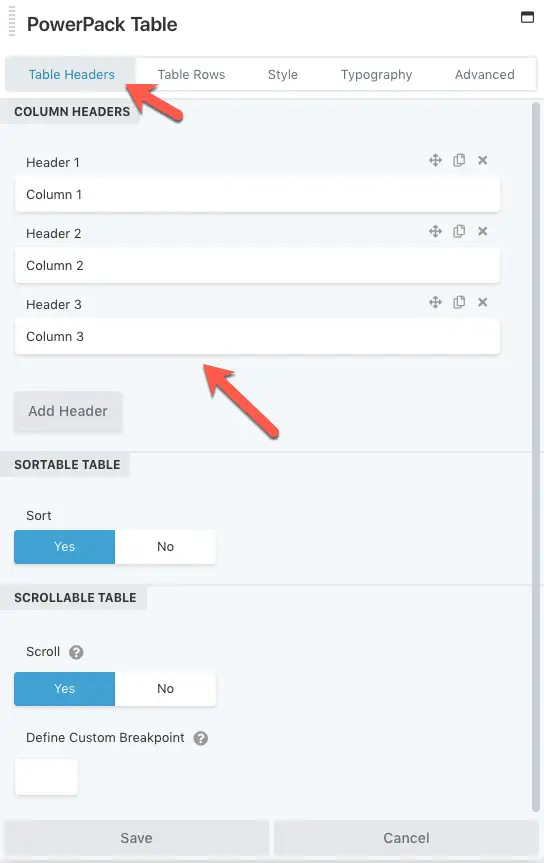
Use the “Table Headers” tab to create the table columns. In the below image you can see that I have created 3 columns.
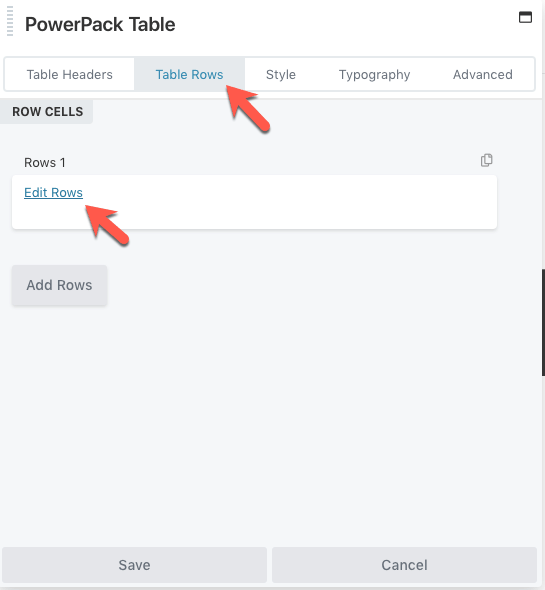
Then use the “Table Rows” tab to create the table rows. PowerPack creates the first row for you. Click the “Edit Rows” link to edit the contents of the first row.
On clicking the link, you will be taken to the “Row Settings” popup where you can set the contents of the cells of the first row.
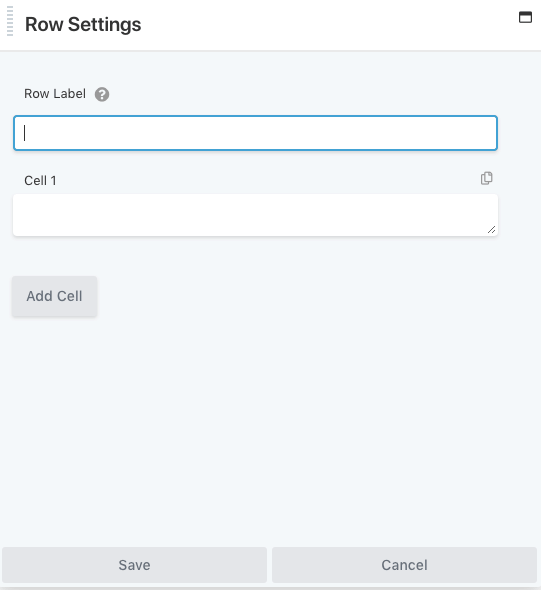
You can use the “Add Cell” button to create more cells.
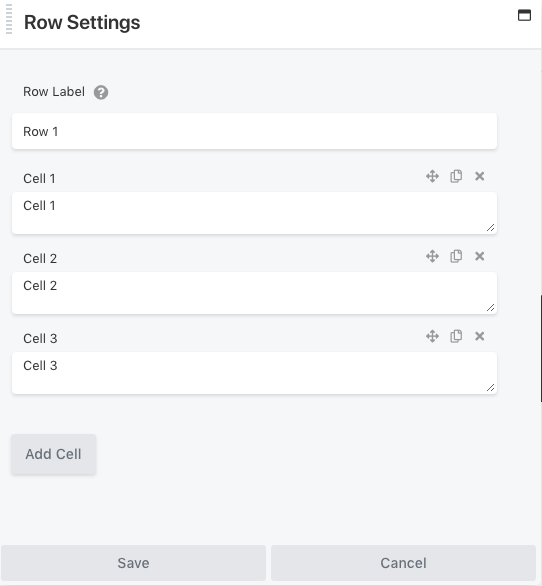
Click the “Save” button once you are done entering the content for your table cells.
In the below image you can see that I have created 3 cells for the first row of the table and entered some content for each cell.
Similarly, I have created 2 more rows with 3 cells each for the table by using the “Add Rows” button.
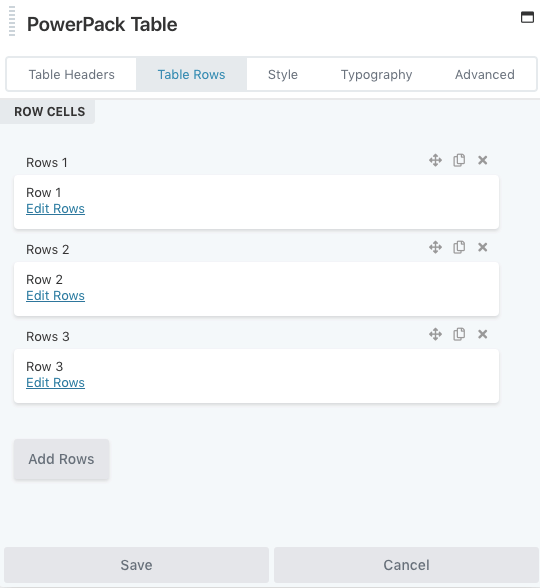
This creates the table. Here’s how it looks on the front-end…
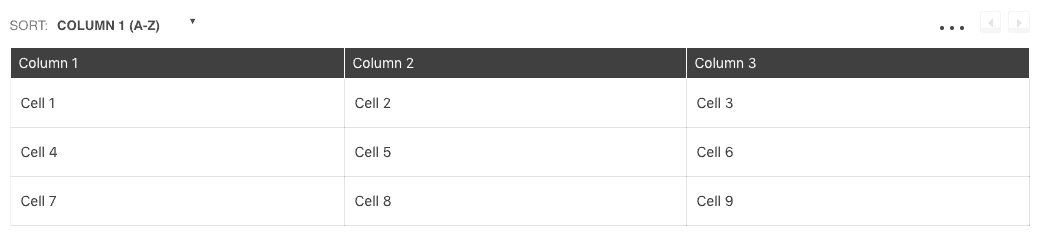
But it looks really basic. So now let’s style this table.
You can do that easily using the “Style” tab.
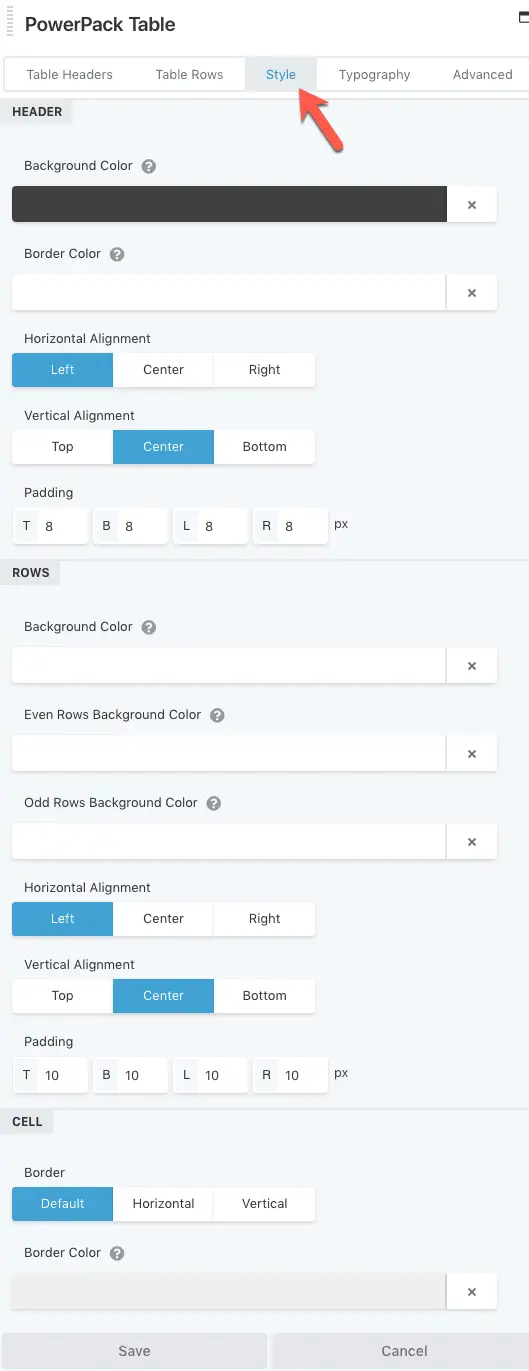
As you can see in the above image, there are a number of styling options that you can use to create a professional-looking table without having to write any CSS code.
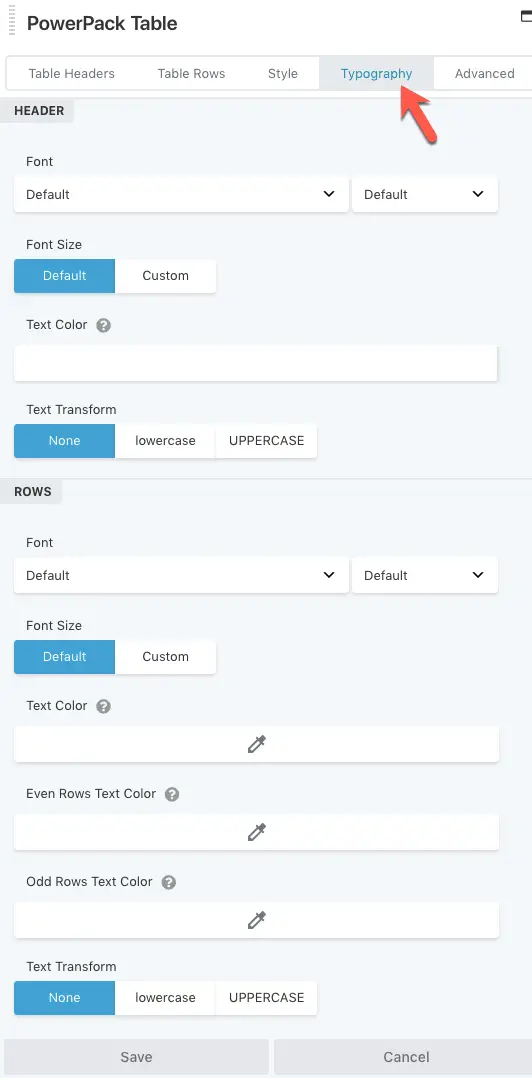
You can also use the “Typography” tab to change the fonts of the text inside the table.
Here’s a sample table that can be created using PowerPack plugin.
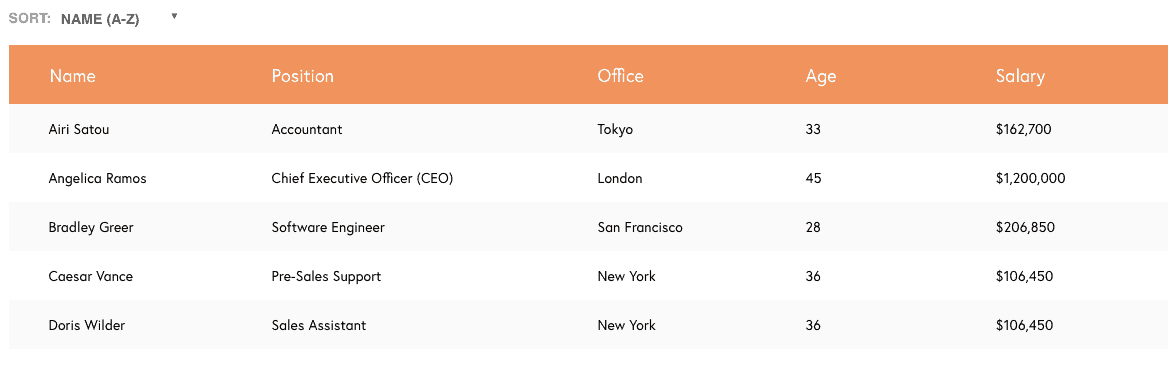
You can check out more professional-looking tables that can be created on PowerPack’s website.
Once you are done creating your table, just publish the page.
That is it!
That is how you make a professional-looking table in WordPress.
And if you are wondering if it is worth it to buy PowerPack plugin, then take a look at all the other modules, sections and templates that come with it.
You can simply drag-and-drop these various PowerPack elements onto the page to make your page stand out.
Isn’t that worth the price of PowerPack plugin?
I think so.
And here are the pros and cons of using the PowerPack plugin.
Pros of Using PowerPack for Beaver Builder Plugin To Create Tables
- You can actually create a professional-looking table by just setting a few options. PowerPack plugin acts like a true WYSIWYG (What You See Is What You Get) table builder.
- There is no need to write any CSS code to make your table look good.
- The tables are mobile responsive by default.
Cons of Using PowerPack for Beaver Builder Plugin
- You need to use Beaver Builder Lite plugin too. Not such a big deal because Beaver Builder is an excellent plugin all by itself.
- You will need to buy PowerPack for Beaver Builder Plugin. But then, you can do so much more with PowerPack plugin than just tables.
Short Conclusion
PowerPack for Beaver Builder plugin is the best plugin to create tables in WordPress without having to write any CSS code.
But what if you want to use Elementor instead of Beaver Builder to design your pages?
This is where the last method comes into picture.
Method 5: Insert A Table Using PowerPack Elements Plugin
PowerPack Elements is an addon plugin that sits on top of the Elementor plugin.
If you are wondering what is Elementor plugin, then wake up!
Elementor and Beaver Builder are two of the best page builder plugins available in the market today for designing WordPress websites without having to write code.
If you are not using one of them, then stop reading this tutorial and go and install one of these plugins first.
If you are confused which one you should use, Beaver Builder or Elementor, then read this Beaver Builder vs Elementor comparison.
Now, if you chose to use Elementor for your website, then here is how you can add a table using it.
First buy the PowerPack Elements plugin.
It is an addon that sits on top of Elementor Plugin. So you will need to install and activate Elementor plugin first and then install and activate PowerPack Elements plugin.
Once Elementor and PowerPack Elements plugins are activated, create or edit a page in Elementor to start creating your table.
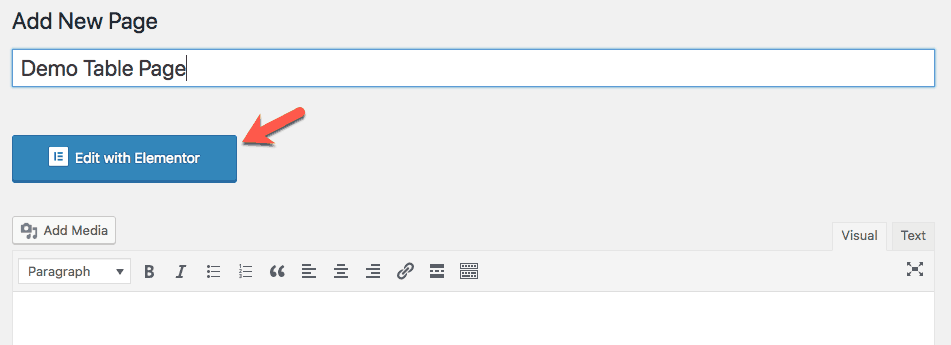
On clicking the “Edit with Elementor” button, you will be taken to the front-end of your website with Elementor active. You should see the Elementor panel on the left side.
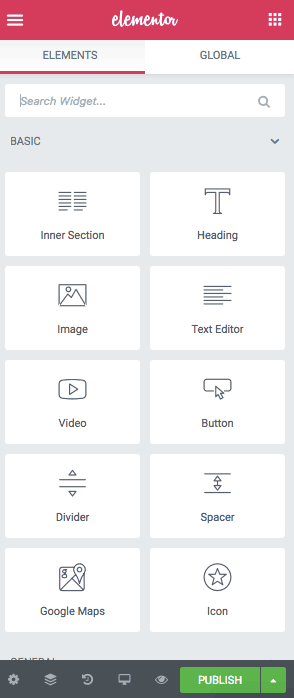
Scroll down in the panel to see the Table Widget of PowerPack Elements.
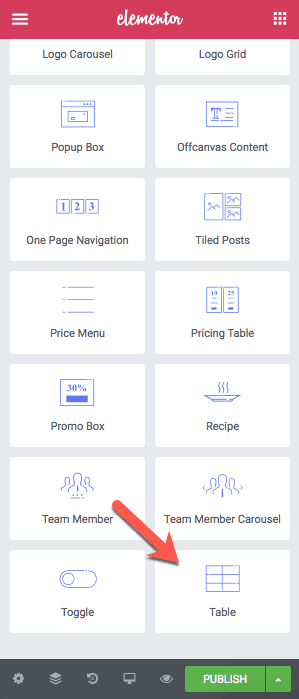
Drag-and-drop this Table widget on the page to start creating your table.
Once you drag-and-drop the Table widget on the page, you will see the table settings in the Elementor panel.

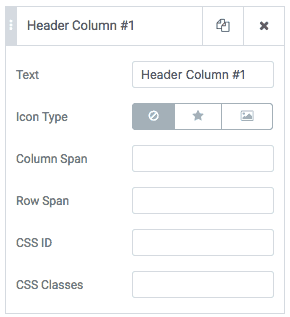
By default, PowerPack Elements plugin will create a table with 3 columns and 2 rows for you. You can see the 3 columns created under “Header” section in the above image.
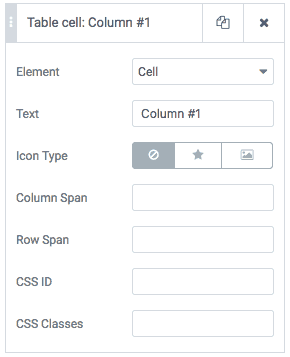
You can click on each of the Heading Columns section to edit its properties.
Similar to the columns, you can see the two rows created under the “Body” section in the Elementor panel.
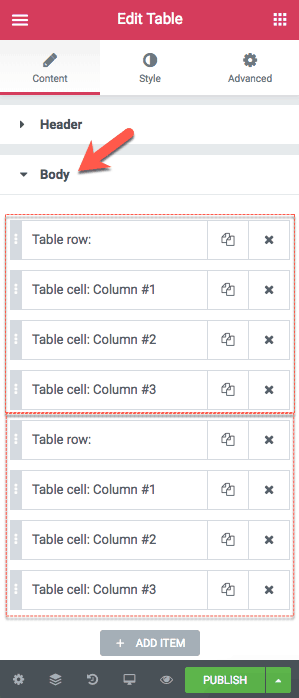
In the above image you can see that there are 2 rows created each with 3 cells.
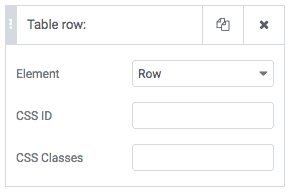
You can edit the row properties by clicking on each of the “Table row:” sections.
And you can also edit the cell properties by clicking on each of the “Table cell:” sections.
You can add more rows and cells by click the “Add Item” button.
Once you are done creating your columns, rows and cells, this is how the table will look like….
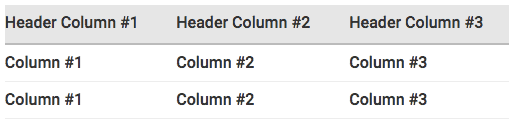
Very basic, isn’t it?
So now it is time to style this table.
You can style this table very easily from the “Style” tab in Elementor panel.
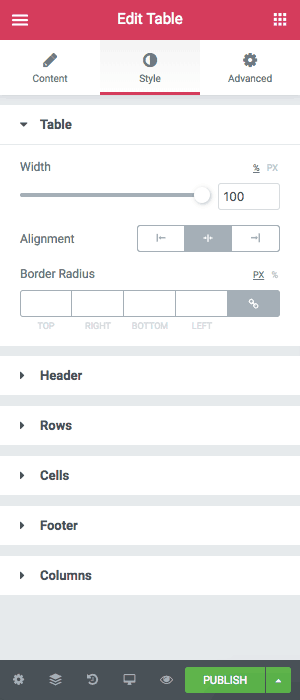
As you can see in the above image, you can style the various parts of your table, like the Header, Rows, Cells, etc. from the Style tab.
Here are all the settings available for you to style the Header of your table.
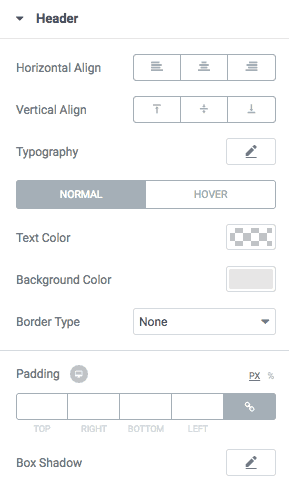
You will get similar options to style the Rows, Cells, Footer, etc. of your table.
You will need to play around a bit to style your table the way you want it to look.
Here is an example PowerPack Elements table that has already been styled.
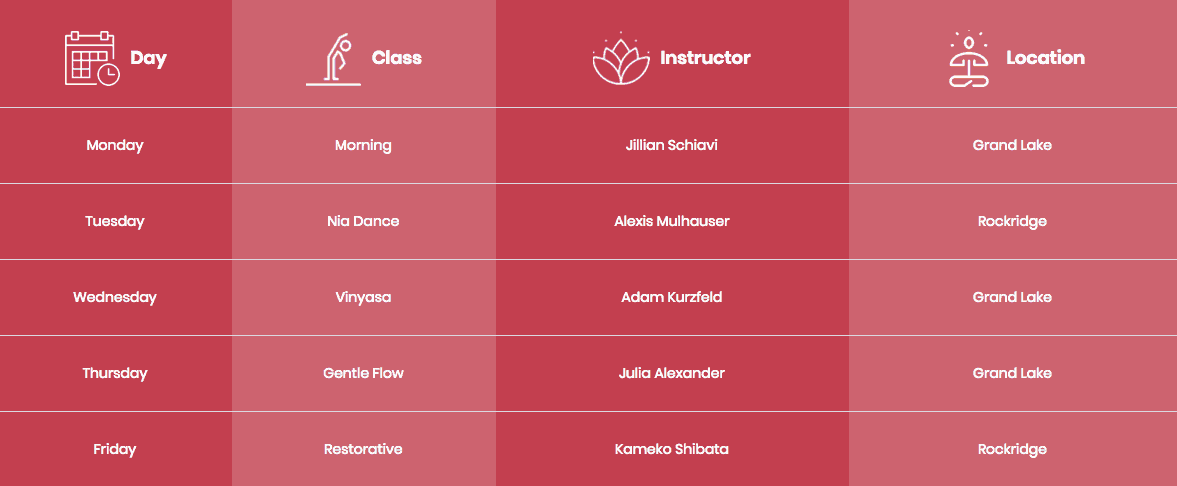
You can see more examples of tables on PowerPack Elements’ website.
And once you are done creating your table, don’t forget to publish the page.
That’s it!
You now have a great-looking table in WordPress.
Congrats!
Other than tables, PowerPack Elements plugin has various other widgets too which you can use to design your page without having to write code.
You can check out all of PowerElements Widgets over here.
Alright!
Now the pros and cons of using this plugin.
Pros of Using PowerPack Elements Plugin To Create Tables
- It is one of the easiest ways of creating a professional-looking table in WordPress. Similar to PowerPack for Beaver Builder plugin, PowerPack Elements plugin also acts like a true WYSIWYG (What You See Is What You Get) table builder.
- No need to write any CSS code.
- Creating tables with Images and Text is very easy with this plugin.
- The tables are mobile responsive by default.
Cons of Using PowerPack Elements Plugin
- You will need to use Elementor plugin. But then, nowadays you should be using Elementor or Beaver Builder plugins anyway. Check out my review of Elementor if you are still unsure.
- You will have to spend some money to get PowerPack Elements plugin. But then, this plugin will let you do a lot more than just creating tables.
Short Conclusion
PowerPack Elements along with Elementor is a great choice to create professional-looking tables in no time and without writing any CSS code.
With that said, now it’s time to quickly wrap up this tutorial.
Quick Wrap Up
This was a rather long tutorial.
But I hope you learned various ways to insert a table in WordPress.
There are free, time-consuming, and code-dependent ways to create tables in WordPress without using a plugin or by using TinyMCE Advanced and TablePress plugin.
And then there are paid, time-efficient and code-free ways to create professional-looking tables in WordPress using PowerPack for Beaver Builder and PowerPack Elements plugins.
Which of these plugins you use to make tables in WordPress is upto you.
You have a lot of options at your disposal, so choose carefully.
If you still have any questions, then ask them in the comments below. I reply to every comment.
And if you liked this tutorial, please share it with your friends on Facebook and Twitter. I would really appreciate that.
Hello – Will Tablepress allow me to upload an Excel file which contains for example 20 tables located in 20 separate sheets (or tabs)? Or am I only allowed to upload 1 table at a time? Thanks for your help.
You can only upload one sheet or table at a time. Here’s the TablePress documentation for the same – Import and Export Formats
Thanks for the quick response. Will PowerPack for Beaver Builder or PowerPack Elements allow me to upload more than one table at a time? Thanks again.
Unfortunately, none of these plugins will let you do this.
Hi Abhijit,
Great post. Loved it.
You’ve shown almost every possible way of adding tables to WordPress. Great job.
I just wanted to let you know about our drag and drop WordPress table plugin – WP Table Builder. It’s the only table plugin that comes with a true drag and drop interface.
If you got a chance, give it a try.
Regards
Istiak Rayhan
Hi Istiak, WP Table Builder does look very interesting. I will give it a try.
Thanks. Please feel free to reach us if you have any suggestions for the plugin.