You don’t need a separate plugin to add a slider in Beaver Builder.
Given below are the steps to add a slider in Beaver Builder:
- Get, install, and activate the Standard version of Beaver Builder plugin.
- Edit the page with Beaver Builder on which you want to place the slider.
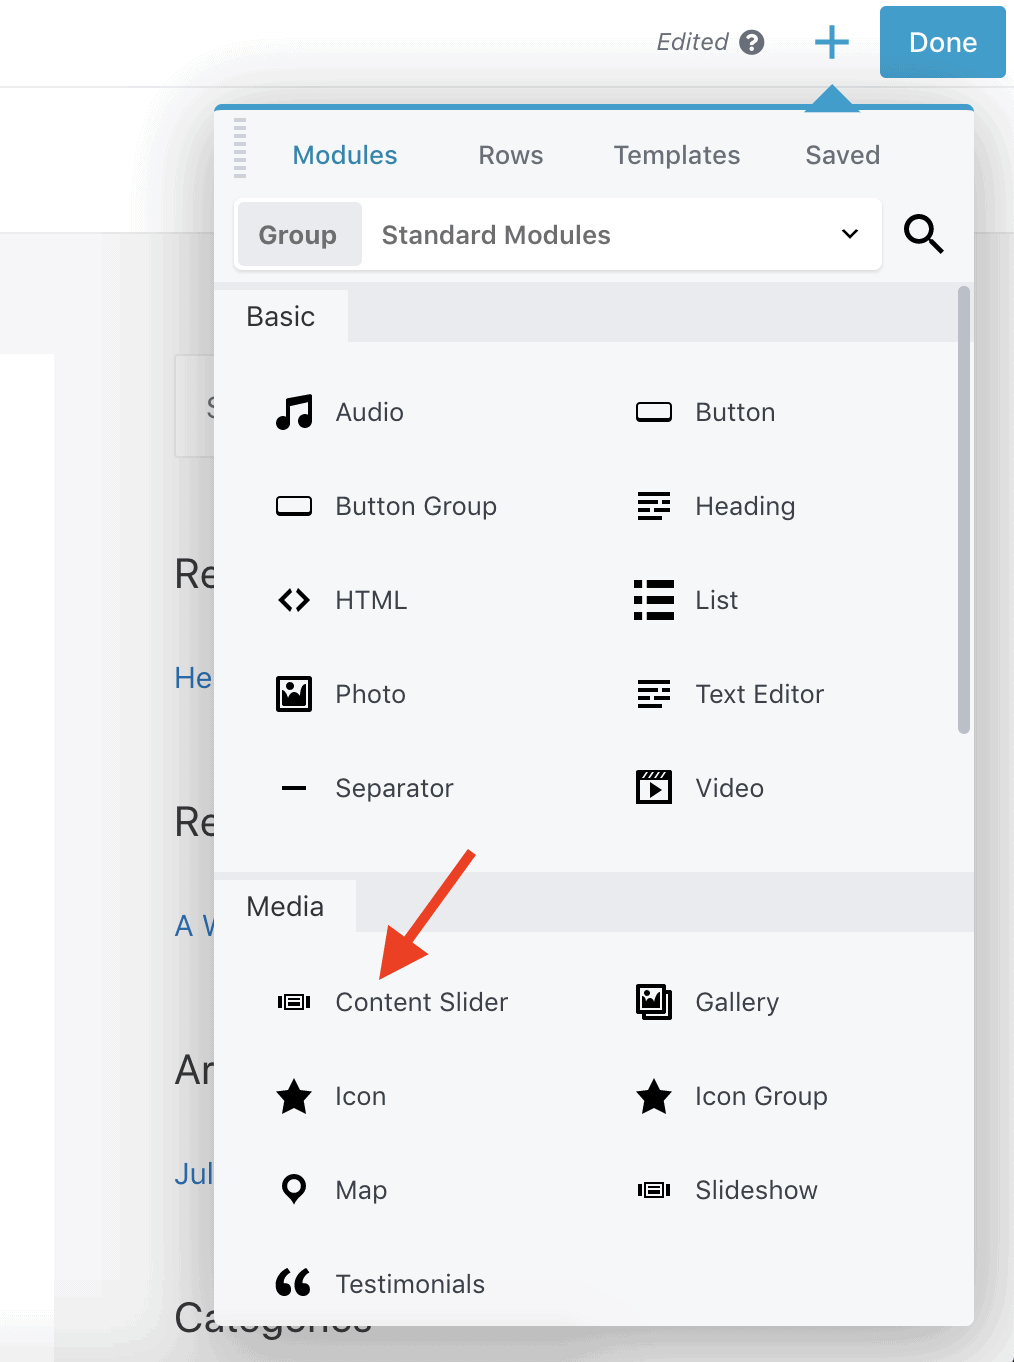
- From the right-side Beaver Builder panel, drag-and-drop the Content Slider module on the page.
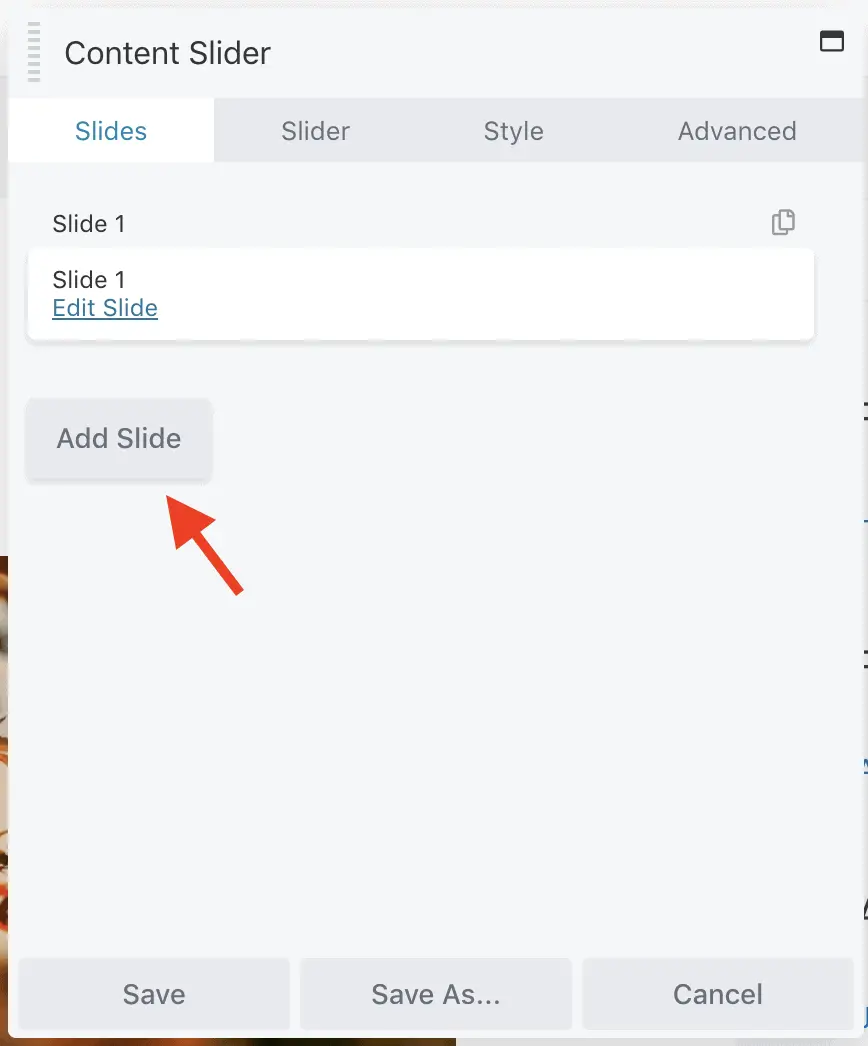
- Click the Edit Slide link on the Slides tab of the Content Slider settings panel.
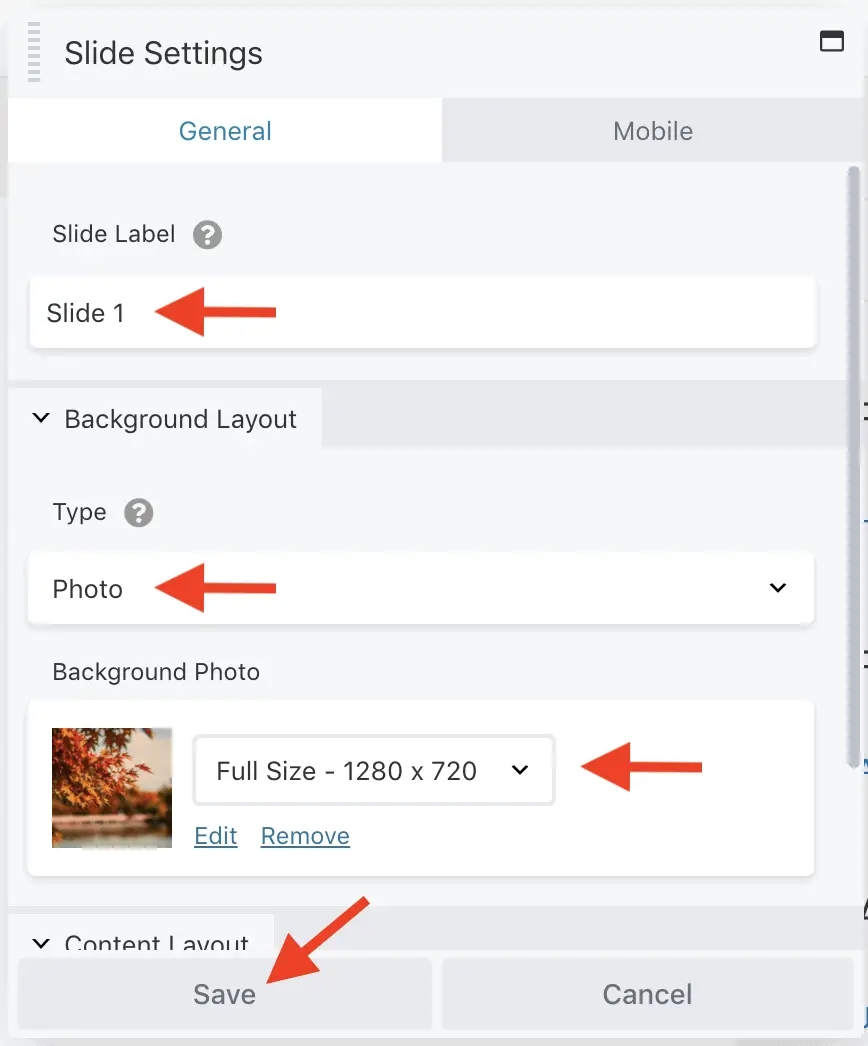
- Enter a label for the slide in the Slide Label field.
- In the Background Layout section, select Photo in the Type field and set a photo in the Background Photo field.
- Click the Save button to save the slide settings.
- Click the Add Slide button to add the next slide of the slider.
- Repeat Steps 4 to 7 for adding the second slide.
- Add as many slides as you want by repeating the above steps. Once all the slides are added, click the Save button on the Content Slider settings panel.
Let’s take a detailed look at each of these steps now.
How To Add A Slider In Beaver Builder Using The Content Slider Module?
First, install and activate the Standard version of Beaver Builder plugin.
Now, edit the page with Beaver Builder on which you want to place the slider. Once Beaver Builder is active on the page, drag-and-drop the Content Slider module from the right-side Beaver Builder panel.
In the Content Slider settings panel, click the Edit Slide link on the Slides tab to add the first slide.

Then in the Slide Settings panel, enter a label for the slide in the Slide Label field. After that, in the Background Layout section, select Photo in the Type field and set a photo from the Media Library in the Background Photo field. Finally, click the Save button to save your changes.
Now, to add the second and subsequent slides, click the Add Slide button and repeat the above steps to add all the slides.
Once all the slides are added, don’t forget to save your changes.
And that’s it!
That is how you can add a slider to your page using the Beaver Builder plugin.
Alright! What to do next?
Next Steps…
There are a lot of settings for the Content Slider module that you can play with.
So, use these settings to give the desired look to your slider. And if you need help in understanding the settings, then read this help doc on the Content Slider module.
But, what if you want to display your blog posts or custom post types in the slider?
In that case, use the Posts Slider module instead of the Content Slider module.
Okay! And here are some more tutorials to help you get the maximum out of the Beaver Builder plugin:
- Beaver Builder Review After Using It Since 2014 [Non-Stop]
- Does Beaver Builder Work With Any Theme? (Yes And No)
- 2 Easy Ways To Embed A PDF In Beaver Builder Without Code
- How To Embed Youtube Video In Beaver Builder? (One Simple Way)
- How To Add A Background Image In Beaver Builder Without Code?
Final Thoughts
I have purposefully kept this tutorial short and to-the-point.
If you liked this tutorial, then please share it with your friends. I will really appreciate it.